
How to Export Meta Box Custom Field Data Using WP All Export
In this article, we show you how to export meta box custom field data, including how to filter and schedule your exports.
Meta Box is a powerful plugin that you can use to create custom fields and custom meta boxes for any WordPress or WooCommerce post type.
WP All Import is a leading WordPress/WooCommerce plugin that lets you import data into all WordPress and WooCommerce post types, including custom post types and fields.
WP All Import now offers a Meta Box Import Add-On to help you import data into Meta Box custom fields. This article shows you how.
You can obtain the free version of the Meta Box plugin from https://wordpress.org/plugins/meta-box/. Install and activate it as you would any other WordPress plugin.
You can purchase additional extensions for Meta Box via this pricing page.
If you’re an existing WP All Import customer, you can obtain the Meta Box Import Add-On through the customer portal. If you’re new to WP All Import, please visit this product page.
WP All Import uses the same basic process to import data into all WordPress and WooCommerce post types:
Go to All Import › New Import and upload your import file:
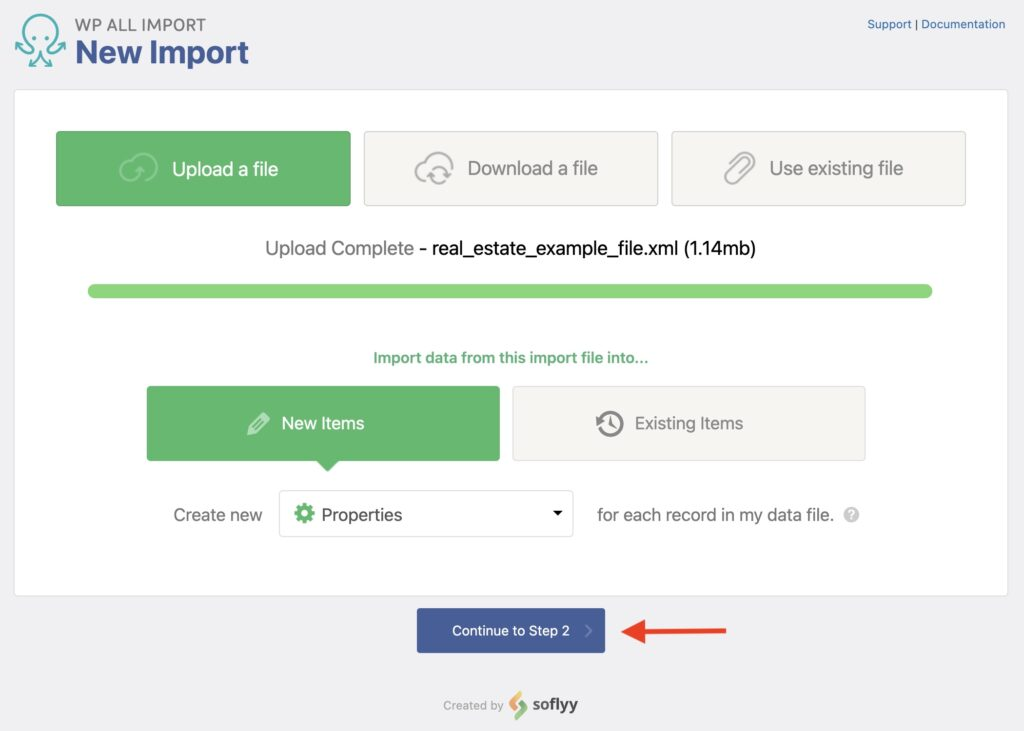
Alternatively, you can download a file from a URL or FTP/SFTP site or use an existing file that you’ve already uploaded to your server.
Near the middle of the screen, select either New Items or Existing Items. Choose New Items unless your intent is specifically to update existing items.
Finally, choose the post type that contains the Meta Box fields that you want to populate or update. For this example, we’ve selected Properties.
When you’re ready, click Continue to Step 2.
Next up is the Review Import File screen, which lets you confirm that the import file contains the data that you need:
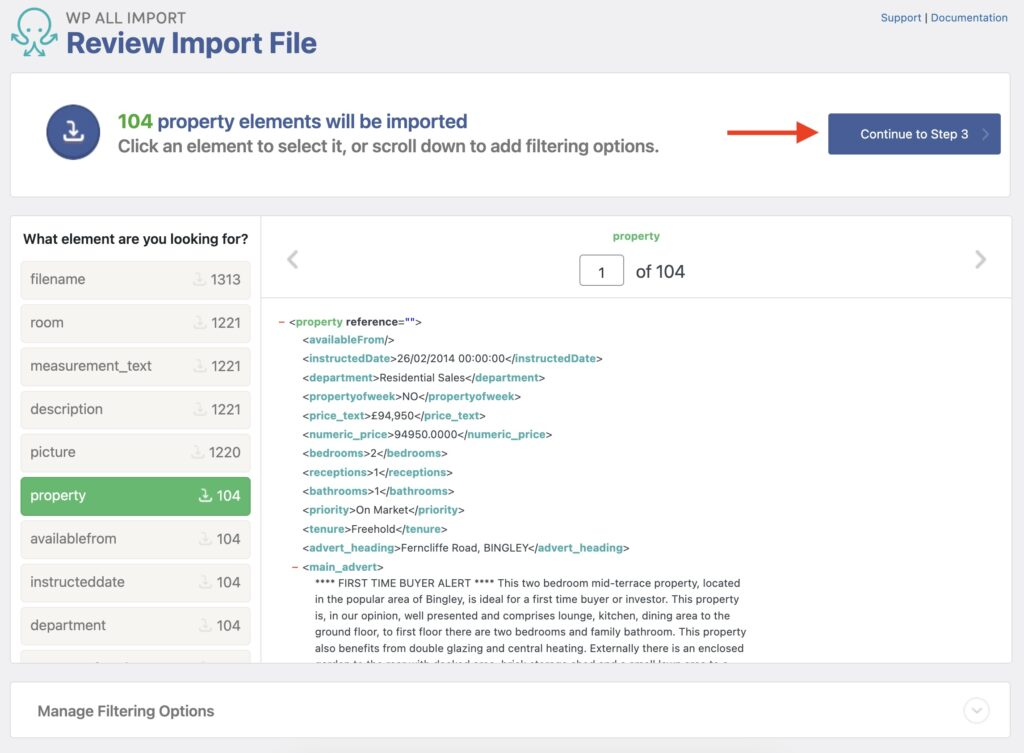
If there is a major problem with the data, fix your file and try again. Don’t worry if some of the data isn’t formatted perfectly, as WP All Import has many features to help you modify incoming data during the import.
If the data is good, Continue to Step 3.
You should now see the Drag & Drop screen. This is where you map the import data elements to the target WordPress fields, as shown below:

To populate Meta Box custom fields, just expand the Meta Box Add-On section and use the same mapping technique there:

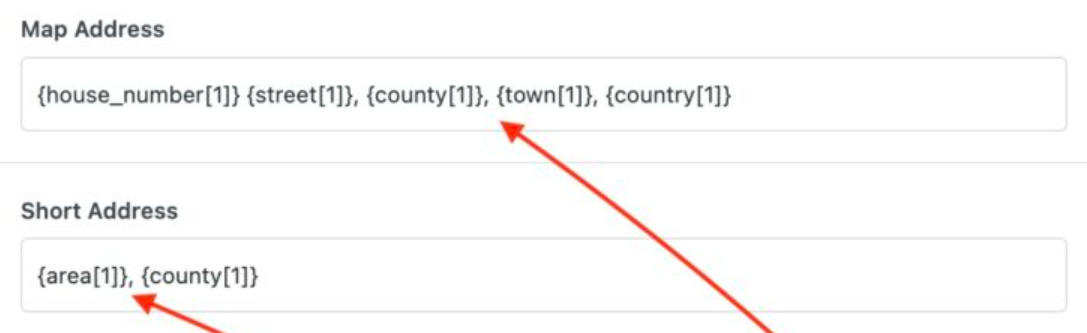
As shown in this image, you can map multiple incoming data elements to one field and separate or surround their values with commas, spaces, and other static values.
You can also split values among multiple fields and use built-in and/or custom PHP functions to manipulate the incoming data in whatever way you wish. For more information on this, see How to Modify Incoming Data During the Import.
When you have mapped all of your data, click Continue to Step 4 (not shown).
The second last screen in the process is the Import Settings screen. This screen contains a number of key settings, starting with the Unique Identifier, which WP All Import uses to distinguish between records so that it can accurately apply updates and avoid creating duplicates.
The easiest way to create this identifier is to click the Auto-detect button and let WP All Import handle it:
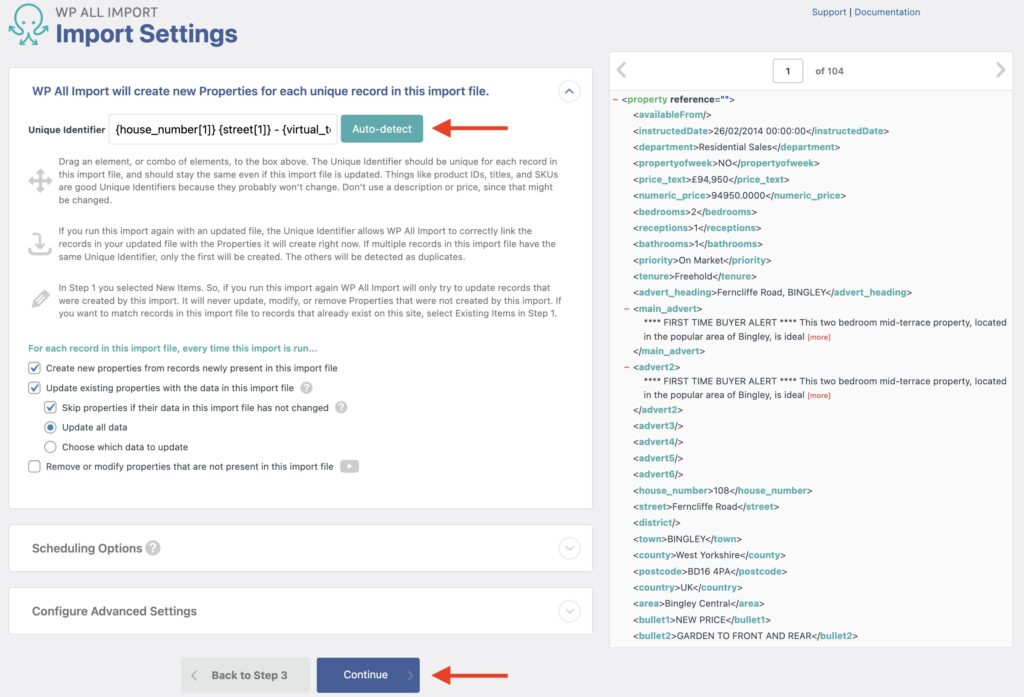
Alternatively, you can construct the unique identifier manually.
The block of options near the middle of the screen lets you control whether the import will create new records, update existing records, or remove existing records if they’re not present in the import file.
If you choose to update existing records, that option will expand to allow you to select the specific fields to update, along with various options per field, if applicable.
The Scheduling Options section near the bottom of the screen lets you schedule your import. For more information on this, see How to Schedule Your Import.
The Configure Advanced Settings section lets you control things like the batch processing size, whether to split your import file into chunks, and other settings often used to enhance performance.
For this tutorial, just click the Continue button.
Finally, you will arrive at the Confirm & Run screen, which gives you a summary of the actions that WP All Import is about to take. If something looks wrong, click the or go back to Step 4 link at the bottom to return to the previous screen, where you can start making corrections.
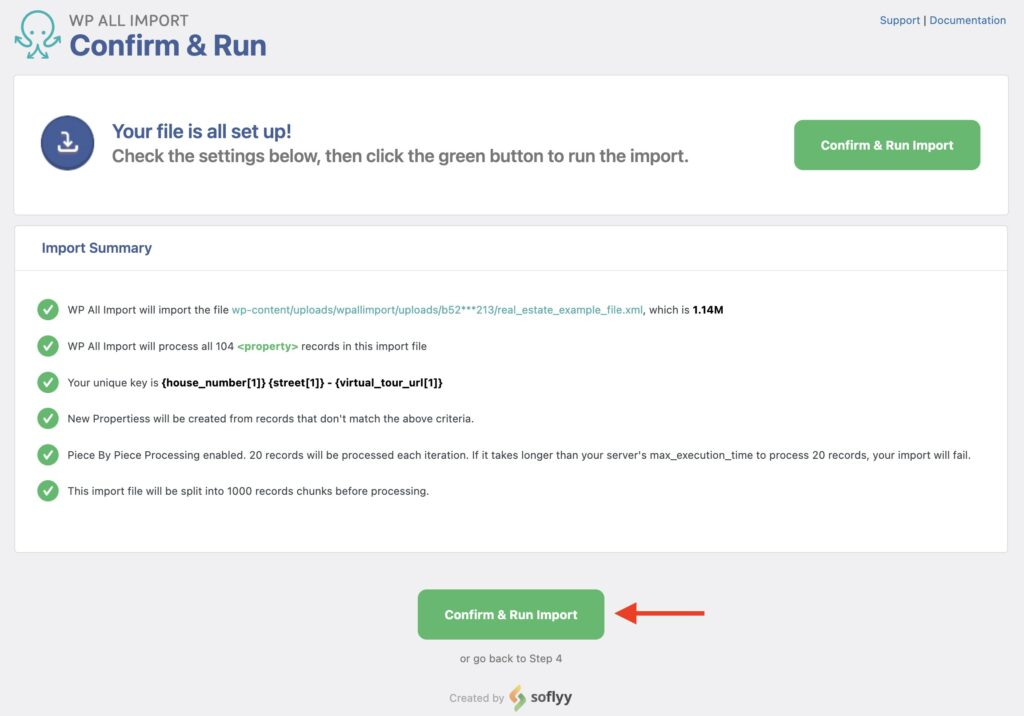
If everything looks good, click Confirm & Run Import. After a short period, an Import Complete! message will appear on the screen along with a log of what took place:
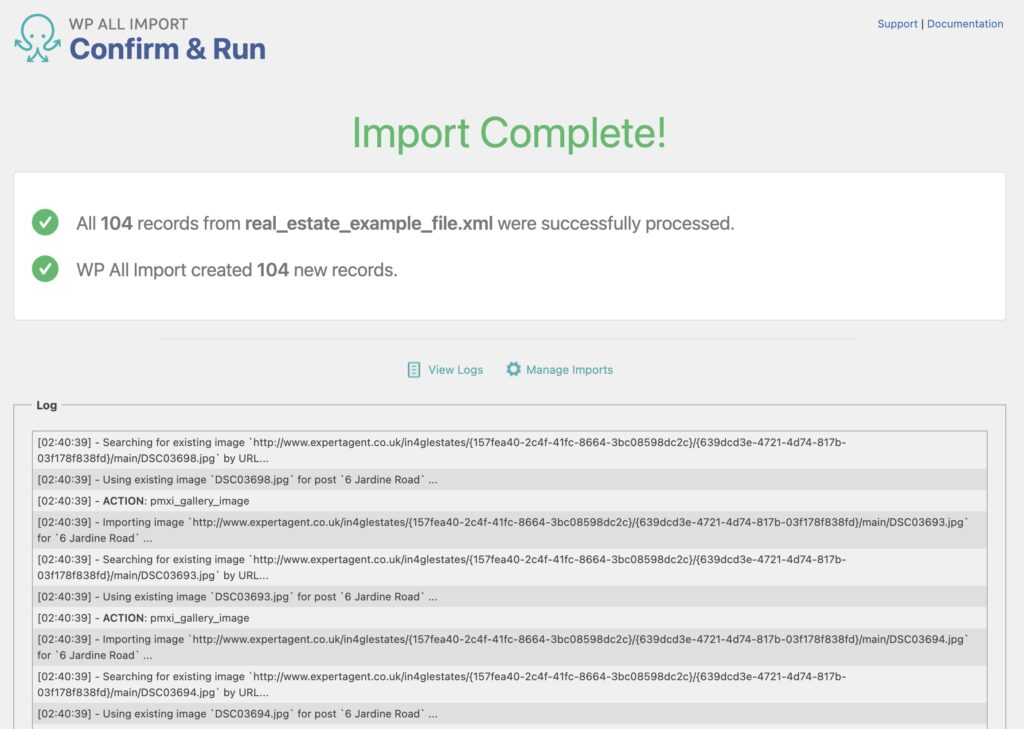
At this point, you should use the WordPress interface to check a few of the records that you just imported to make sure that they’re in the correct state.
And that’s it — that’s how you import data into Meta Box custom fields!
In Step 3 of this article, we showed you how to map incoming data elements to WordPress and Meta Box fields.
However, as mentioned, you’re not limited to simple one-to-one mapping. For example, you can map multiple incoming data elements to the same field or combine them with static values such as spaces, commas, or text strings:
If you need to modify import data, you can apply standard PHP functions to incoming data elements. Here, we’re using the PHP str_replace() function to remove all commas from the title element:
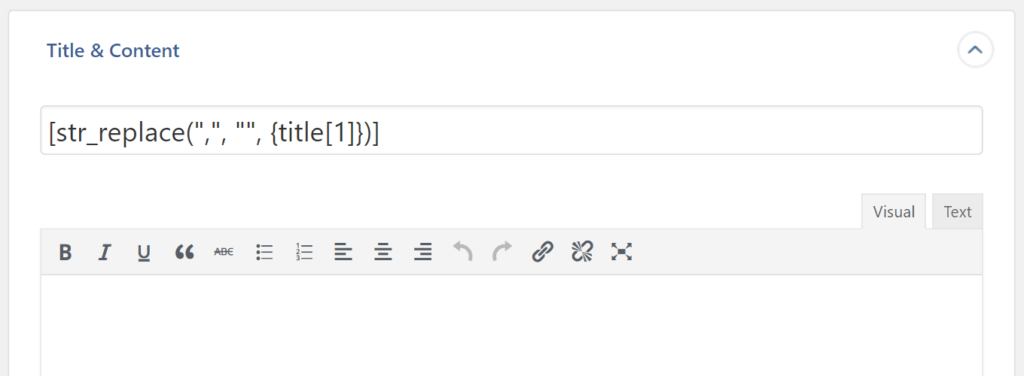
There are scores of standard PHP functions you can use like this.
If you can’t find a standard PHP function that does what you need, you can use the Function Editor in the Drag & Drop screen to create your own custom function. In this example, we’ve built a function that rounds a price value:
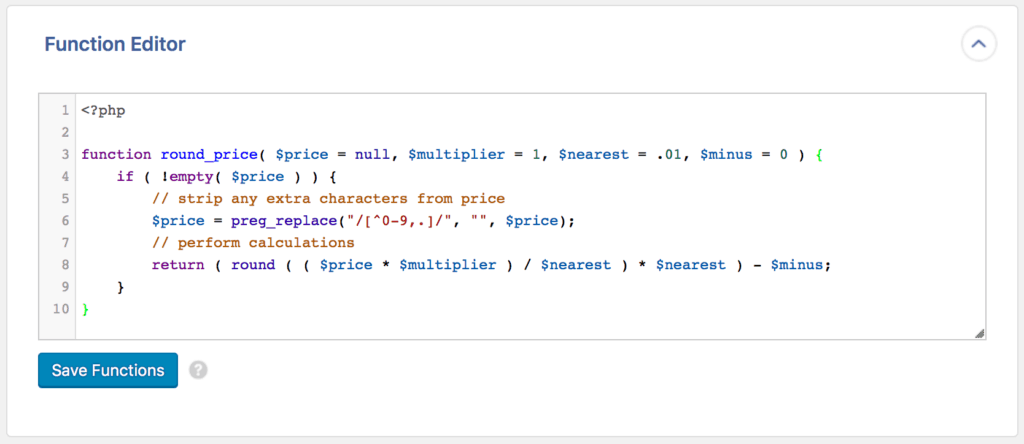
You can then use this custom function just like a standard PHP function:

This is why you don’t have to worry if your import data isn’t formatted perfectly, since you can correct the problem during the import itself.
For more information, see Calling PHP Functions In Your Import Configuration.
To filter data, start by expanding the Add Filtering Options section on the Review Import File screen.
A filter consists of one or more filter conditions, each containing an Element, a Rule, and a Value.
For example, this filter consists of two filter conditions:
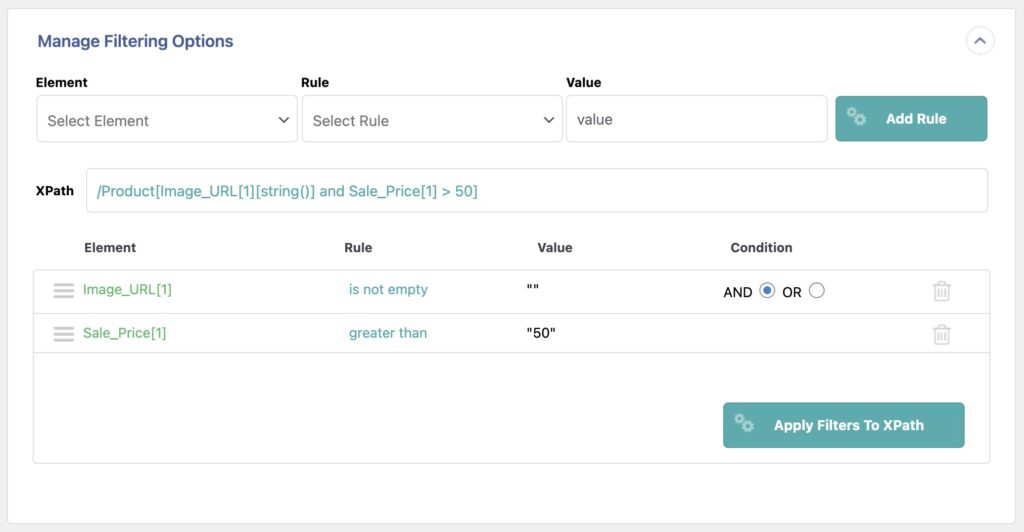
Note that any two filter conditions must be joined by either an AND or OR operator. The AND operator means that both filter conditions must be true, while the OR operator means that either condition can be true.
To learn more, see Filtering Import Data with XPath.
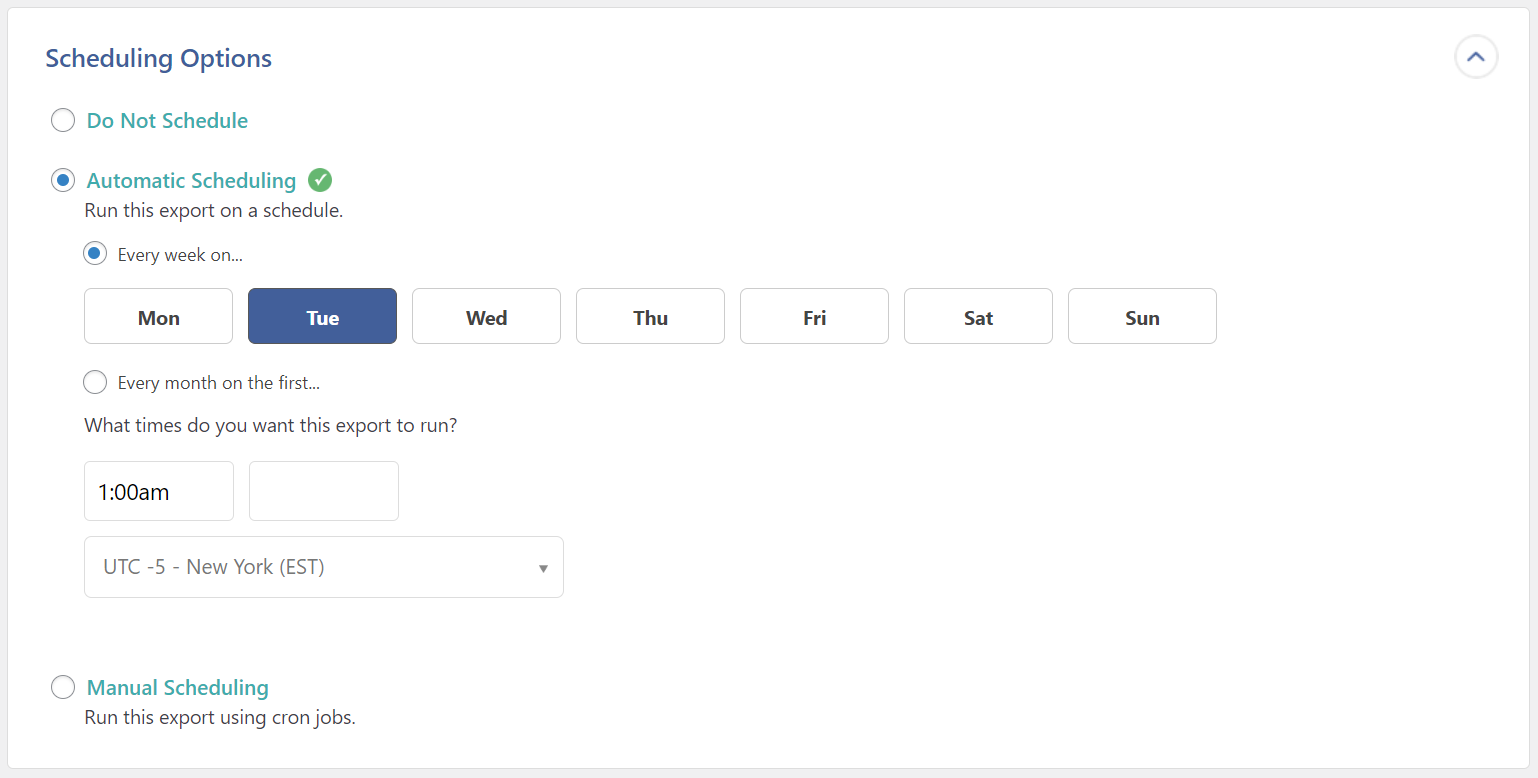
Scheduling an import occurs in the Scheduling Options section on the Import Settings screen.
The most convenient way to do this is to use WP All Import’s Automatic Scheduling service. While this costs $9 per month, it lets you schedule your imports directly through the interface and also verifies that they’ve been completed on time. Here, we’ve set up a schedule for the import to run every Tuesday at 1:00 a.m.
You can also schedule your imports manually by setting up cron jobs on your server. While this option is not as convenient or thorough, its main benefit is that it’s free:
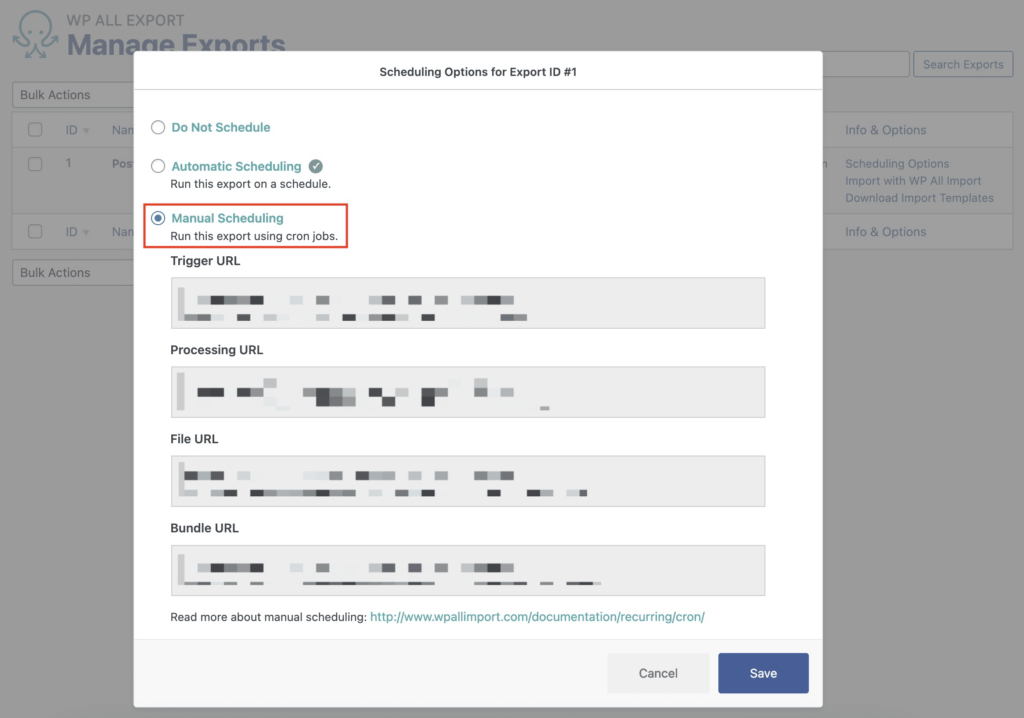
For more information, see Recurring Imports Overview.
Meta Box lets you greatly expand the capabilities of WordPress and WooCommerce through the use of custom fields and custom meta boxes. Its only drawback is that it doesn’t provide a convenient way to import data into these new features.
With its Meta Box Import Add-On, WP All Import has solved this problem. As an added benefit, WP All Import subscribers can import data into every other WordPress or WooCommerce post type using the same convenient Drag & Drop interface. This means that even if you purchase WP All Import just to work with Meta Box custom fields initially, you’re actually solving all of your data import needs now and into the future.
We can’t think of a more beneficial way to combine two such powerful plugins.