WP All Import can import all WordPress and WooCommerce post types. It now offers a JetEngine Add-On that lets you import data into JetEngine fields, too.
This article shows you how.
Table of Contents
- Obtaining the JetEngine Import Add-On
- Importing Data into JetEngine Fields
- Advanced Features
- Related Information
Obtaining the JetEngine Import Add-On
If you’re an existing WP All Import customer, you can obtain the JetEngine Import Add-On through the customer portal. If you’re new to WP All Import, please visit this product page.
Importing Data into JetEngine Fields
WP All Import imports all WordPress and WooCommerce post types using the same basic process:
Step 1: Create a New Import
Navigate to All Import › New Import and load your import data using one of the following options:
- Upload a local file;
- Download a file from a URL or FTP/SFTP site;
- Use an existing file that you’ve already used with WP All Import;
In this example, we’ve uploaded a local file:

In the lower half of the screen, select either New Items or Existing Items. Choose Existing Items if you’re specifically trying to update records that are already on your site. Otherwise, choose New Items.
Finally, select the post type that you’re targeting for your import, i.e., the one that contains the JetEngine fields that you’re trying to populate. In this example, we’ve selected Posts.
When you’re ready, click Continue to Step 2.
Step 2: Review the Import Data
Next up is the Review Import File screen, which helps you verify that WP All Import has correctly interpreted your import file:

If there is an error, fix your file and try again. Don’t worry if some of the data isn’t formatted exactly the way you want it. WP All Import has many ways to modify incoming data on the fly.
If everything is okay, Continue to Step 3.
Step 3: Map the Import Data to the JetEngine Fields
The Drag & Drop screen appears next. This screen lets you drag and drop incoming data elements from the panel on the right to the target WordPress fields on the left.

If you scroll down, you’ll find the JetEngine Add-on section. Expand that section:
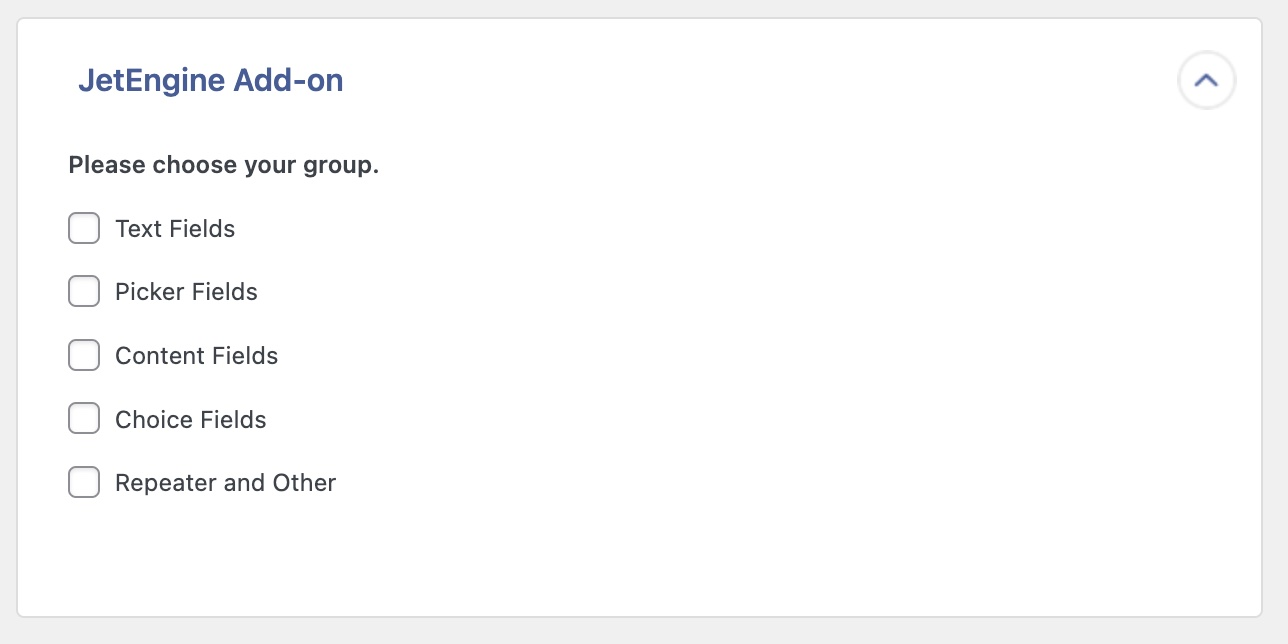
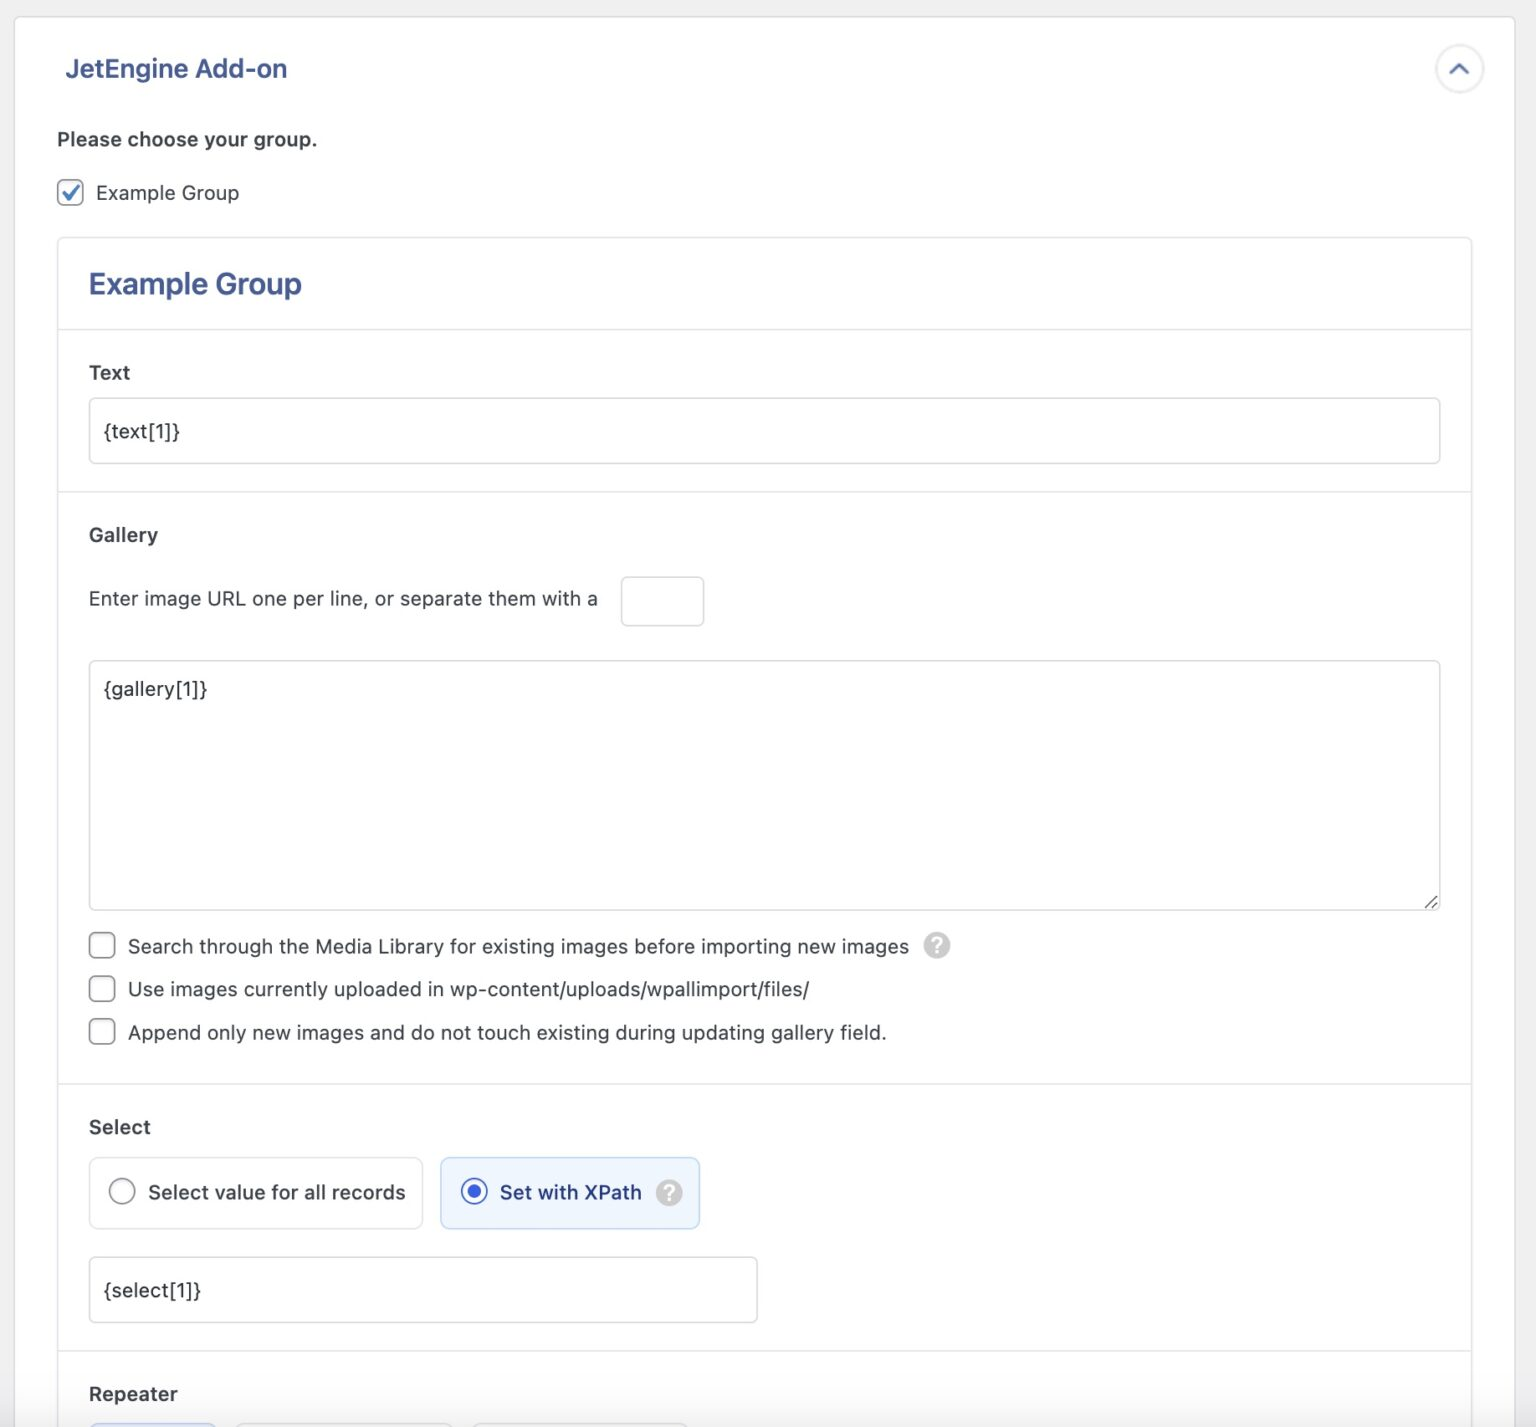
Select the field groups where you want to import your data. As you do so, each group will expand to reveal the fields it contains. You can then drag and drop incoming data elements into these fields:
When you’ve finished mapping your import data, click Continue to Step 4 (not shown).
Step 4: Configure the Import Settings
The next step is to configure your import settings, starting with the creation of a Unique Identifier. WP All Import uses this identifier to distinguish between records so that it can properly update them. The identifier also prevents the creation of duplicate records.
You have two options to create a unique identifier: you can do it manually or click the Auto-detect button to have WP All Import do it for you. Using Auto-detect is the preferred option.

You’ll also find several other settings midway down the screen. These allow you to control whether the import should create, update, or remove existing records during the import.
If you choose to update existing records, you can choose which fields to update. This is not shown in the above image, but this feature allows you to exert granular control over your import.
The Schedule Options section near the bottom of the screen helps you configure your import to run automatically. We provide more information on this feature in Advanced Features.
Finally, the Configure Advanced Settings section at the bottom of the screen lets you control things like the batch processing size, whether to split your import file into chunks, and other settings that may affect the speed of your import.
For now, just click the Continue button.
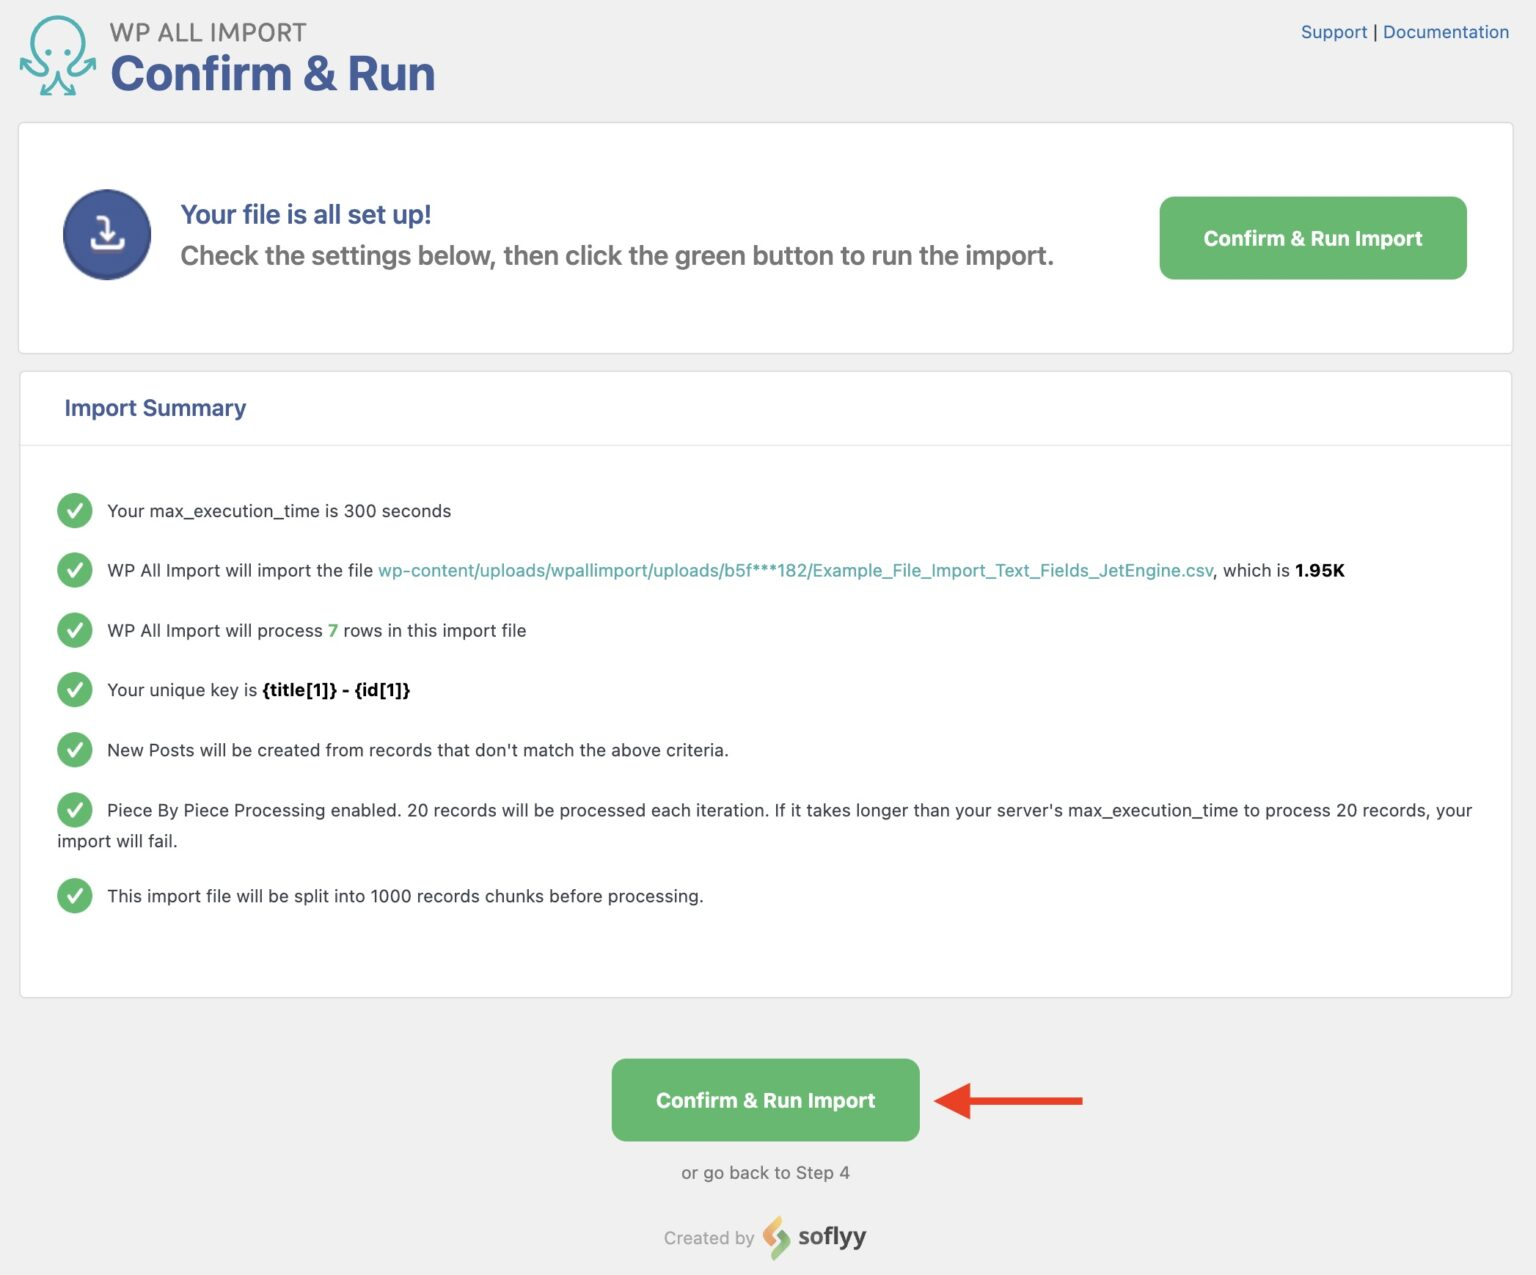
Step 5: Run the Import and Verify the Results
The Confirm & Run screen is the last screen in the import process. It provides an Import Summary that describes the planned actions. If anything is incorrect, click the or go back to Step 4 link at the bottom to make corrections. Otherwise, click the Confirm & Run Import button:
When the import is complete, WP All Import will update the screen with a message like this:

Even if the import appears to have worked perfectly, make sure to perform a quick check of your data through the WordPress interface.
That’s how you perform a basic import of data JetEngine fields!
Import JetEngine Fields — Advanced Features
Modify Incoming Data on the Fly
In Step 3 of this article, we showed you how to map incoming data elements to WordPress/JetEngine fields on a one-to-one basis.
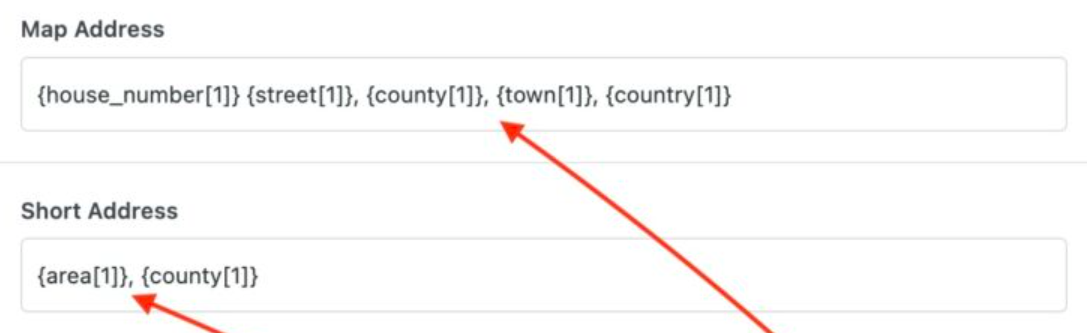
However, you are not limited to this simple form of mapping. You can also map multiple incoming data elements to the same field and even combine them with literal values like spaces, commas, and other text strings.
You can also use standard PHP functions to modify incoming data. For example, the str_replace() PHP function can be used to remove all commas from an incoming data element:
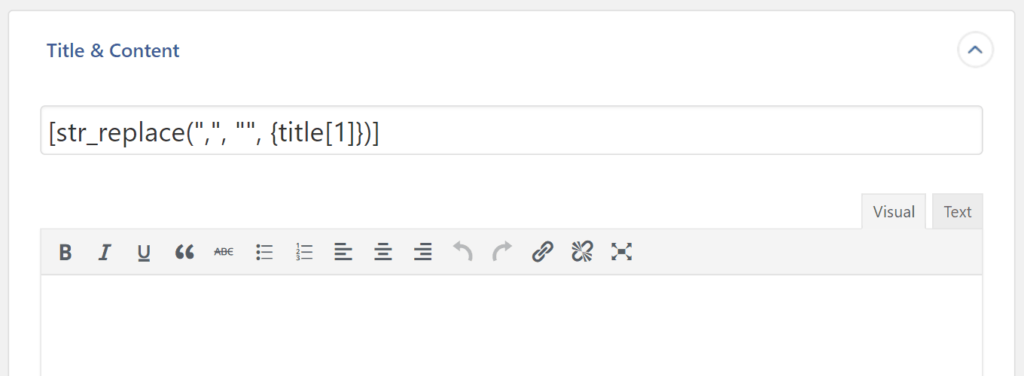
You have access to many standard PHP functions like this, i.e., directly from within the Drag & Drop Interface.
Finally, you can create custom PHP functions in the Function Editor near the bottom of the Drag & Drop screen. Here, we’ve created a function to round a price value:
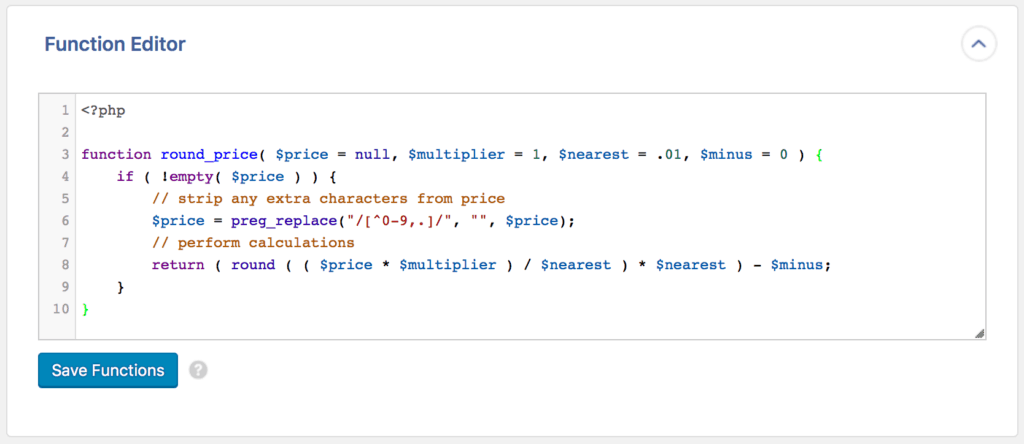
You can then use this custom function just like you use a standard PHP function:

Note, these examples are not from our tutorial data, but the same principles apply to every import.
These features explain why you don’t have to worry if you receive import data that isn’t formatted exactly the way you need it. WP All Import helps you correct the problem without having to edit your import file.
To learn more, see Calling PHP Functions In Your Import Configuration.
Filtering Your Import Data
To filter your import data, expand the Add Filtering Options section near the bottom of the Review Import File screen.
A filter is defined by one or more filter rules. A filer rule consists of an Element, a Rule, and a Value.
In this example, we’ve created two filter rules:
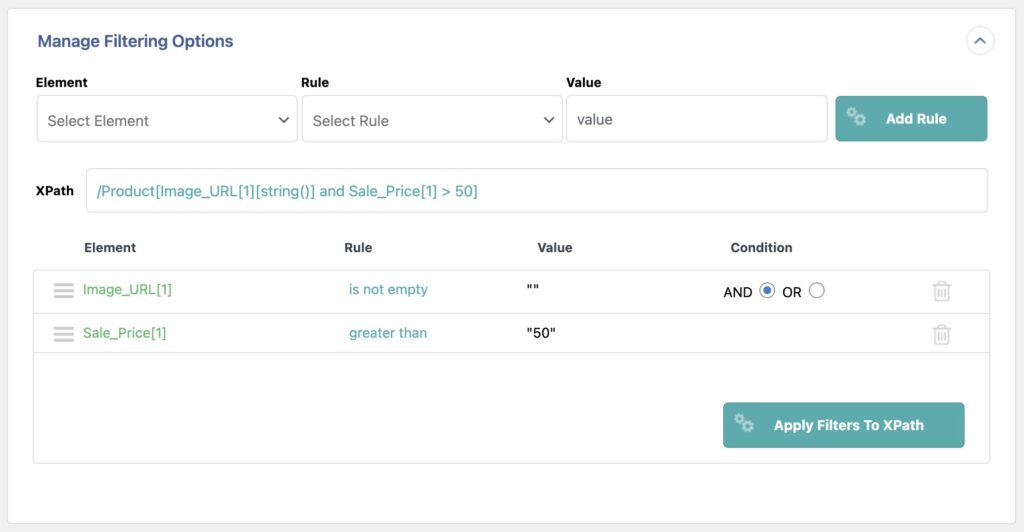
One specifies that the incoming Image_URL cannot be empty.
The other specifies that the incoming Sale_Price must be greater than 50.
These two rules are currently joined by an AND condition, which means they both must be satisfied for a record to be imported.
For more information, see Filtering Import Data with XPath.
Scheduling Your Import
To schedule your import, expand the Scheduling Options section of the Import Settings screen. You have three options when you do this:
- Do not schedule the import
- Use the Automatic Scheduling service
- Use Manual Scheduling
The Automatic Scheduling service costs $9 per month but allows you to schedule your imports directly through the interface:
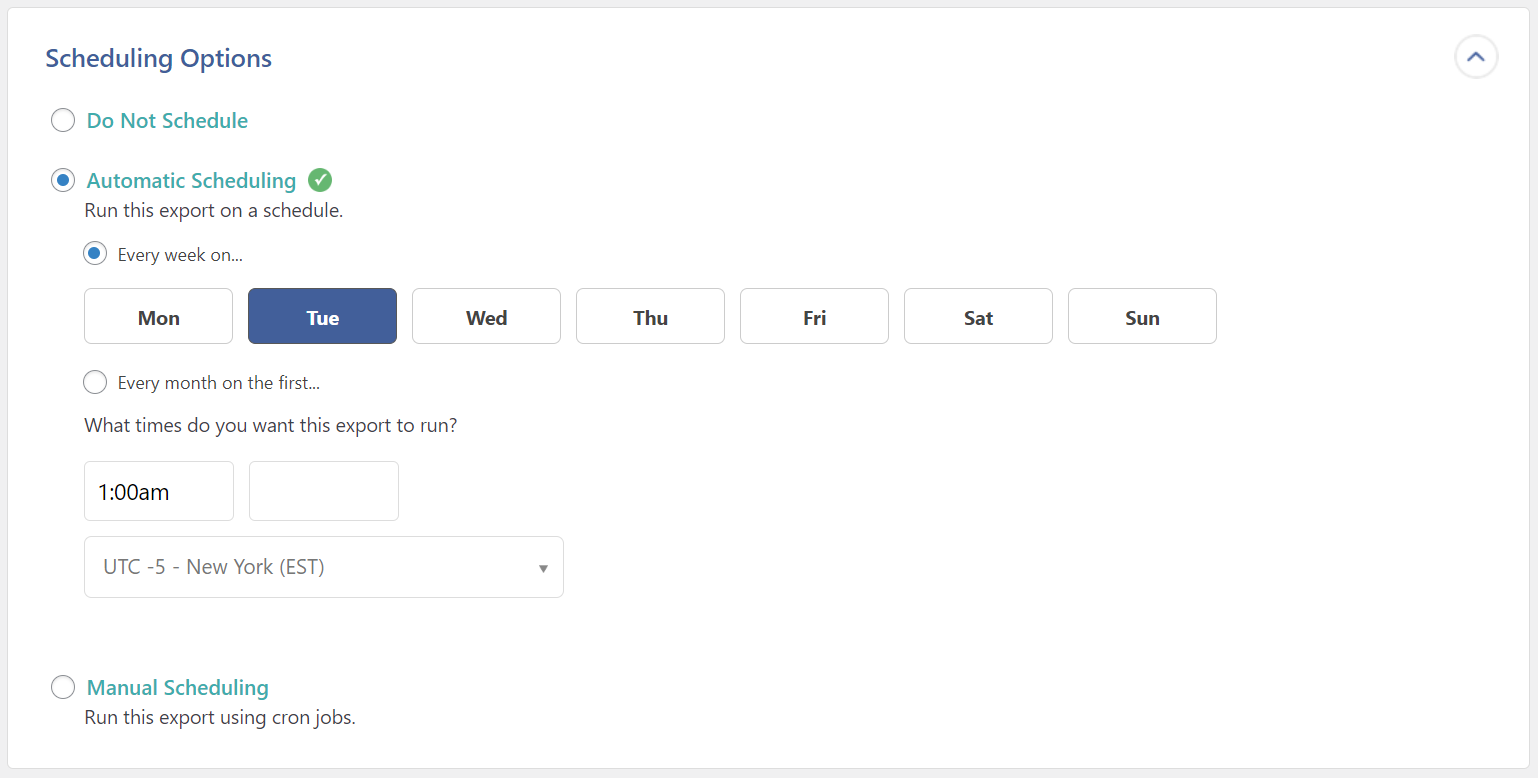
Here, we’ve scheduled our import to run every Tuesday at 1:00 a.m. New York time. The other advantage of the Automatic Scheduling service is that it will verify that each scheduled import is completed successfully.
Alternatively, you can schedule your import manually by setting up cron jobs on your server:

To learn more, see Recurring Imports Overview.
Related Information
In this article, we’ve shown you the basics of using WP All Import and its new JetEngine Import Add-On. However, these tools offer far more features than we can demonstrate in one article. To learn about these additional features, we recommend that you start with this import documentation overview.