WP All Export is a WordPress plugin that can export all types of WordPress and WooCommerce data. It now has a JetEngine Export Add-On that lets you export JetEngine fields, too.
In this short tutorial, we’ll show you how to use this add-on to perform a basic export of JetEngine data.
Table of Contents
- Obtaining the JetEngine Export Add-On
- Creating a Simple JetEngine Export
- Advanced Features
- Related Information
Obtaining the JetEngine Export Add-On
If you’re an existing WP All Export customer, you can obtain the JetEngine Export Add-On through the customer portal. If you’re new to WP All Export, please visit this product page.
Creating a Simple JetEngine Export
Step 1: Create a New Export
Navigate to All Export › New Export in the WordPress main menu and choose the post type that contains the JetEngine fields that you want to export. Note, it’s not possible to export the JetEngine fields separately from the post type that contains them because the two share a parent-child relationship.
In the image below, we’re creating an export for the Posts post type, which has been modified to contain several JetEngine fields.
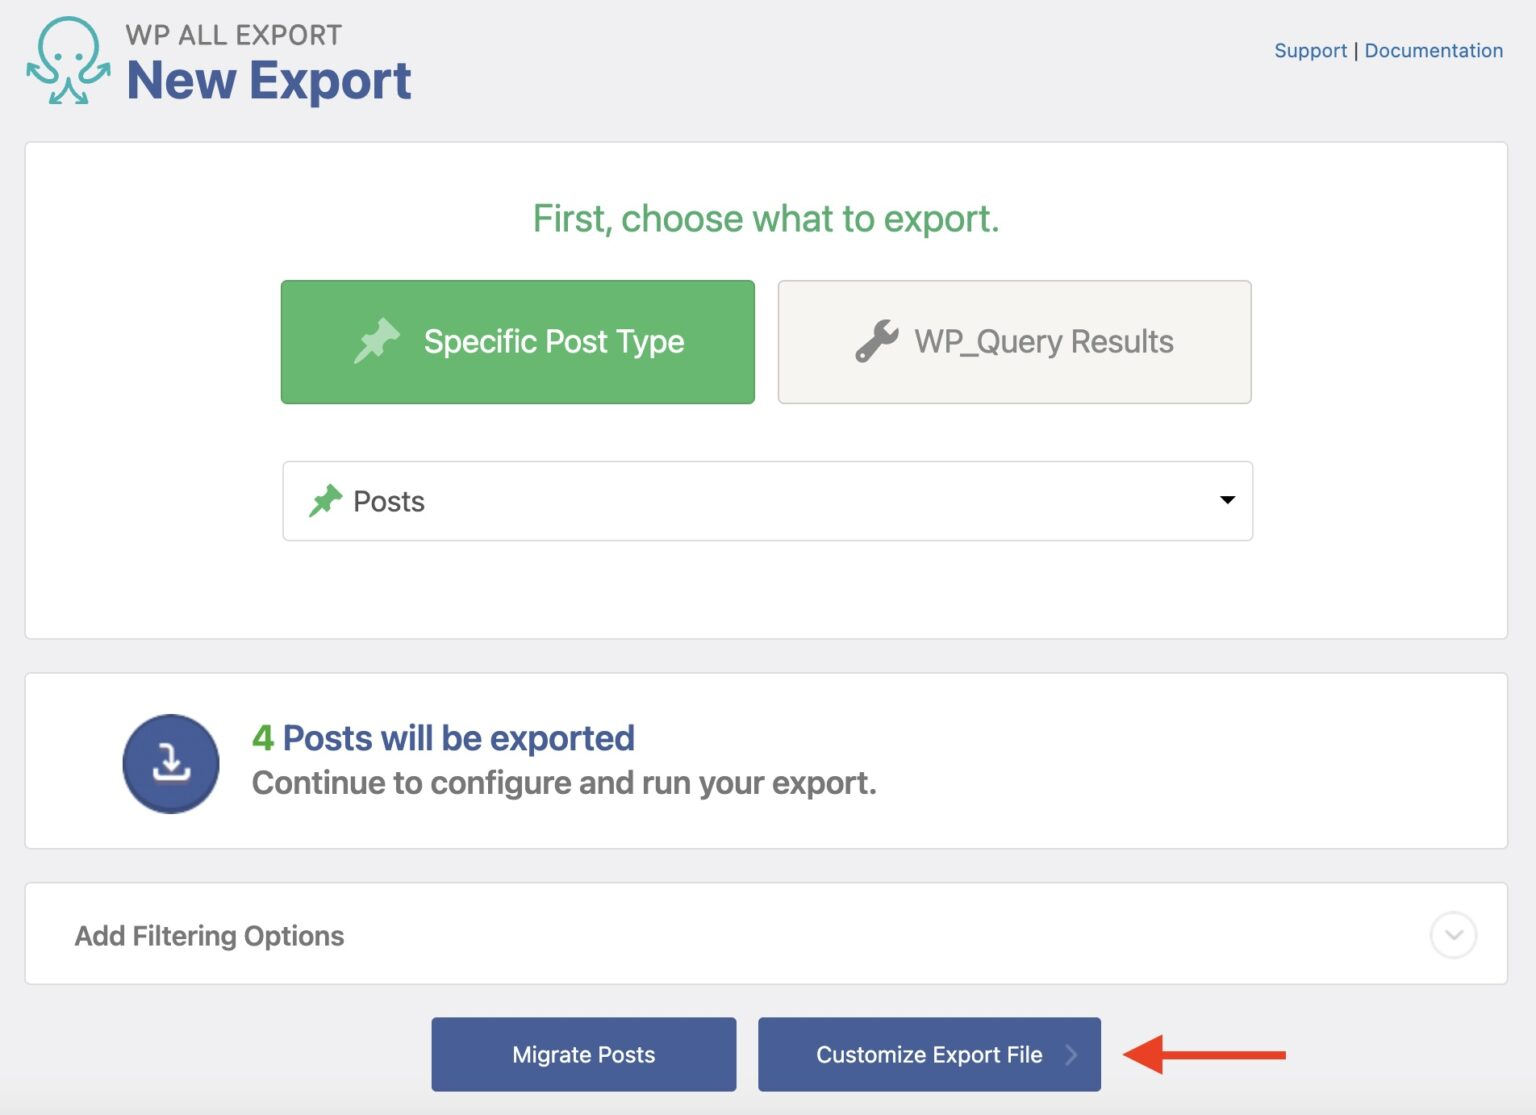
To continue, click the Customize Export File button.
Step 2: Include the JetEngine Fields in Your Export
The Drag & Drop screen will appear next. This is where you select the fields for your export. The available fields appear in the Available Data panel on the right, organized by subsections. To work with a subsection, simply expand it. To include a field in your export, drag and drop it from the expanded subsection to the column selection area on the left.
In the image below, we’ve expanded the Available Data › JetEngine subsection and dragged all of its fields into the column selection area:
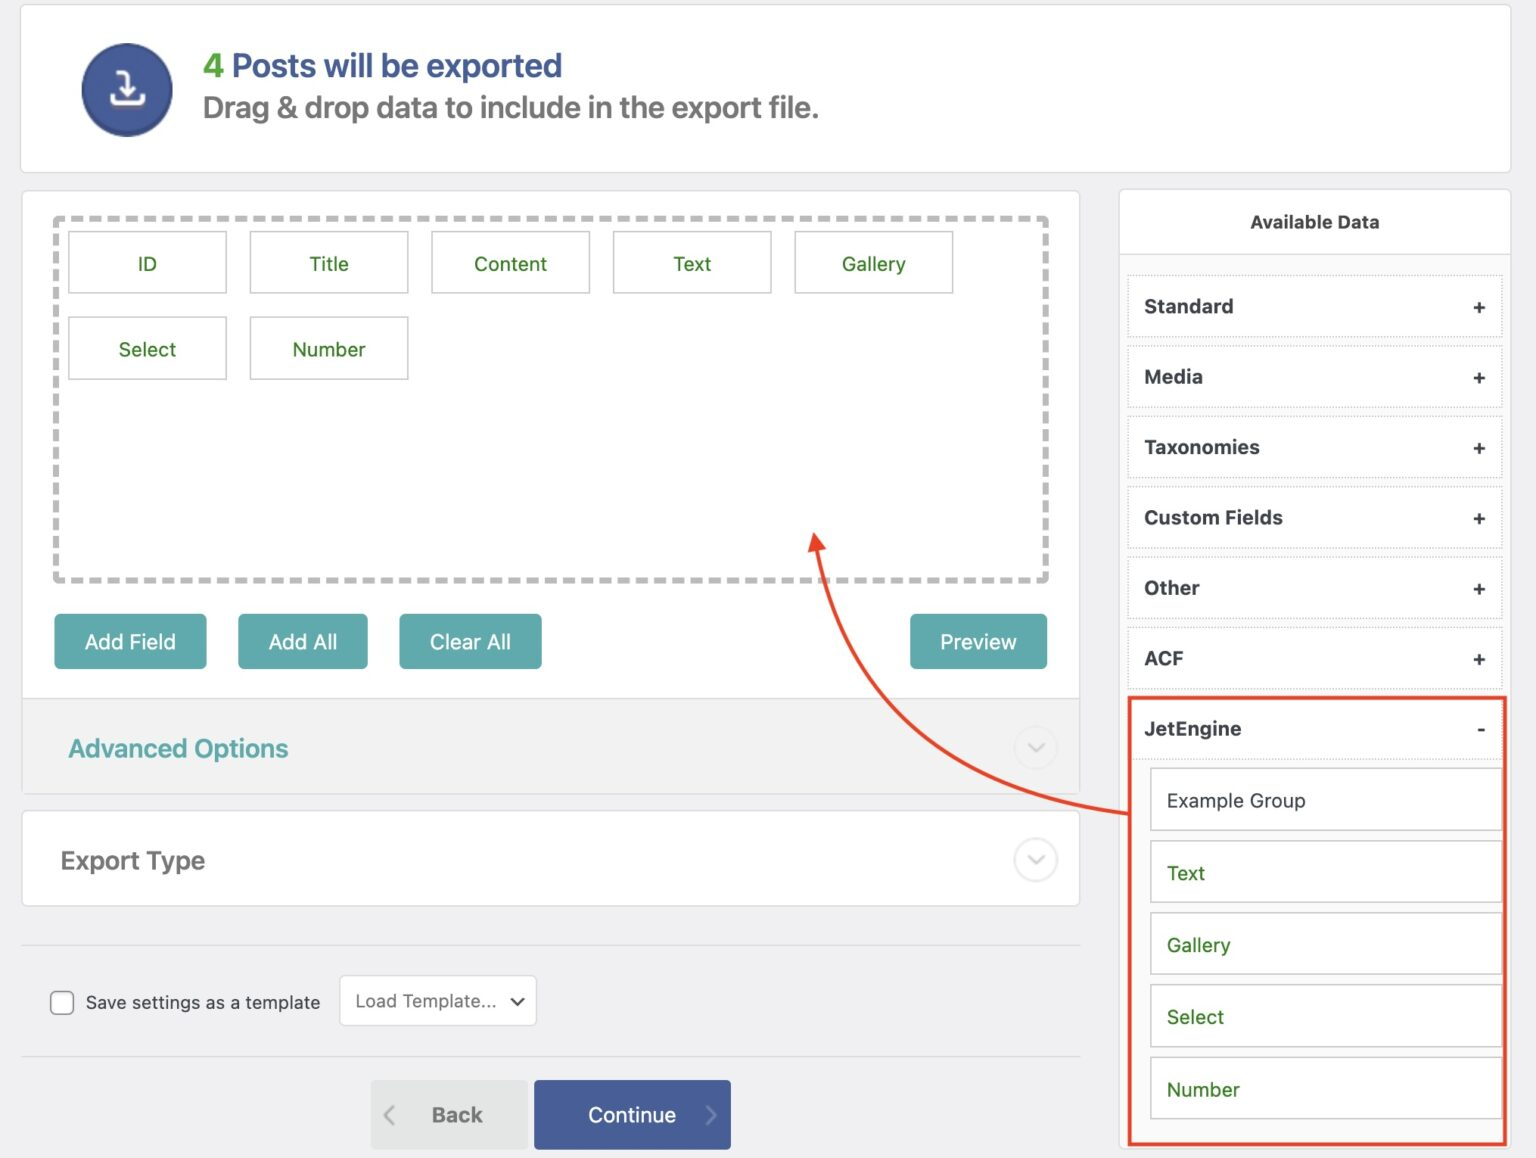
When you’ve selected all of your export fields, click the Continue button.
Step 3: Complete the Export
Next up is the Export Settings screen:
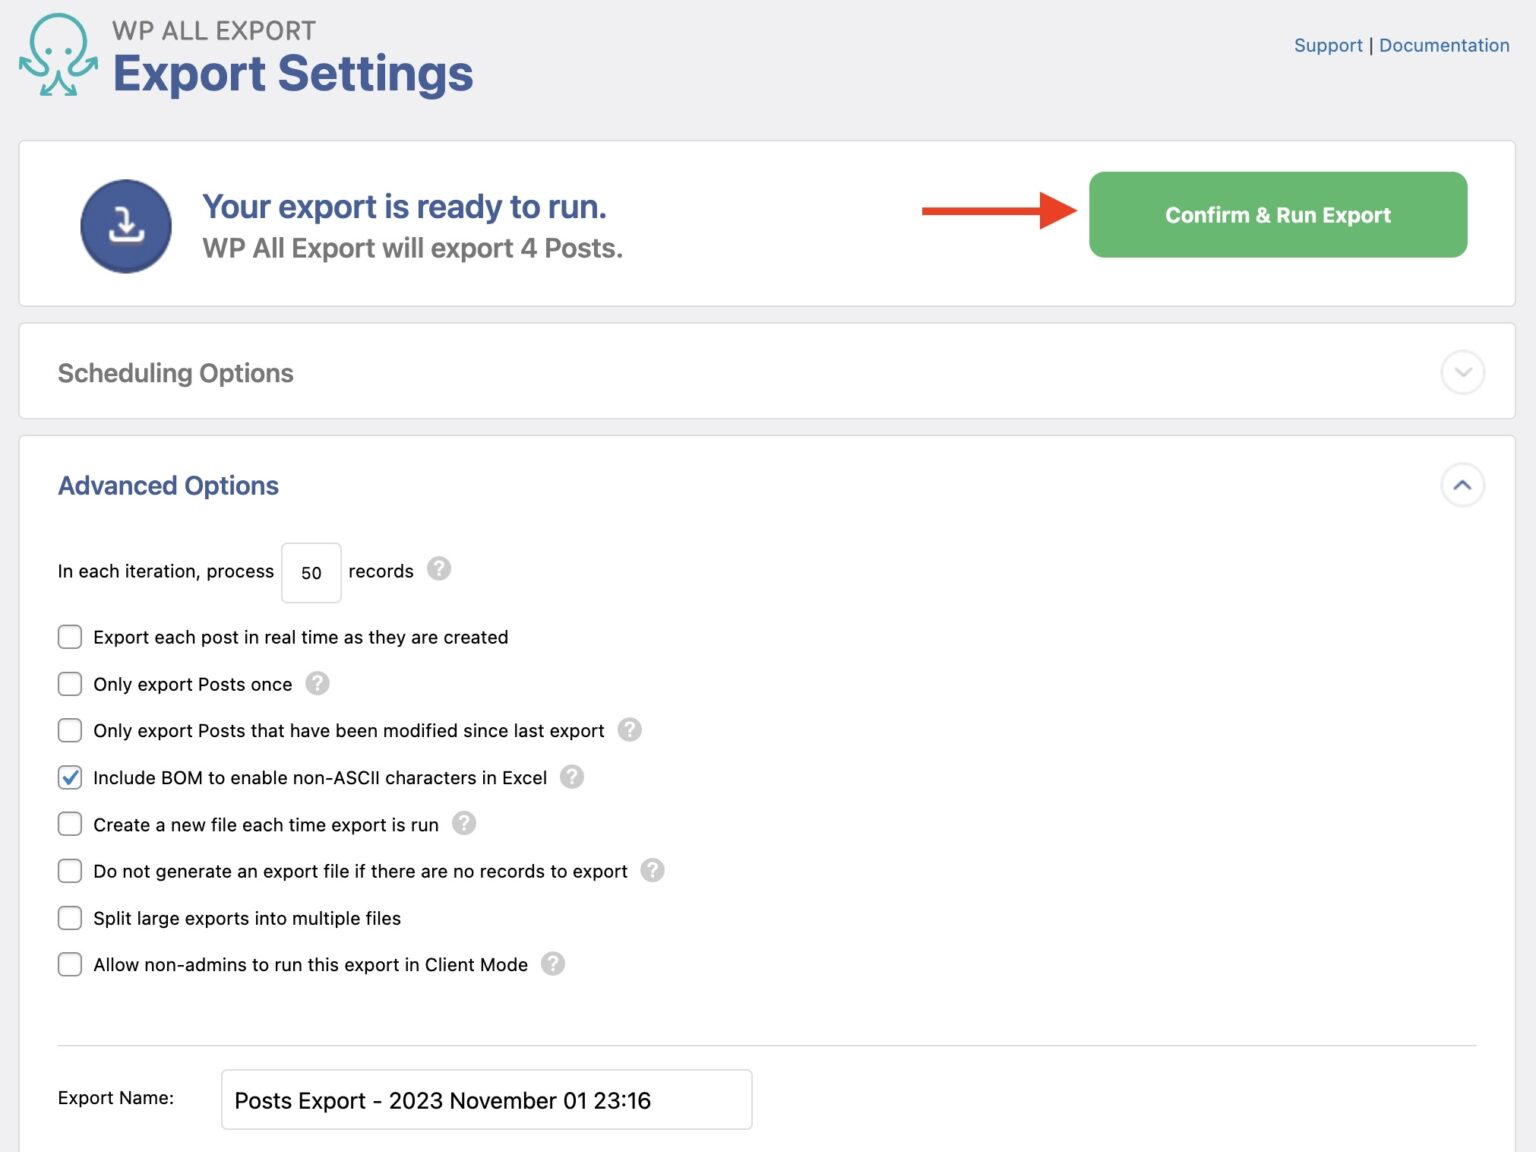
The Scheduling Options section lets you configure your export to run automatically.
The Advanced Options section lets you control various aspects of the export process, including whether to create a new export file each time the export is run, split the export into multiple files, etc.
Leave these settings alone for now and click the Confirm & Run Export button.
Step 4: Download the Export File
When the export finishes, WP All Export will display a message similar to this:
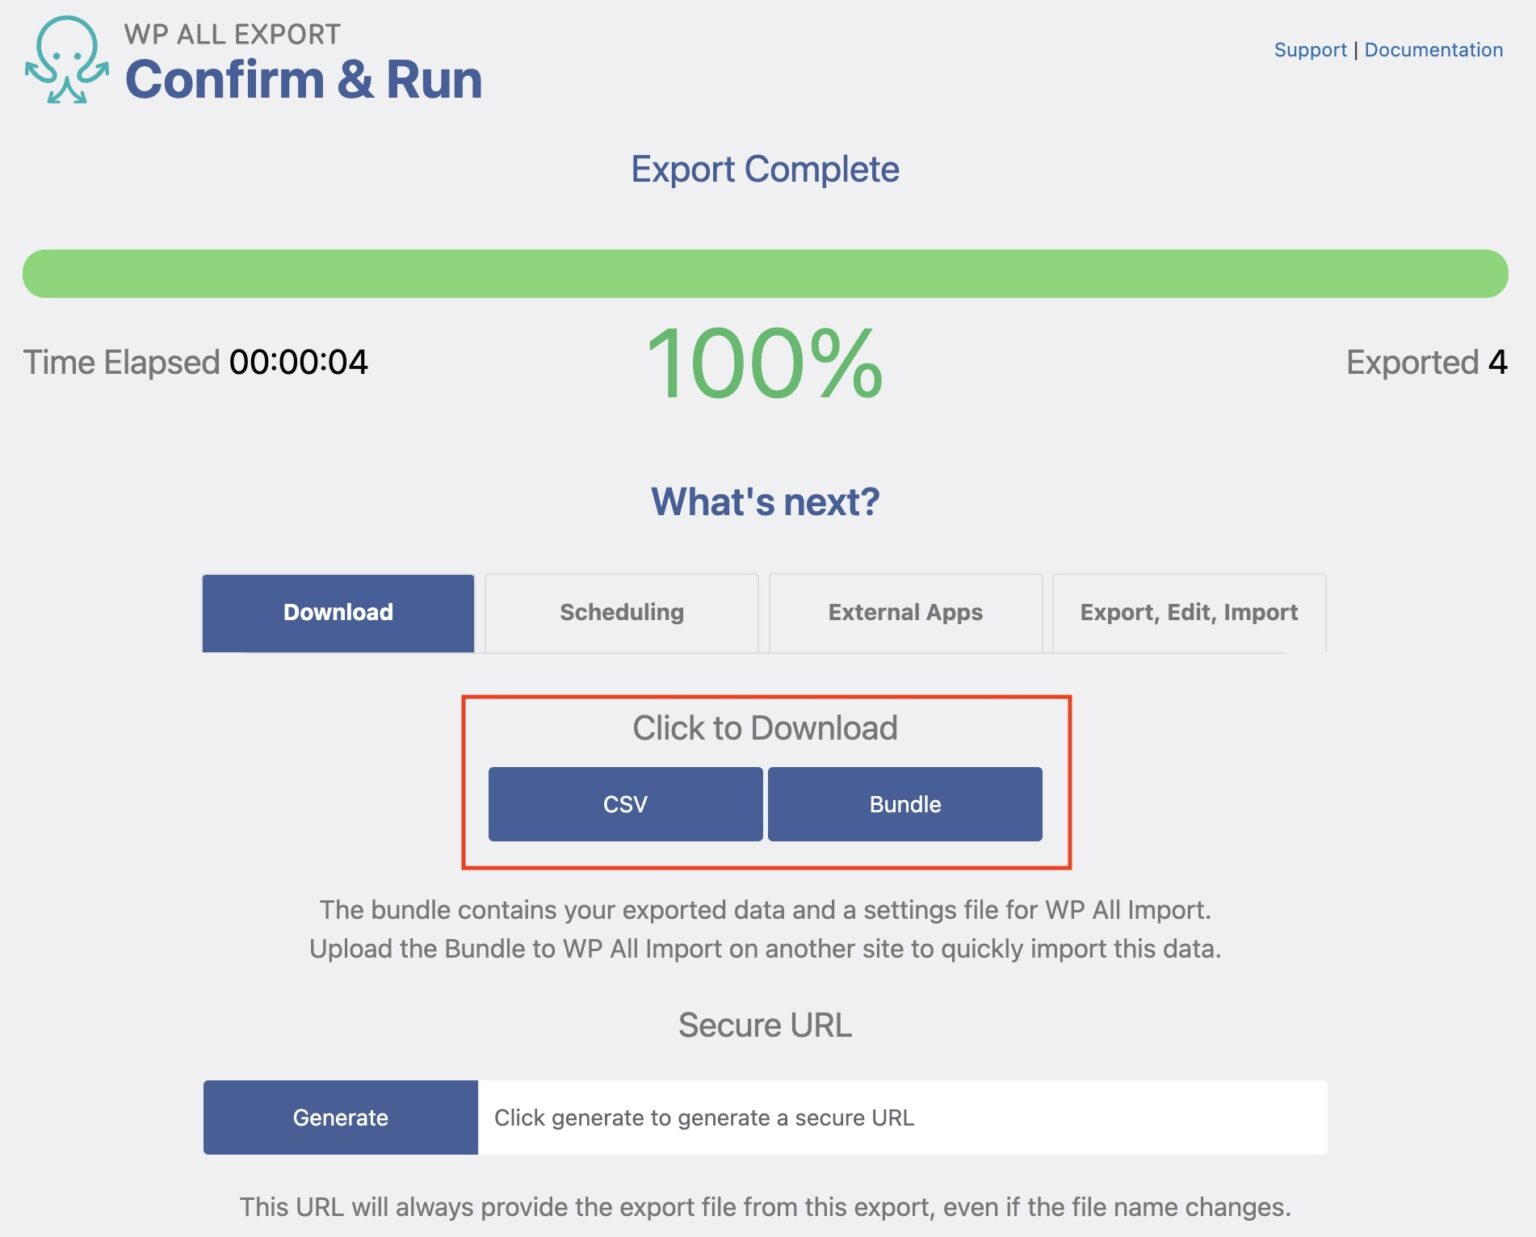
You can download your export file in the Click To Download section in the center of the screen. The CSV button will download just the export file. This button will have a different label if you changed the export file type earlier in the process.
The Bundle button will download the export file and another file that contains instructions for WP All Import on how to import the exported data. This is useful if you want to copy JetEngine field data from one site to another.
Export JetEngine Fields — Advanced Features
Filtering Your Export Data
You can filter your export data by expanding the Add Filtering Options section on the New Export screen. A filter rule consists of an Element, a Rule, and a Value:
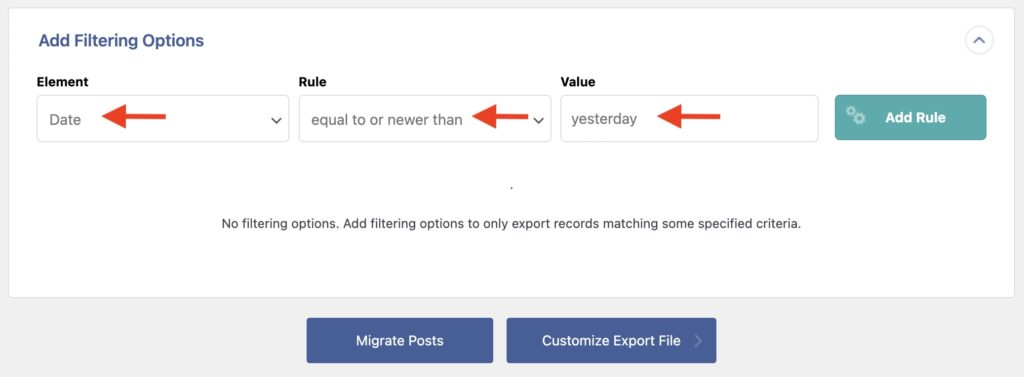
In this example, the Element = Date, the Rule = equal to or newer than, and the Value = yesterday. In plain English, this means “export all posts with a date equal to or newer than yesterday.”
Click the Add Rule button on the right to apply the rule.
You can create as many rules as you like, each separated by an AND or OR condition:
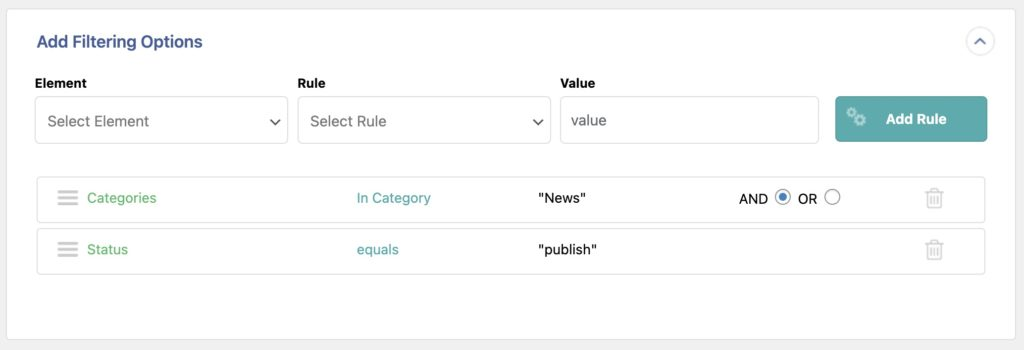
For more information, see How to Filter WordPress Data.
Scheduling Your Export
You can schedule your export by expanding the Scheduling Options section of the Export Settings screen, where you have three options:
- Do Not Schedule
- Automatic Scheduling
- Manual Scheduling
Automatic Scheduling lets you schedule your export directly through WP All Export’s interface, as shown here;
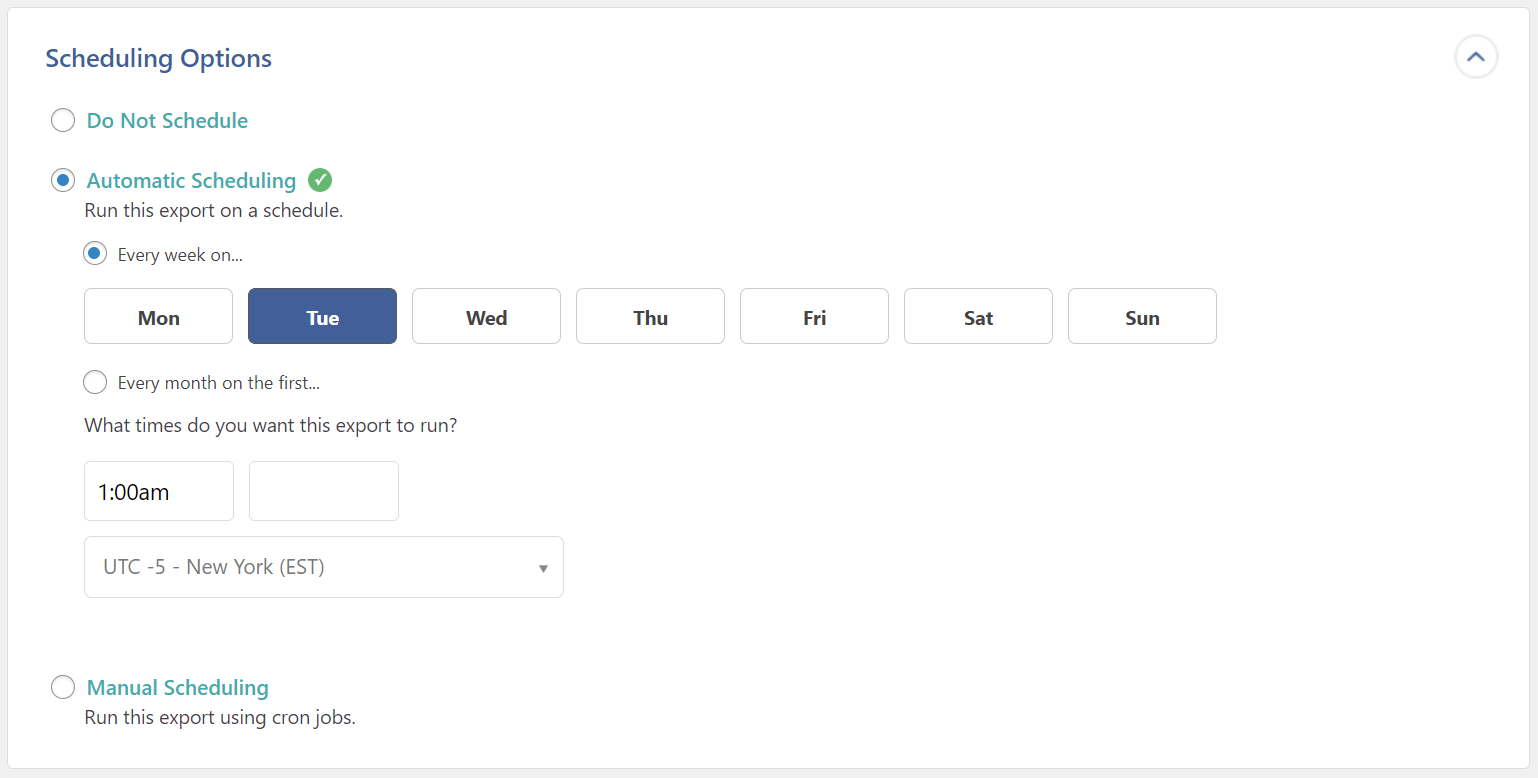
In this example, we’ve set the export to run every Tuesday at 1:00 a.m. New York Time.
This scheduling option costs $9 per month but is obviously very convenient. It will also verify that your export ran as expected.
Alternatively, you can use Manual Scheduling, which is free but requires you to manually set up cron jobs on your server:
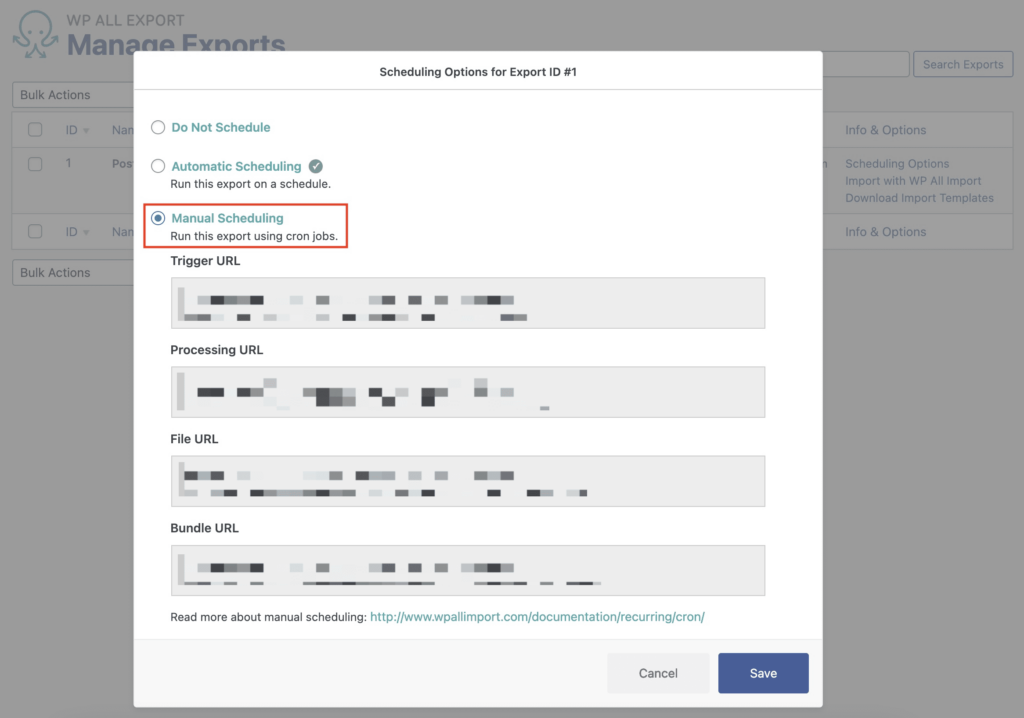
To learn more, see How to Schedule WordPress Exports.
Exporting Data to a Different File Type
CSV is the default file format for all exports, but you can also export to Excel and XML. You can select your file format in the Export Type section of the Drag & Drop screen:

In this example, we’ve selected Feed as the main export type and Simple XML Feed as the subtype.
Alternatively, you can select Spreadsheet as the main type and either CSV or Excel as the subtype.
For more information, see Export WordPress to CSV, Excel, or XML.
Related Information
In this article, we’ve described a basic export of JetEngine fields, which you should be able to complete in a few minutes. However, WP All Export has many more powerful features that we haven’t described. To learn about these, we suggest you start with this export documentation overview.