Are you looking to import multiple WordPress users from an Excel file?
If you’re transitioning from a different platform or simply have a large number of users to import, WordPress doesn’t provide a built-in way through its dashboard.
Fortunately, there are third-party plugins that allow you to import users quickly and easily using an external Excel file. This bulk-import method not only saves time but also minimizes the errors that can occur when entering data manually.
In this article, we will guide you through the steps of importing WordPress users using the WP All Import plugin.
When Do You Need to Import Users into WordPress?
There are several situations where it becomes crucial to import users into WordPress. Here are some common reasons why you might need to import users:
- When you’re merging multiple websites along with users and content into a single WordPress website.
- If you’re managing a membership site and need to add a large number of members at once.
- You’re migrating from a non-WordPress website to WordPress.
- When you’re using WordPress as a CRM to manage customer relationships, and need to import client data.
- If you’re running an educational institution and need to add students and faculty members in bulk.
- If you’re launching a new service and need to onboard multiple users at once.
WP All Import – The Best Import User Plugin for WordPress
When it comes to importing users into WordPress, WP All Import is a popular choice among many users. Unlike many other user import plugins that only support CSV files, WP All Import stands out as the best and supports uploading Excel files (XLS and XLSX).
This flexibility makes it an ideal choice for users who prefer to organize the user data in spreadsheets, as Excel is a widely used format in many businesses and organizations.
One of the standout features of WP All Import is its user-friendly drag-and-drop interface, which simplifies the process of mapping your Excel columns to the corresponding WordPress user fields. Additionally, it comes with a wizard that breaks down the import process into multiple steps.
Some of the advanced key features of WP All Import include:
- Schedule your imports to run at specified intervals.
- Support for other file formats such as CSV, JSON, Google Sheets, and XML.
- Powerful filtering data to ensure only necessary data is imported.
- Custom PHP functions to modify data during the import process.
- Support for user custom fields created by third-party plugins.
Let’s look at how to import users from an Excel file using the WP All Import plugin in detail.
How To Import WordPress Users From an Excel File
WP All Import simplifies the user import process by breaking it down into multiple steps using an easy-to-follow wizard. This makes it easy for anyone, even those with limited technical knowledge, to import user data into WordPress.
In the following sections, we’ll look at the various steps of the import wizard and guide you through the process of adding WordPress users from an Excel file.
1. Install and Activate the WP All Import Plugin and Import Users Add-On
Before you start importing users from an Excel file, you need to first install and activate the WP All Import plugin on your website. Since WP All Import is a WordPress import plugin with support for multiple data types including users, there are separate add-ons available to help you carry out these processes.
To import users from an Excel file, you’ll need the Import Users add-on in addition to the core plugin.
Start by purchasing the premium version of the WP All Import package that includes the Import Users add-on. Once you have downloaded the zip files for both the plugin and the add-on, head over to your WordPress dashboard and navigate to Plugins › Add New. Upload the WP All Import Pro zip file and proceed to install it on your website.
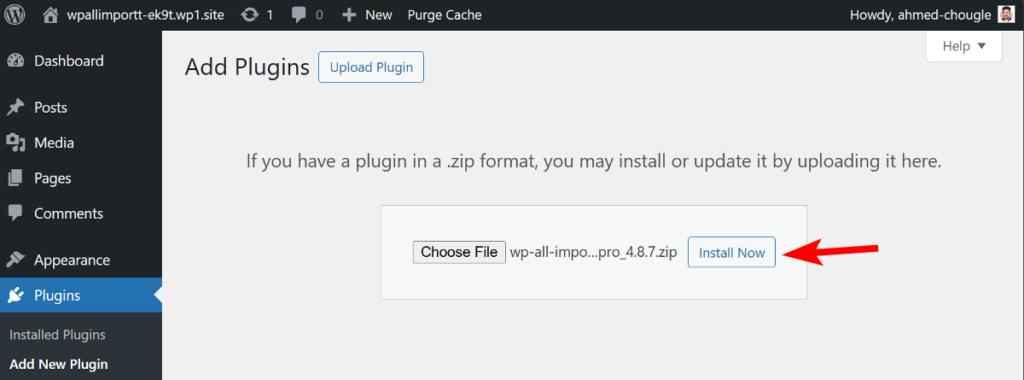
Similarly, upload the Import Users add-on and install it as well.
Once both the plugin and the add-on are activated on your website, you’re ready to start the import wizard.
2. Start a New Import and Upload the Excel File
To start the import process, go to All Import › New Import. WP All Import offers several methods to load user data, including:
- Uploading a local file
- Downloading the file from a URL
- Using an existing file on your server
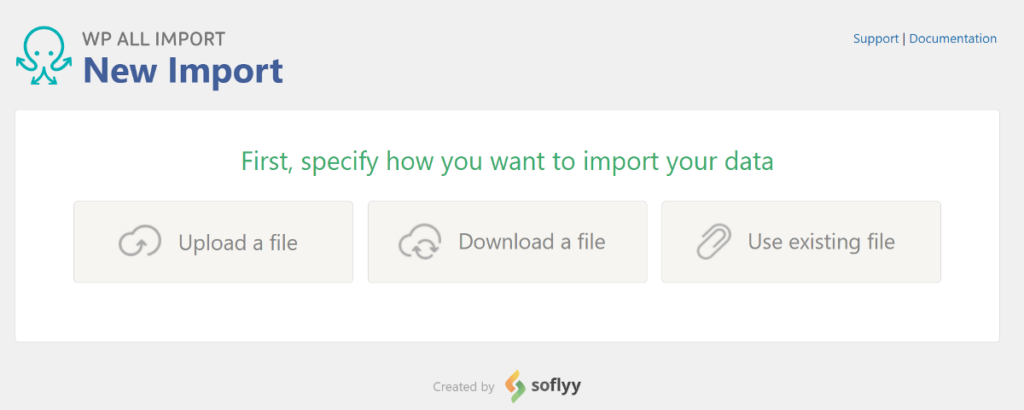
For this tutorial, we will choose to upload the Excel file from your local computer.
Select the Upload a file option and choose your Excel file in the window that opens. After the file is uploaded, WP All Import will prompt you to choose whether to add new users or update existing ones.
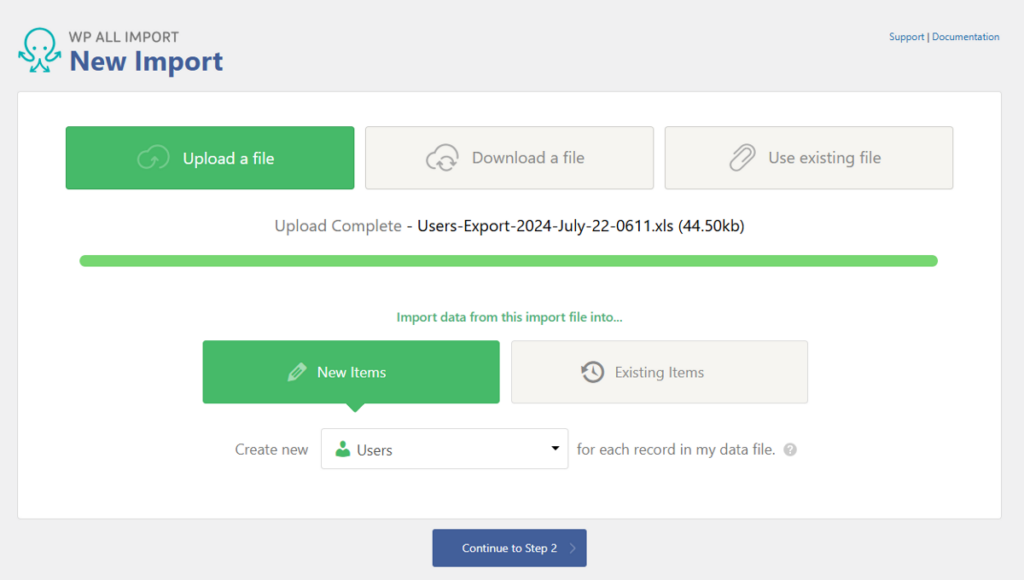
Select New Items and then choose the import type as Users. Now that your user data is loaded, click the Continue to Step 2 button to proceed.
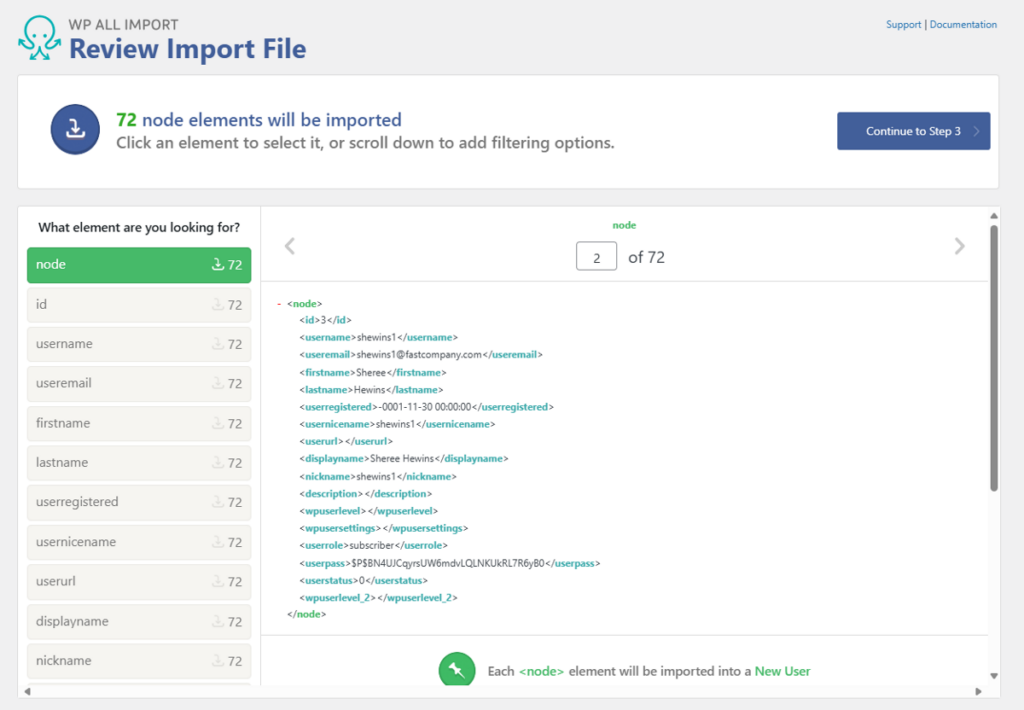
2. Review User Entries in Your Excel File
In this step, you can review the user data individually before they are added to your website.
The user records will be displayed on the right, with each new line representing a separate column from the Excel file. You can easily navigate between these entries using the grey arrows on either side and filter specific columns by clicking on the column names on the left. This is a crucial step to ensure that you only add the users you want.
What if your import file contains user records that you don’t wish to import? No need to worry! WP All Import includes a powerful filtering option on the same page that allows you to filter out any users you don’t want to add.
You can set up multiple filter rules to target specific users in your import file. For example, if your import file is an export from another website and includes users with an administrator role, you can create a rule to exclude them from the import.
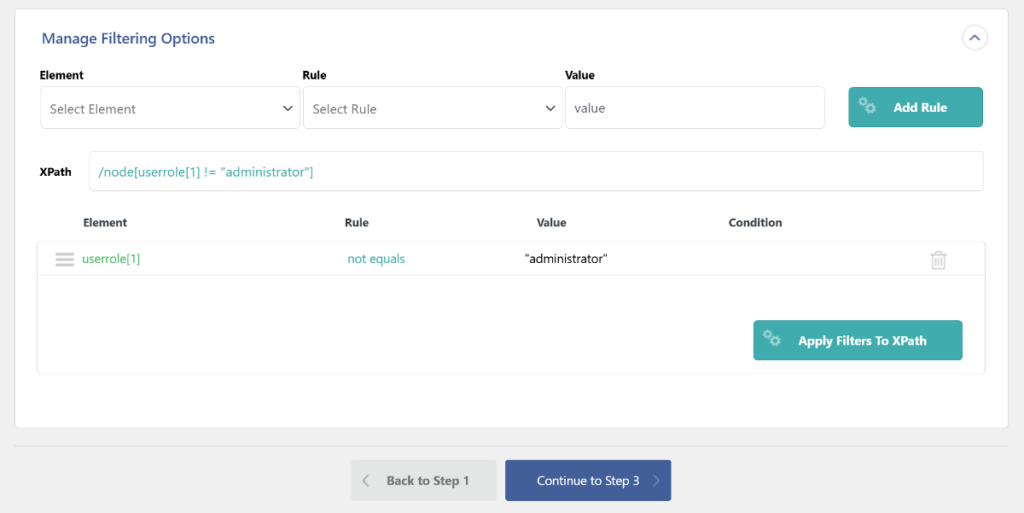
You can add multiple rules and combine them using AND and OR conditions, giving you full control over the users you wish to include or exclude. Additionally, it supports relative data for dates, allowing you to create filters when setting up a recurring import.
Once you’ve added the necessary filters and ensured that your import only includes the users you want, click the Continue to Step 3 button to advance to the next step.
3. Map User Columns From Excel File to WordPress User Fields
This step is the most crucial part of the import process. It allows you to use a drag-and-drop interface to map the Excel columns from your import file to the corresponding WordPress user field boxes in WP All Import.
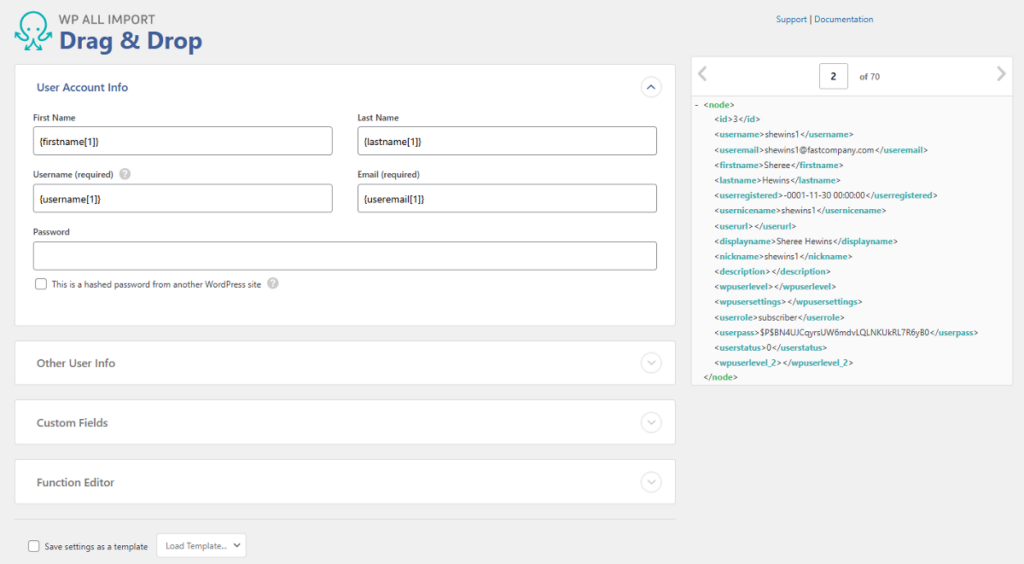
You can expand the user field panels and drag each field one by one. If your Excel file includes a password column, you can drag and drop it into the password field box. WP All Import supports hashed passwords, meaning that if your passwords are from another WordPress site, they will be automatically converted to valid passwords. Alternatively, you can allow new users to generate their passwords through a link sent in the welcome email notification; in this case, leave the password field blank.
WP All Import also supports custom user fields created by third-party plugins like ACF, Meta Box, and Jet Engine. You can expand the Custom Field panel, and WP All Import will automatically detect custom user fields on your website.
Moreover, it includes advanced data customization features, such as combining multiple columns into one user field or modifying the data in a specific field.
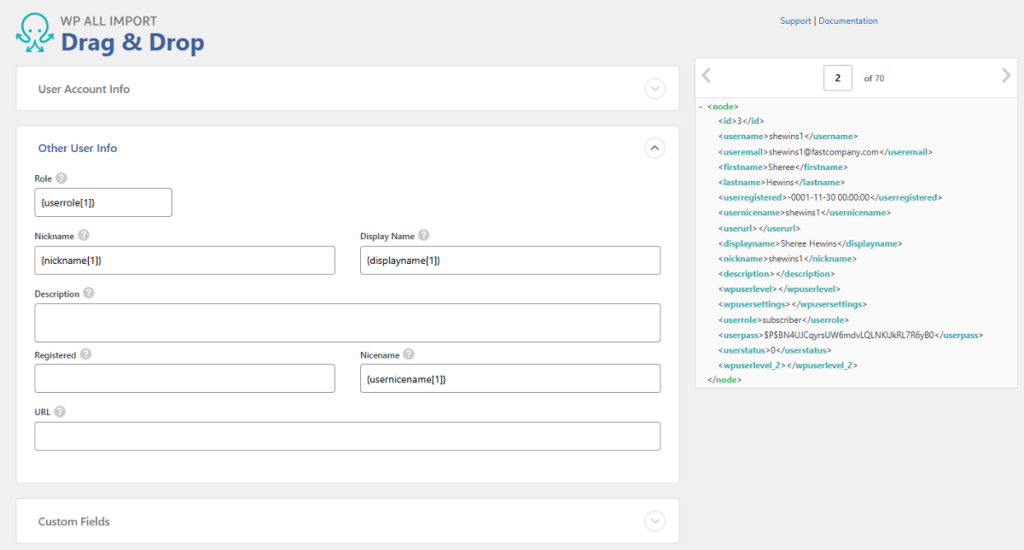
Combining multiple columns can be easily done using the same drag-and-drop interface. Modifying data involves using custom PHP functions, which you can learn more about in WP All Import’s documentation on using inline PHP functions.
Once you’ve mapped all the fields, click the Continue to Step 4 button to move to the next step.
4. Apply Additional User Settings
In this step, you will find multiple additional settings to optimize the import process further. Let’s look at each settings panel one by one.
The Unique Identifier allows you to define specific columns in your import file so that WP All Import can differentiate between different users. This helps prevent duplicate users from being imported and is especially useful when running the same import with an updated file.
You can click the Auto-detect button to let WP All Import automatically select the best Unique Identifier from your Excel file. Alternatively, you can manually set it using the drag-and-drop interface, but the auto-detect option is quick and requires just clicking a button.
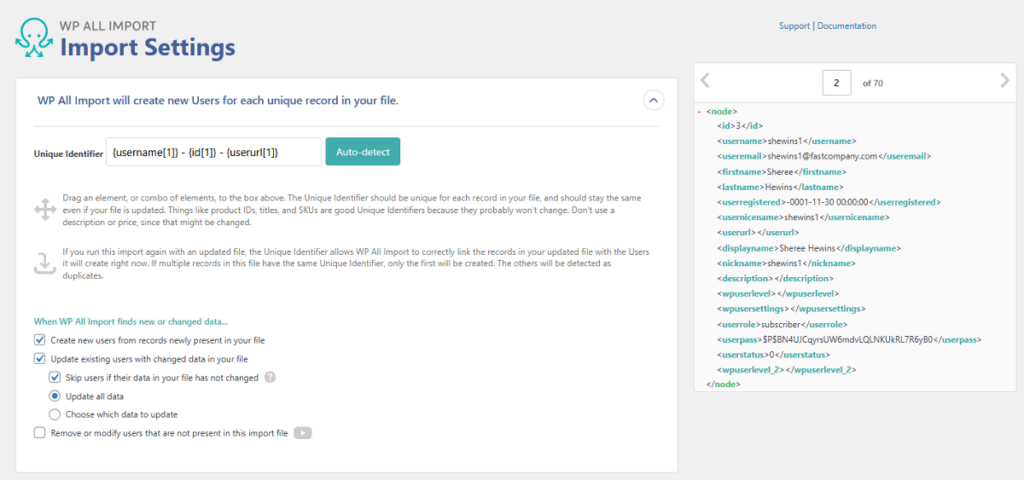
This panel also lets you choose what to do if a user already exists on your website or whether to delete existing users if they are not present in the import file.
As we did not map the user password field previously, you can uncheck the optional option in the next panel to allow WordPress to send a welcome email containing a password reset link.

The next panel on the Additional Settings page is the Scheduling Option. This optional setting allows you to set up recurring imports that work without manual intervention. However, this feature only works if you select to download the file from a URL or use an existing file on your server in the first step. You can learn more about this from WP All Import’s documentation on scheduling recurring imports.
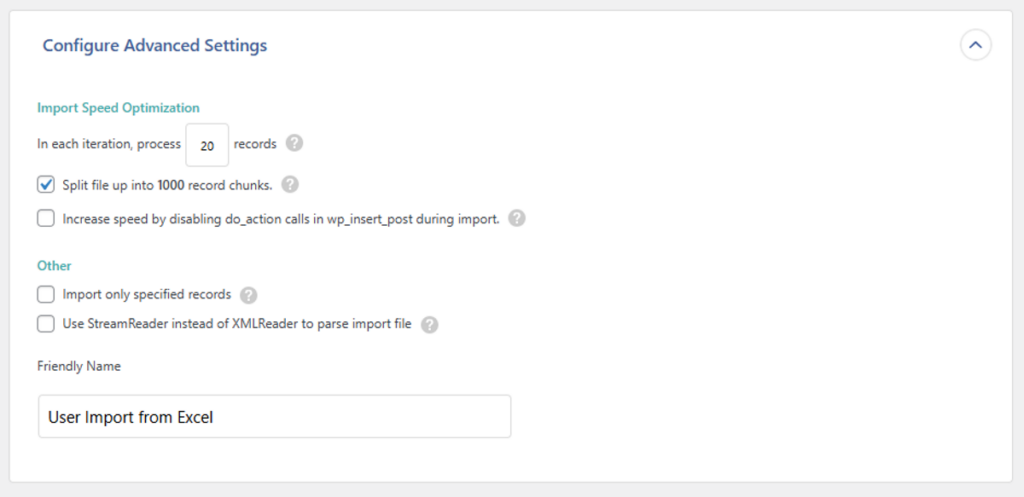
The final panel on this page is the Advanced Settings panel, which provides options for speed optimization and other settings to enhance the import process. All options are self-explanatory and can be easily enabled with just a click.
Once you have configured all the options on this page, click Continue to proceed to the next step.
5. Run the User Import From an Excel File
This is the final step in the user import process from an Excel file using the WP All Import plugin. Before running the import, you will see a summary of all the steps you’ve completed so far. This allows you to review the settings and ensure everything is correct.
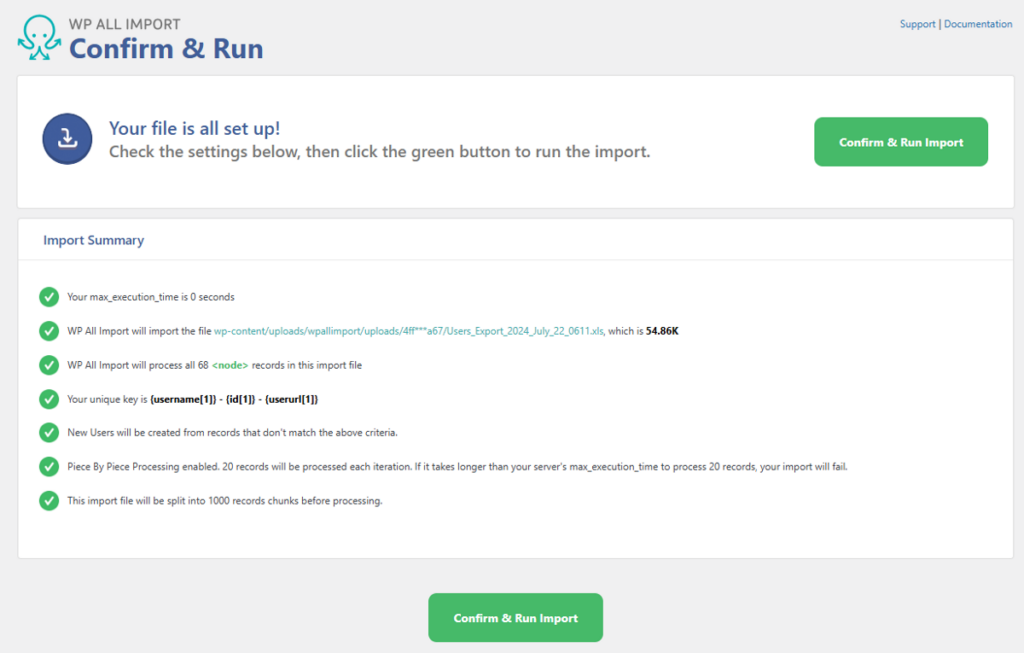
Once you have verified all the information, click the Confirm & Run button to initiate the import process. WP All Import will start adding users from your Excel file, and you will be able to see the progress in real-time.
When the import is complete, WP All Import will present you with a confirmation screen along with a summary of how many users were successfully imported and whether any existing users were updated.
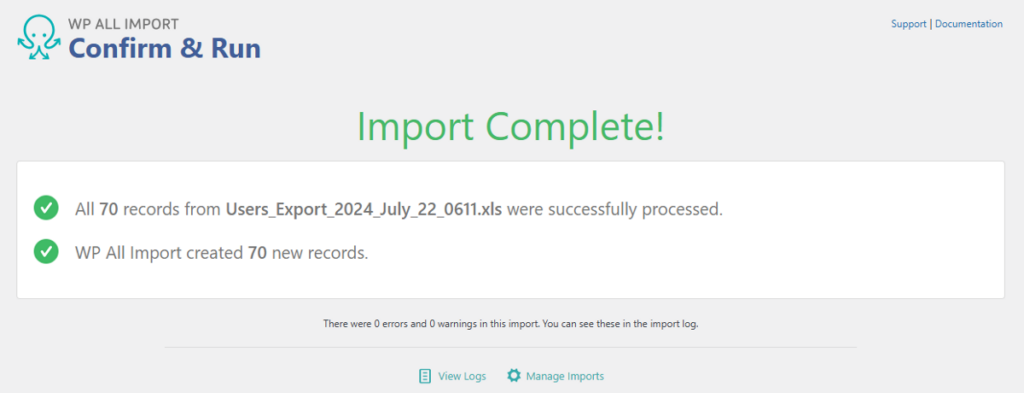
That’s it! Isn’t it easy to import WordPress users from an Excel file using the WP All Import plugin?
Import WordPress Users From Excel – Frequently Asked Question
How Do I Import Data From Excel to WordPress?
WP All Import allows you to import multiple WordPress data types such as Users, Products, Orders, Posts, Pages, Taxonomies, and CPTs and supports uploading Excel files (XLS and XLSX).
How To Bulk Add Users in WordPress?
Any import involving more than one user is technically a bulk import, and here are the steps to bulk-add users in WordPress.
- Navigate to All Import › New Import.
- Choose how you want to load your data (upload a file, download from a URL, or use an existing file).
- Select your import file and choose Users as the import target.
- Use the Drag & Drop interface to map incoming data to your WordPress user fields.
- Run the import.
How To Migrate Users in WordPress?
You can use the combination of the WP All Export and WP All Import plugins to efficiently migrate users from one WordPress site to another:
- Use WP All Export to export the users that you wish to migrate.
- Download the Bundle file, which contains import instructions.
- On the destination site, upload the bundle file using WP All Import.
- Finish the import to complete the migration.
- Check the migrated users.
How Do I Export Users From WordPress to Excel?
Follow these steps to export WordPress users to Excel:
- Go to All Export › New Export and select Users as the export type.
- Configure your export columns using the Drag & Drop interface.
- Change the file type to Excel XLS or Excel XLSX.
- Run the export and download your export file in Excel format.