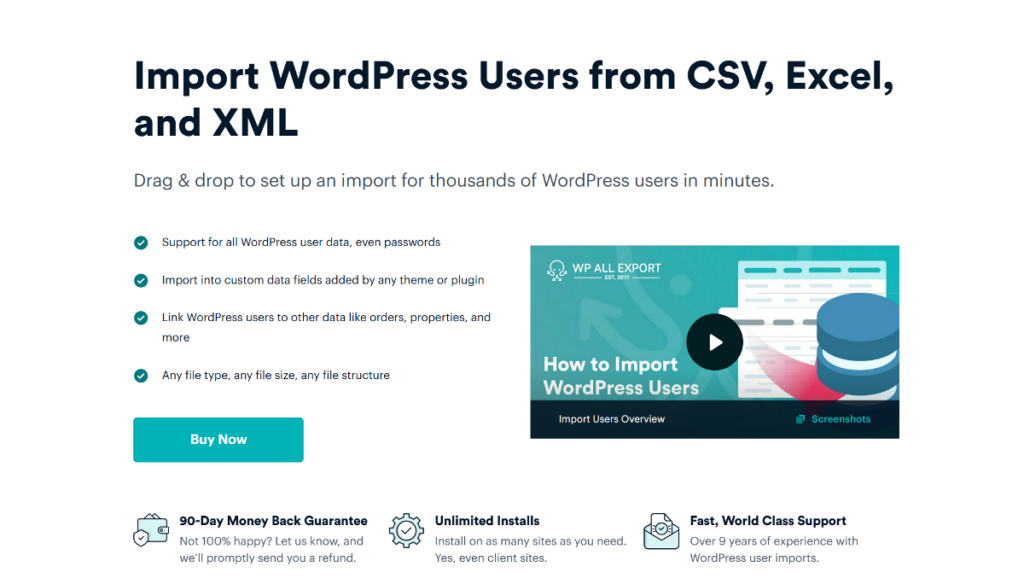
Are you looking to import a large user base into your WordPress website?
If you’ve ever tried to add users one by one, you know it can be a tedious and time-consuming task. By default, WordPress lacks a feature to import users in bulk, which can be a major inconvenience if you need to migrate users from another platform, onboard members for a new community, or manage large lists of users for any reason.
In this guide, we’ll walk you through the step-by-step process of bulk importing users into your WordPress website using the WP All Import plugin.
Let’s get started!
When You Might Need to Import Users in WordPress
There are many scenarios where the ability to bulk import users into WordPress can be incredibly useful. An efficient import process can save you a significant amount of time and effort. Here are some common use cases where you might need to import users in bulk:
- Site Migration
When moving your website from another platform to WordPress, you don’t want to lose existing user data. The import process ensures that all user accounts, along with their roles and permissions, are seamlessly transferred to the new WordPress site. - Merging Websites
If you are merging multiple websites into a single WordPress site, you’ll need to import users from each site to create a unified user base. The import process helps migrate all user data from each source site to the destination site. - Bulk User Registration
For membership or online course sites, bulk user registration can save significant time. Importing users in bulk allows you to onboard new users quickly without the need for manual entry.
Considering these use cases, let’s look at how to bulk import WordPress user data in detail.
How to Easily Import Users into WordPress
Importing users in bulk to your WordPress site can seem daunting, especially if you’re dealing with large datasets or complex user information. Thankfully, the WP All Import plugin simplifies this process. It is a comprehensive plugin that allows you to easily import any WordPress data, including users, in just a few straightforward steps.
WP All Import supports importing user data from CSV, Excel, Google Sheets, and XML files. One of its standout features is its intuitive drag-and-drop interface, which makes mapping fields from your import file to your WordPress website easy, even for beginners.
In the following sections, we’ll provide detailed instructions for the entire import process.
Let’s start by preparing your import file.
1. Prepare the User Data File For Import
Before starting the import process, you’ll need to prepare the user data you want to import.
If you’re migrating or merging sites, the best way to get the user data is by using the WP All Export plugin. This plugin is excellent for exporting all kinds of data, including user information. It works in a similar way as the WP All Import plugin by breaking down the export process into simple steps. You can refer to WP All Export’s documentation for more information on exporting user data.

If your user data comes from another source in a spreadsheet or XML format, make sure it contains all the necessary fields such as username, email, and password. The organization of the data is not a priority as WP All Import includes on-the-fly manipulation using custom PHP code.
Once you have the user data and the premium version of the core WP All Import and User Add-on installed, you can start the import process.
2. Start a New User Import in WP All Import
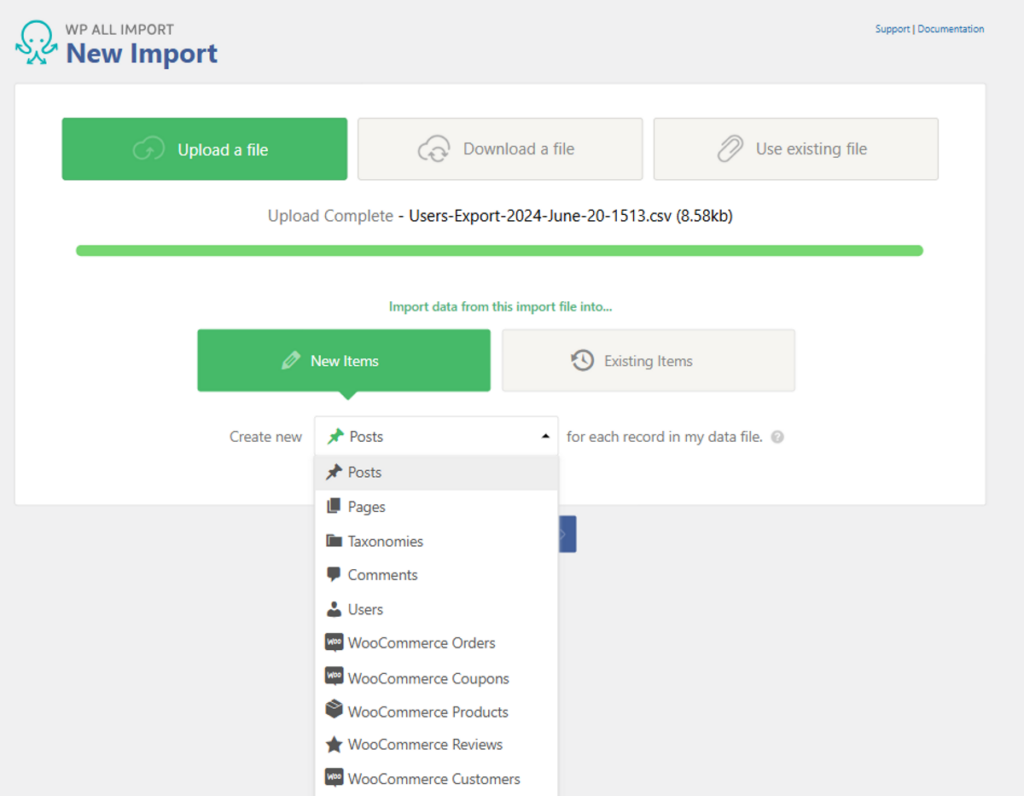
To begin the import process, navigate to All Import › New Import in your WordPress dashboard.
WP All Import provides three ways to upload your data. You can either:
- Upload the file from your local computer.
- Download it from a URL, including Dropbox or Google Sheets/Google Drive.
- Use an existing file on your server.
Since we exported the user data from the source site, we’ll select the first option. Click the Upload a file option and then select the CSV file from your local computer.
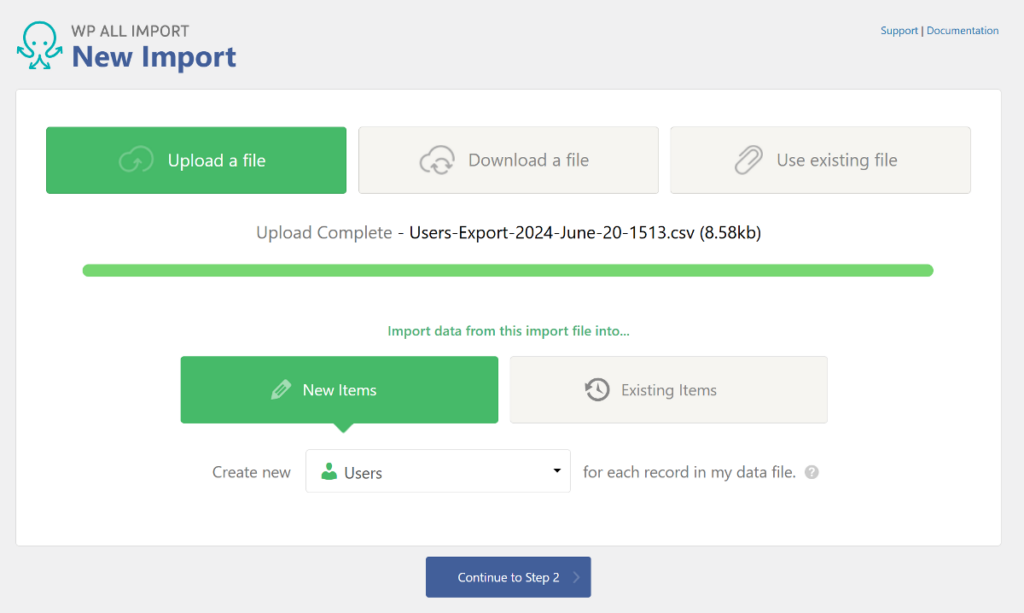
Once uploaded, under New Items, select Users as the Import Type. Next, click Continue to Step 2.
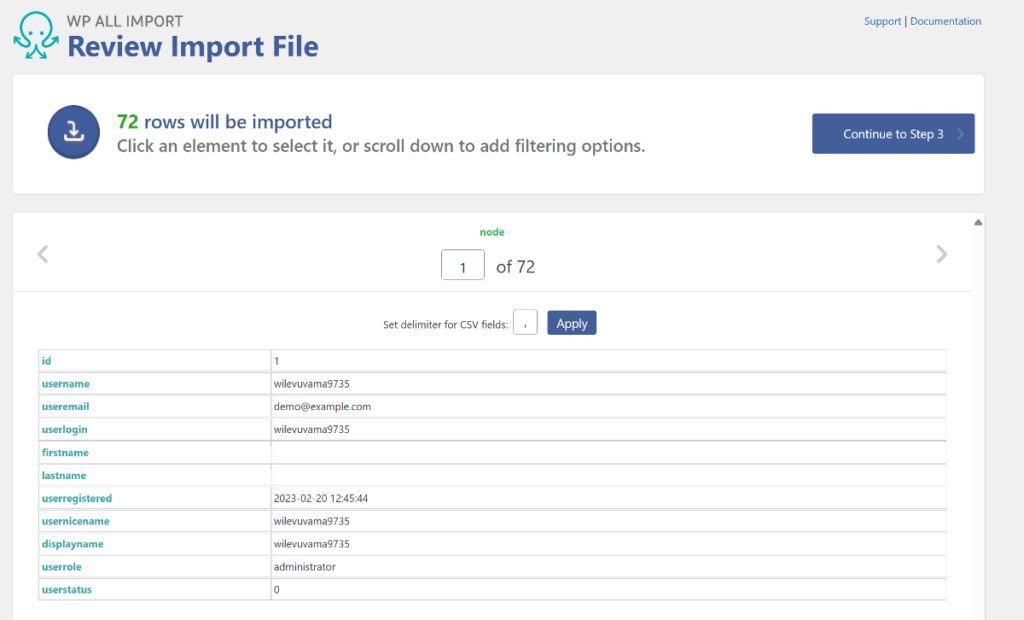
3. Review the User Data From the Import File
The Review Import File page allows you to verify the records in your CSV file before moving ahead with the import process.
WP All Import will read your import file and display the total user count at the top. You can use the gray arrows to navigate between records and verify each user’s information individually.
If your CSV file contains a large user base but you only want to import a subset of that data, WP All Export lets you apply filters so you import only the required user data.
Expand the Manage Filtering Options panel and start adding your filter rules. Each filter rule includes three components: Element, Rule, and Value.
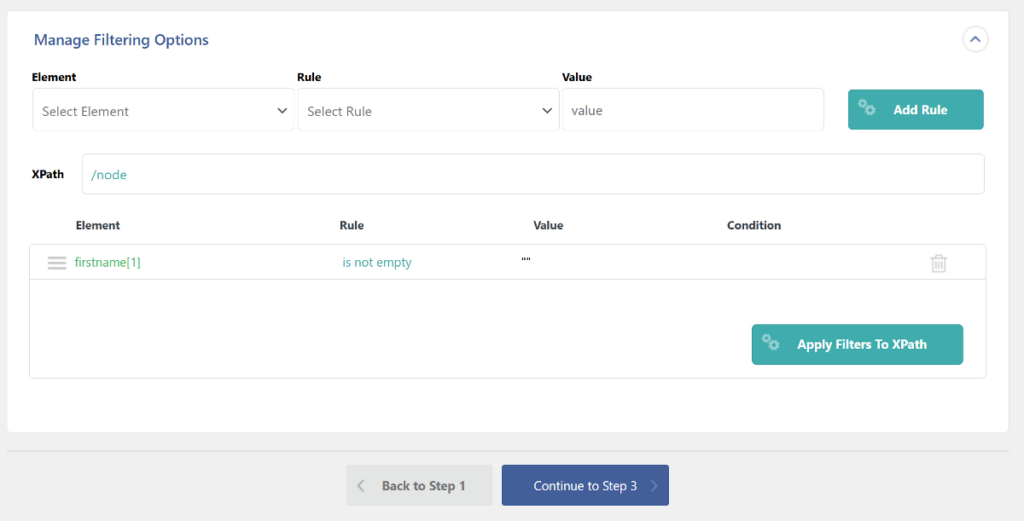
After adding all three components, click the Add Rule button. The filter rule won’t apply as the imported data is stored outside the WordPress database. To apply the filter, you must click the Apply Filters To XPath button.
WP All Import doesn’t restrict you to applying just one rule. You can also combine multiple filters using the AND and OR logic to get granular control over which specific users to import.
After verifying all the data and applying the required filters, click Continue to Step 3 to move to the next step.
4. Map Data From the Exported File to the WordPress User Fields
One of the features that make WP All Import a popular plugin in this space is its user-friendly drag-and-drop interface. It allows anyone to easily map fields from your file to the relevant WordPress user fields.
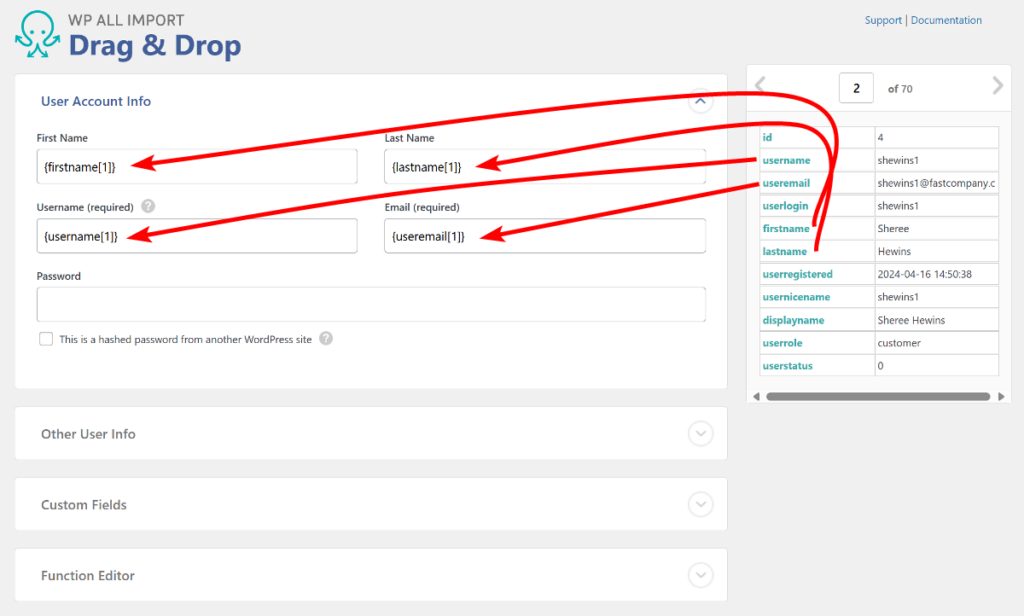
The fields are organized into logical sections to help you map related sets of fields from the right section. Expand the Other User Info and Custom Fields sections to map additional relevant fields.
WP All Import also allows you to combine multiple columns from your export file into a single field on WordPress.
Sometimes, when you receive the user data file from a third party, it may not align with the data requirements of your WordPress user fields. WP All Import solves this by allowing you to manipulate the data by applying built-in PHP functions to incoming data.
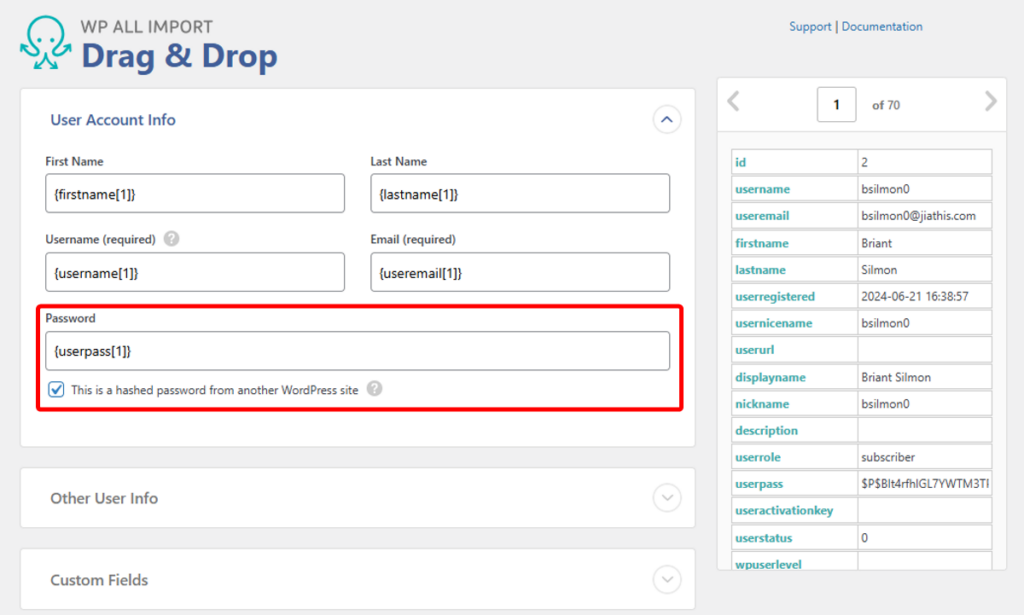
WP All Import also lets you securely import user passwords by using hashed (encrypted) values when the user data you have is from another website. To do this, check the box below the password field to confirm that the password is from another website.
After mapping everything, click the Continue to Step 4 button to proceed to the next step.
5. Configure WordPress User Import Settings
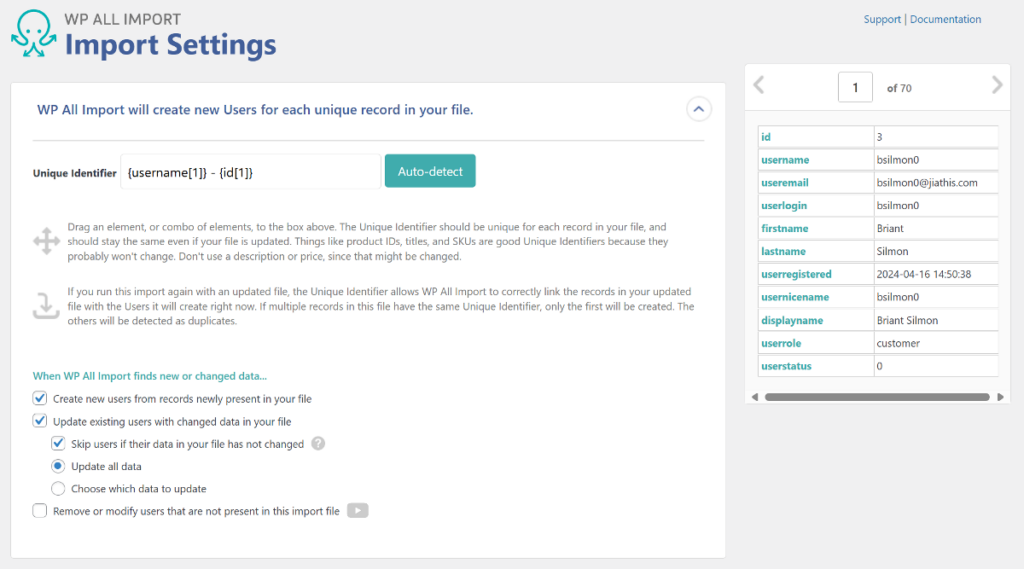
The import settings include assigning a unique identifier, blocking email notifications to users during the import process, speed optimization options, and scheduling.
The unique identifier helps WP All Import differentiate between users, which is crucial for identifying users when you run the same import again with an updated file.
You can click the Auto-detect option to let WP All Import select the best identifier from your file. You can also manually add this value, but the auto-detect option works well most of the time.
WP All Import also includes Automatic Scheduling, which allows you to import users without manual intervention. This works when you select the Download from URL or Use Existing File option in the first step of the import.
You can combine it with the automatic scheduling of WP All Export to automatically transfer new user data from one WordPress website to another.
To create an automatic import, expand the Scheduling Options panel and select between automatic and manual scheduling. The Automatic Scheduling is a plug-and-play optional paid service that allows you to easily select which specific days you want to run the import.
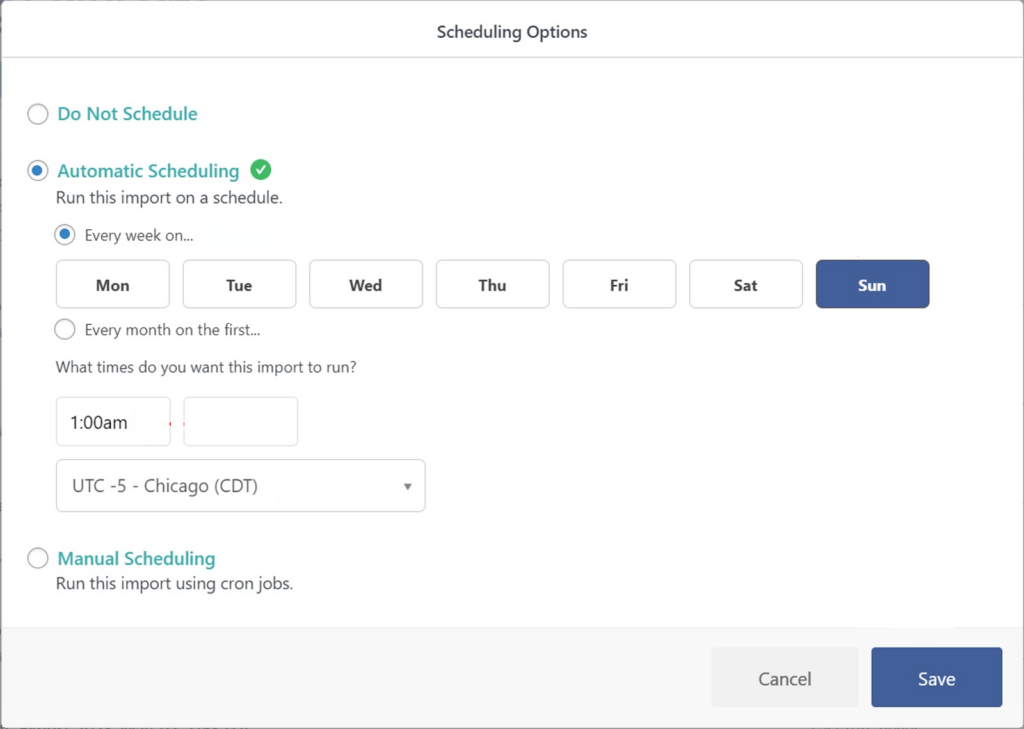
Manual Scheduling requires you to set up cron jobs on your server. You can learn more about setting up cron jobs from WP All Import’s documentation.
The Advanced Settings options are self-explanatory and can be enabled using simple checkboxes.
Once you’ve configured all the settings, click Continue to move to the next step.
6. Confirm and Run WordPress User Import
The Confirm & Run page appears next. This page gives you a summary of the steps that WP All Import will execute to complete the import process.
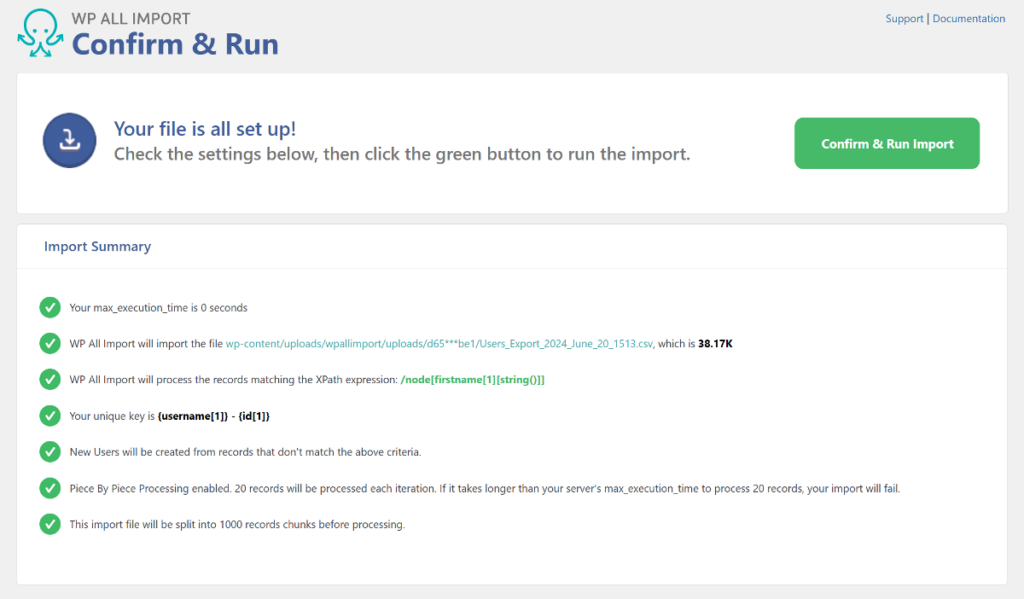
If everything looks correct, click the green Confirm & Run Import button to start the process. When the import process finishes, you’ll see a confirmation with a summary of how many users were imported and how many were updated.

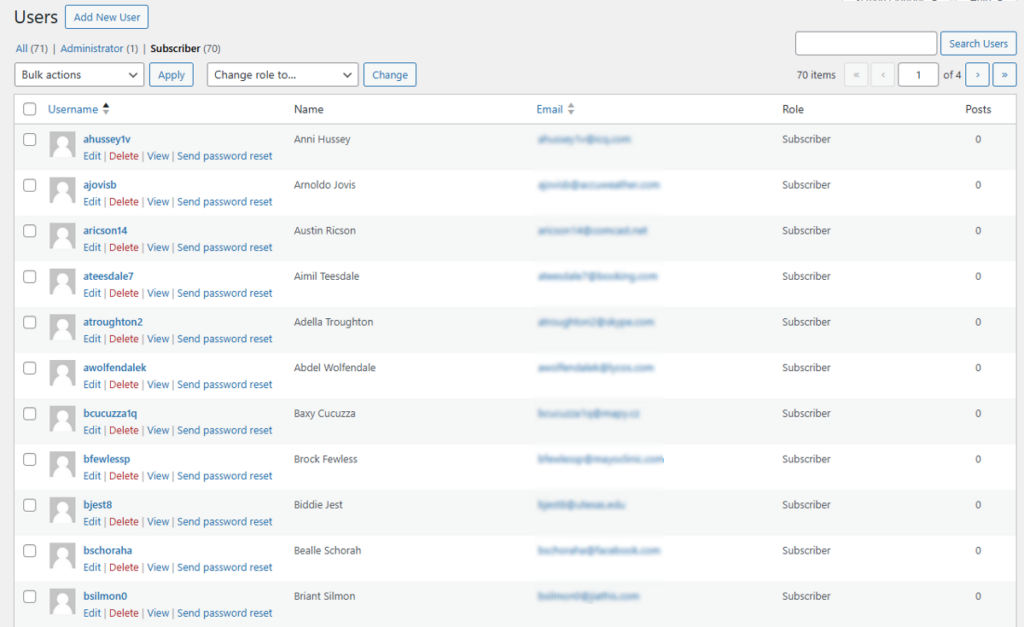
To verify the import, navigate to Users › All Users in the WordPress menu and search for the newly imported users.
Next: Migrate Other WordPress or WooCommerce Data
If you’re migrating from another platform to WordPress or WooCommerce, you might also need to transfer other types of data. WP All Import can handle all of these needs, and include support for WooCommerce, WooCommerce orders, ACF, Meta Box, JetEngine, Gravity Forms, as well as the default WordPress data types.
With WP All Import, you can easily import products, orders, customers, reviews, coupons, posts, pages, listings, and SEO data. It truly is a single plugin for all your import requirements.
Ready to easily import user data into WordPress? Download and install the WP All Import plugin today.
Import Users Into WordPress – Frequently Asked Questions
How To Bulk Add Users to WordPress?
To bulk import users into WordPress, simply follow the same steps outlined in this guide using the WP All Import plugin. Any import involving more than one user is technically a bulk import, so there is nothing special about this process.
How Do I Import Customers Into WordPress?
Importing customers in WordPress using WP All Import is similar to importing regular users. The only difference is that you need to select WooCommerce Customers as the import type in the first step of the process.
How Do I Export Users on WordPress?
You can export users from any WordPress site using the WP All Export plugin. Just follow these steps:
- Navigate to All Export › New Export.
- Use the Drag & Drop interface to add fields to your export file.
- Run the export.
How Do I Transfer Users From One WordPress Site to Another?
It’s easy to migrate users from one WordPress site to another using the combination of WP All Export and WP All Import plugins. First, use the WP All Export plugin to export users from your source site. Then, import these users into your destination site using the WP All Import plugin.