Do you want to easily import products from Shopify to WooCommerce?
As a store owner, there are many reasons why you may decide to migrate from Shopify to WooCommerce. Customization and control, cost savings, data ownership, and even access to more advanced SEO optimizations are some considerations that could inform your decision. WooCommerce generally provides a better platform for store owners thinking about long-term business growth and scalability.
In this article, we will show you how to effortlessly import your products from Shopify to WooCommerce with the leading import plugin for WooCommerce and WordPress – WP All Import.
Why Choose WooCommerce Over Shopify
WooCommerce is an e-commerce platform powered by open-source code and used by over 4 million store owners globally. Compared to Shopify, WooCommerce provides users with more flexibility and operational efficiency, ensuring easier business growth.
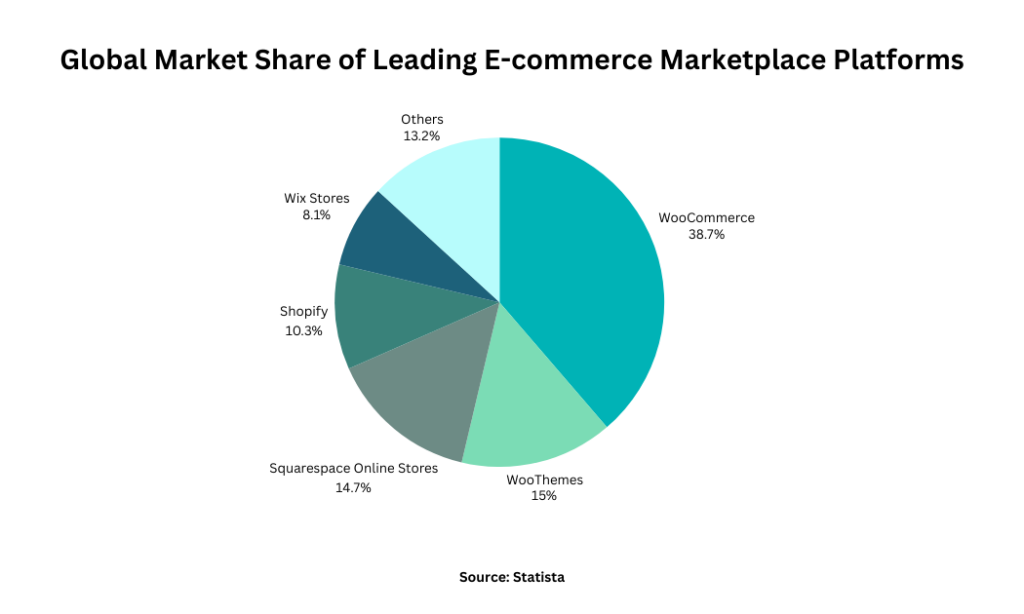
Migrating your store from Shopify to WooCommerce comes with a long list of valuable benefits, including:
- Complete flexibility & control.
- Cost savings (WooCommerce is free to use).
- Integration with multiple payment gateways.
- Better search engine optimization.
- Full data ownership.
- Extensive plugin options for robust functionality.
- Huge global community of developers and users for easier access to support.
These benefits make it clear why WooCommerce is the e-commerce platform of choice for many store owners. If you want to scale to selling thousands of products while keeping your running costs low, switching from Shopify to WooCommerce is a good idea.
How To Import Products From Shopify to WooCommerce
Now that you are ready to import your products from Shopify to WooCommerce, let’s look at the step-by-step process in detail.
1. Manually Export Products From Shopify
The first step in setting up your Shopify to WooCommerce product import is to export your products from Shopify.
To do this, go to your Products page from your Shopify admin dashboard, click Export, choose the products you want to export, select the type of CSV file you want to export, and finally, Export products.
Once you follow these steps, you can download your CSV list of exported products. For more detailed information, see the comprehensive guide for exporting products from Shopify.
Please note that Shopify includes links to product images in your export files. Your store should remain live until the import process is completed to ensure the product images can be downloaded and assigned correctly.
2. Install WP All Import and Its WooCommerce Import Add-On
To import the exported product data into WooCommerce, we’ll be using the WP All Import plugin. It stands out as the best WooCommerce import plugin used by some of the biggest brands in the world.
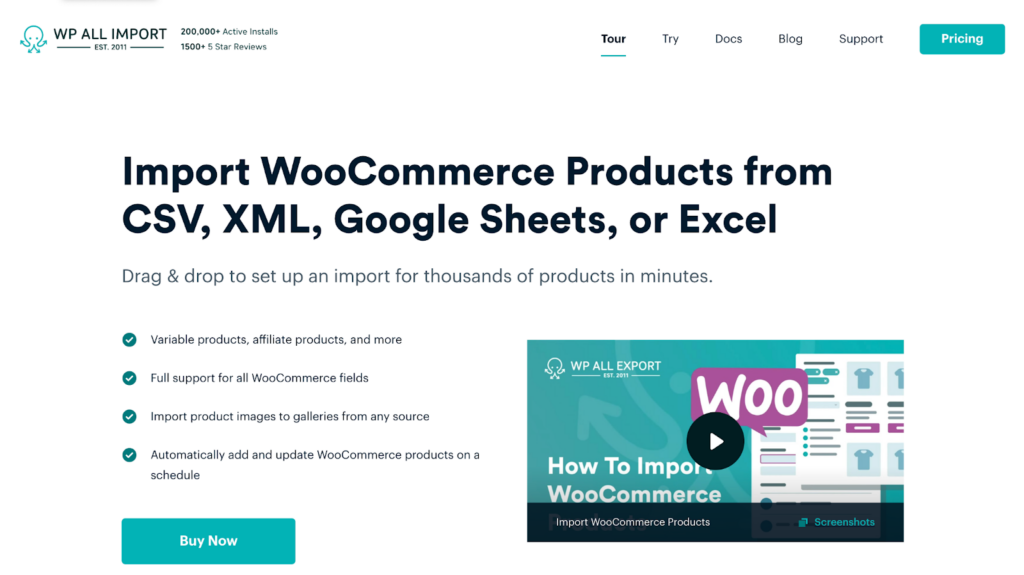
The plugin features the most robust import features in the WordPress ecosystem and a user-friendly drag-and-drop interface. This makes it ideal for beginner and advanced WooCommerce store owners who want to carry out simple or complex imports.
Some of the most exciting features that WP All Import offers include:
- Automatic scheduling of imports to save time.
- Support for importing from multiple formats including Excel, Google Sheets, CSV & XML.
- Powerful filtering functionality to import only specific products.
- Support for all WooCommerce products and data types.
- Support for all WordPress data types.
- Functionality to modify data on the fly using PHP functions, and more.
To access all these features and to get started with your Shopify to WooCommerce product import, first purchase and download the WP All Import plugin.
Once downloaded, go to your WordPress admin dashboard and navigate to Plugins › Add New Plugins › Upload Plugin › Choose File › Install Now › Activate. The WP All Import plugin will now be activated and ready to use on your website.
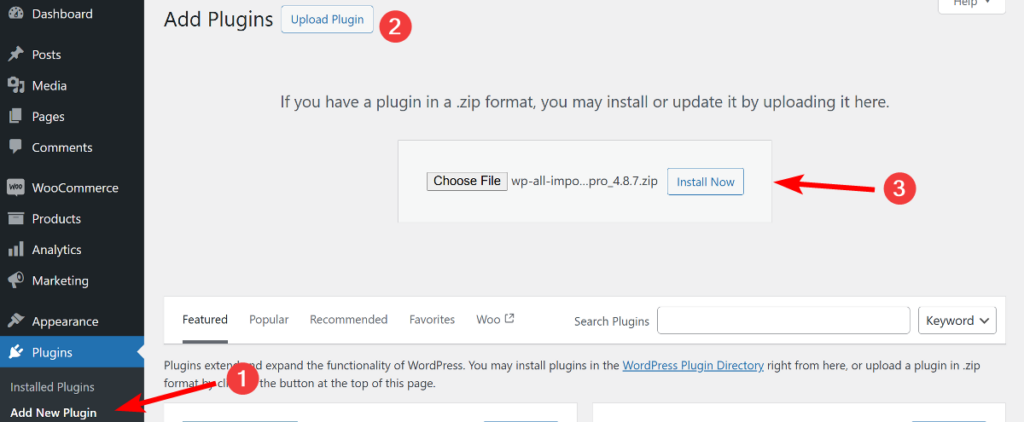
Since you are importing Shopify products into WooCommerce, you also need to install its WooCommerce Import add-on. This add-on adds support for all WooCommerce data fields for any type of product. To install the add-on, simply follow the same steps for installing the plugin.
You are ready to start your import as soon as you install and activate the WP All Import plugin and WooCommerce Import Add-On.
3. Start Shopify to WooCommerce Product Import
To start the Shopify to WooCommerce product import, go to All Import › New Import from your WordPress admin dashboard.
On the New Import screen displayed, click Upload File and select the CSV file of your exported Shopify products as the file to be uploaded.
Once the file upload is complete, under New Items, select WooCommerce Products from the dropdown menu as the import type.
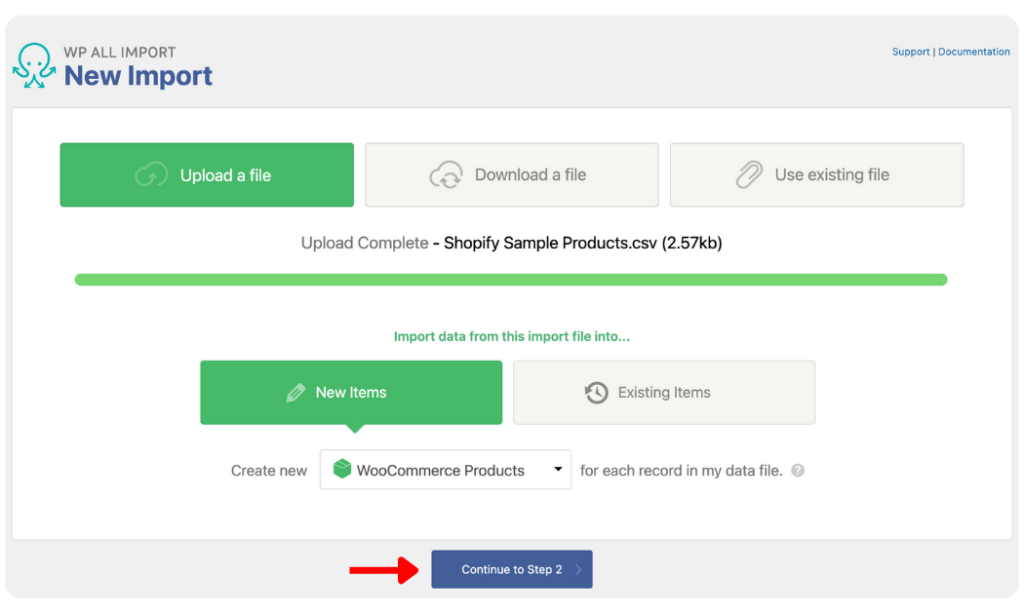
If you need to carry out additional product imports in the future, note that WP All Import provides options to import product data from other sources. You can select the Download a file option to download your product data from a URL or FTP/SFTP, or you can choose the Use existing file option to reuse a previously uploaded import file.
Once you have successfully uploaded your Shopify product data and selected the product type, click Continue to Step 2 at the bottom of the screen to move to the next step.
4. Review Exported Shopify Product Data and Apply Filters
On the Review Import File screen that appears, you can review the Shopify product data you uploaded to be sure that WP All Import has properly detected all the products in your import file.
Use the gray left (<) and right (>) arrows on the screen to review the data until you are satisfied.
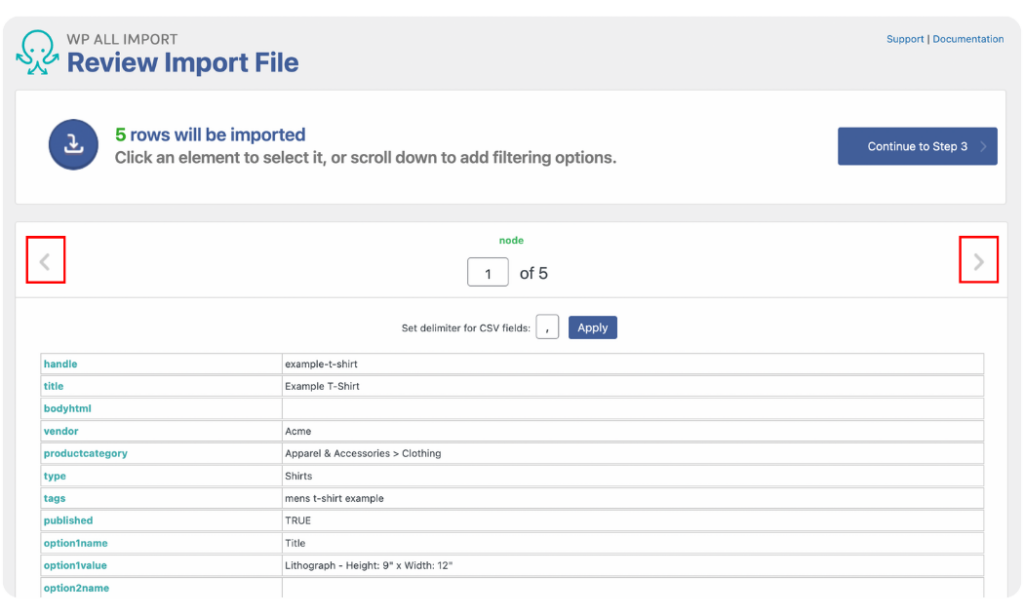
Once reviewed, scroll to the bottom of the screen and click the Manage Filtering Options panel to reveal WP All Import’s powerful filtering functionality. The feature allows you to filter your Shopify products and import only specific products depending on your needs.
Suppose you run a clothing store and want to import only products that are under the “Male Apparel” category in your Shopify store. To apply a filter rule, you’ll select the product category column title as the Element, select equals as the Rule, and input “Male Apparel” as the Value. Once all three fields are selected, click the Add Rule button followed by the Apply Filters to XPath button to filter only items under the Male Apparel category.

After reviewing your Shopify product data and applying filters as relevant to your use case, click Continue to Step 3.
5. Map Shopify Product Data to the Appropriate WooCommerce Fields
We have now reached the most important (and fun) step in the import process – the Drag & Drop screen.
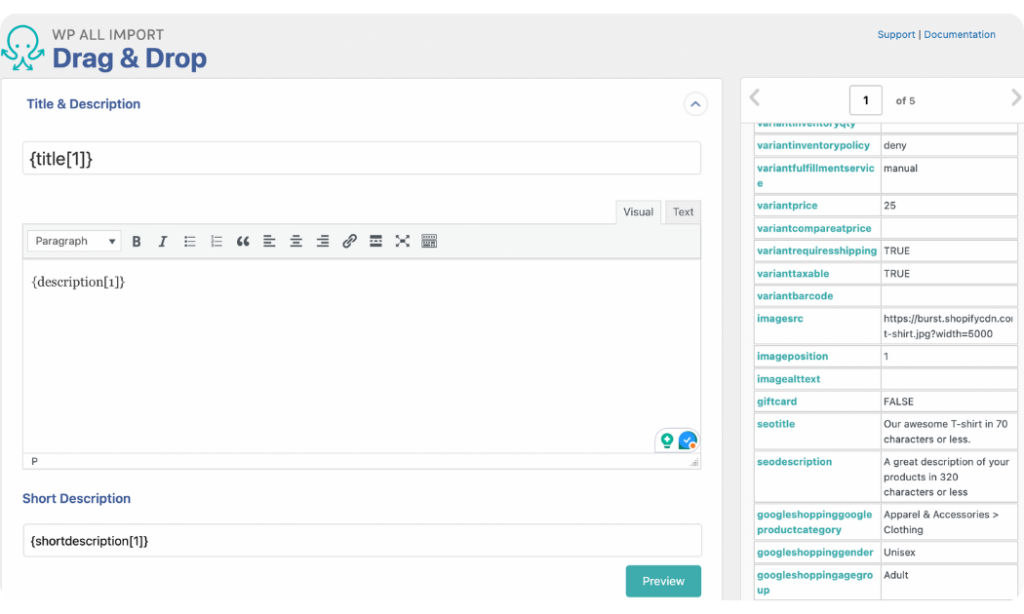
On the Drag & Drop screen, your Shopify product data will be listed in a table format on the right, while the WooCommerce input fields will be listed on the left. The drag-and-drop interface makes the import process a breeze for beginner or advanced users.
Title & Description
In the Title & Description section, you can map the title and description of your Shopify products. To do this, drag the Title, Description & Short Description elements from your incoming import list on the right and drop them into the provided fields on the left.
WooCommerce Add-On Panel
The WooCommerce Add-On section lets you map your product details to the standard WooCommerce fields.
Here, you can specify the Product Type by selecting between Simple product, Grouped product, External/Affiliate product, or Variable product.
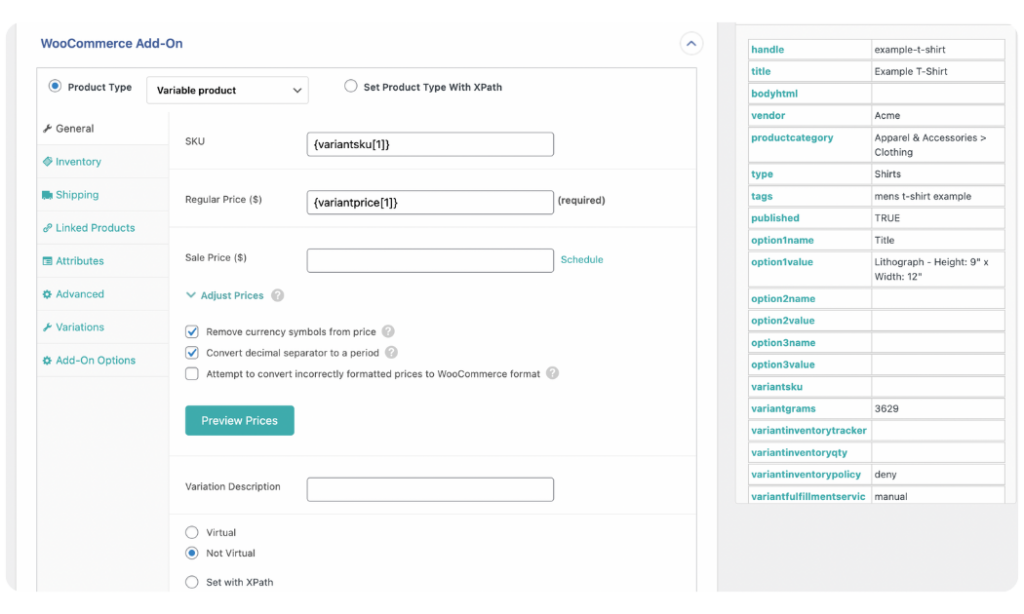
Once you have selected your Product Type, the General tab opens. You can drag and drop the elements from your import file containing the SKU, Regular Price, and Sale Price (if applicable) data into their respective fields provided on the left of the screen.
Below the General tab, you will see other tabs that allow you to import other parts of your product data including Inventory, Shipping, Linked Products, Attributes, and more. Switch to each tab as relevant to your product type and drag and drop the elements from your incoming data file into the corresponding fields.
Images Panel
WP All Import lets you add images to your WooCommerce products from multiple sources. With the Download images hosted elsewhere option, you can easily import product images from Shopify to WooCommerce.
Drag and drop the element that contains the link to your product images into the input box provided for the image URL. If you have multiple image URLs, you can separate them with a comma or enter one per line.
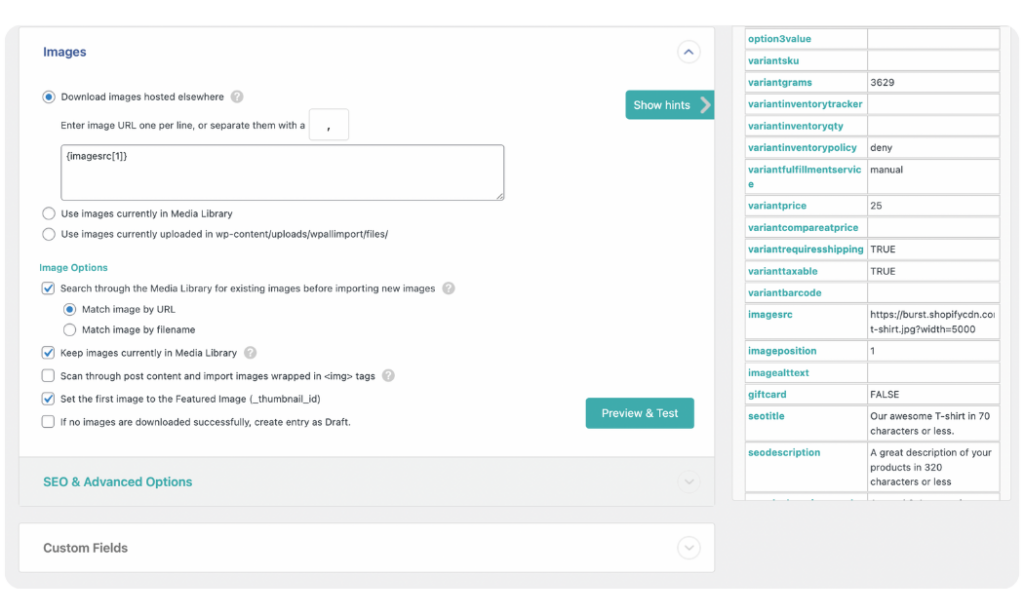
You will find other options for image import settings within the Images panel. You can leave the default settings or change them as needed.
Custom Fields Panel
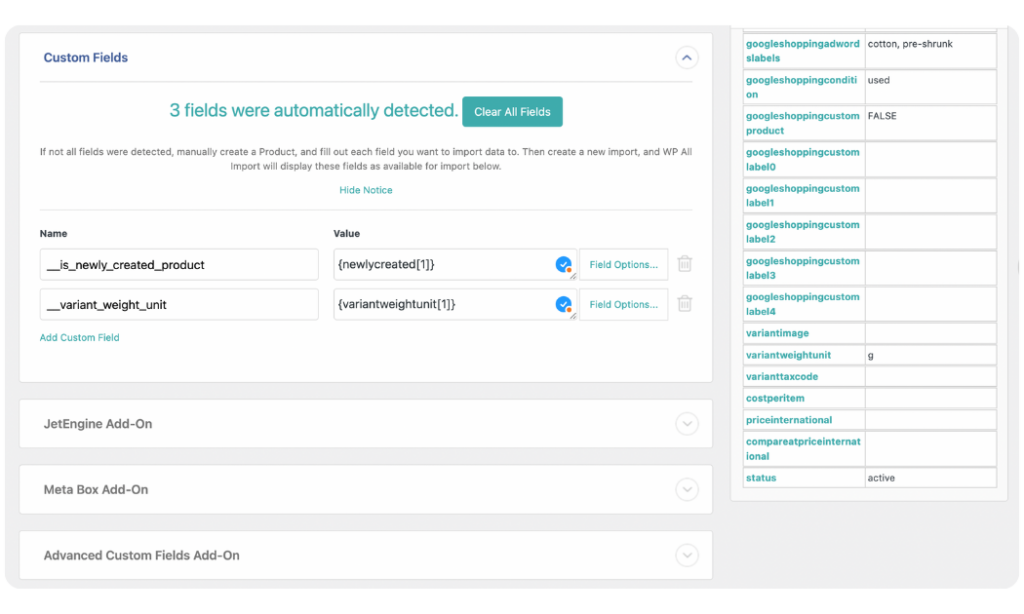
WP All Import provides the Custom Fields panel to enable you to import custom data of your Shopify products. If you have previously manually added a product with custom fields to your WooCommerce store, WP All Import can auto-detect these custom fields and will display a button to See Detected Fields.
However, if you have not added any products to your WooCommerce store, you can manually create the custom fields. To do this, add a Name and drag and drop the element for that custom field into the Value input box.
Taxonomies, Categories & Tags Panel
The Taxonomies, Categories & Tags section provides settings for importing your Shopify products’ categories and tags. You can import products with single or multiple categories or tags, and products with hierarchical categories, by dragging and dropping them in the provided fields.
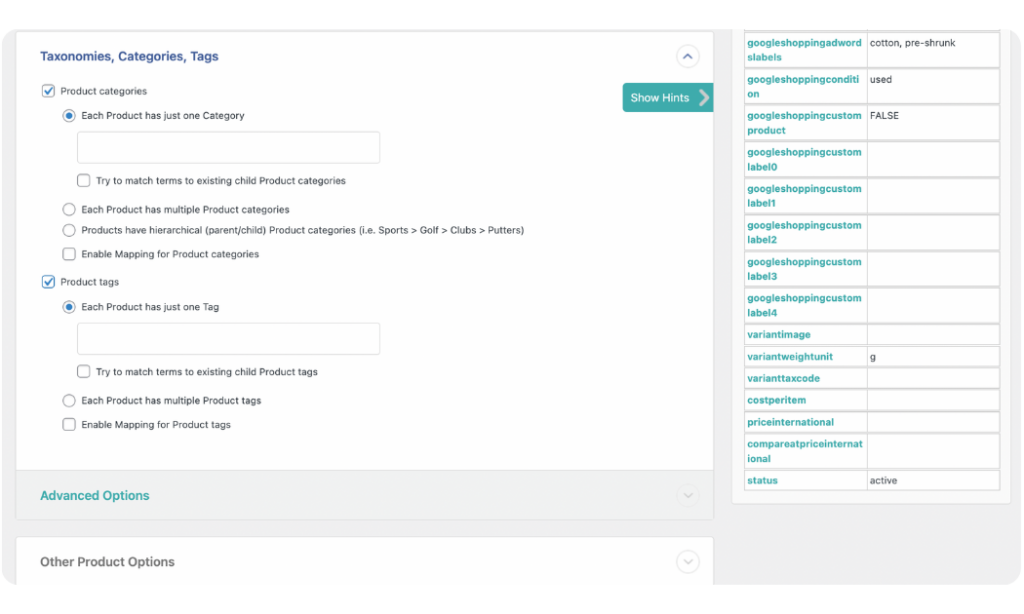
To learn more about importing product categories, read this in-depth guide on importing products with categories.
Other Panels
WP All Import provides many other additional panels to enable you to customize your product import fully. These panels include the Advanced Custom Fields Add-On, Toolset Types Add-On, Meta Box Add-On, Function Editor, and more. These panels will show up when you have the add-ons for the specific plugin installed on your site. However, we won’t cover those other panels in this article.
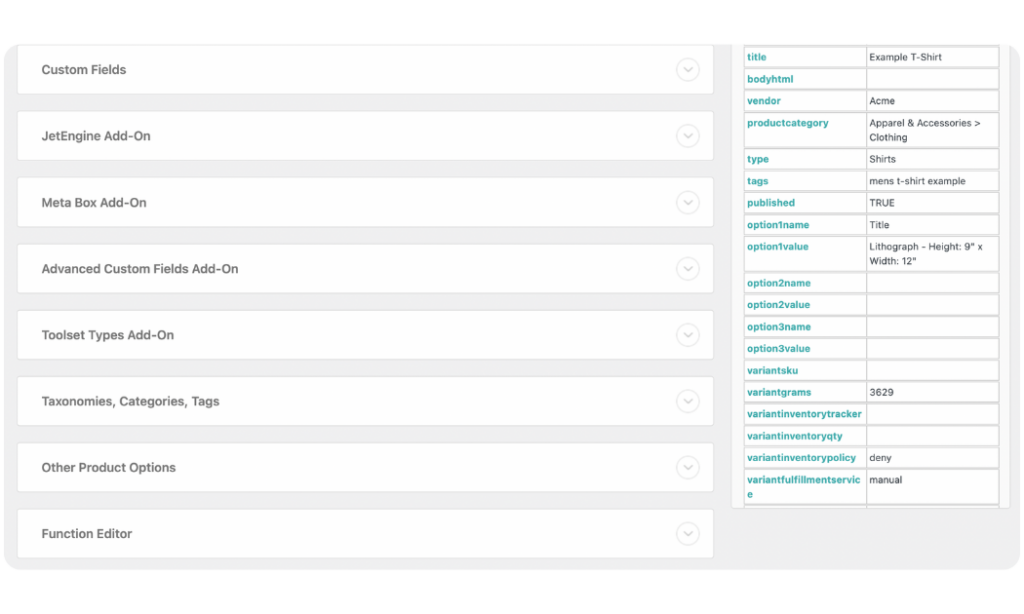
Once you have finished mapping your Shopify product’s data to the correct fields, scroll to the bottom of the screen and click Continue to Step 4.
6. Configure Additional Product Import Settings
You can configure additional settings for your product import on the Import Settings screen that appears.
The first thing you need to do is to set a Unique Identifier for your import. The Unique Identifier is important because it helps WP All Import prevent product duplicates if you import the same file again in the future. Click the Auto-detect button to allow WP All Import to autogenerate a Unique Identifier for your import.
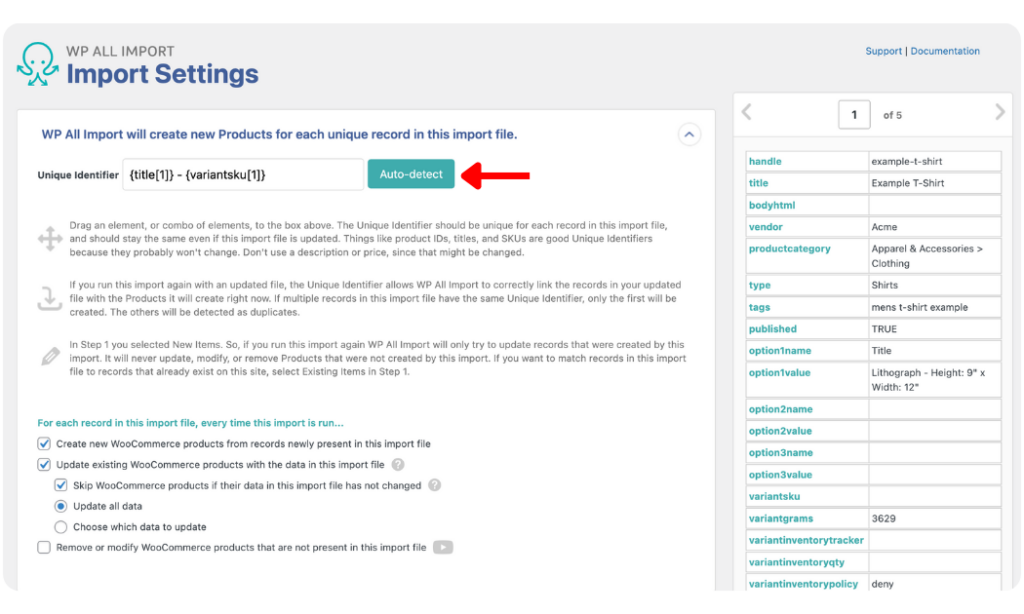
You will see other settings for your product import within the same panel. The default settings work well for most imports, but you can change them if required.
Scroll down to reveal panels for Scheduling Options and Configuring Advanced Settings. From the Scheduling Options panel, you can set up automatic product imports that run on a schedule or manually create cron jobs on your server to automate imports.
The Configure Advanced Settings panel contains settings to optimize the speed of your import. You can leave the default settings or modify them as needed.
Click Continue to proceed to the next step.
7. Run Shopify to WooCommerce Product Import
We’re at the final step in the Shopify to WooCommerce product import process!
On the Confirm & Run screen, WP All Import provides a summary of your import settings so you can review them and confirm that there will be no issues with your import. If you notice any errors, you can return to the previous steps to fix them before you run the import.
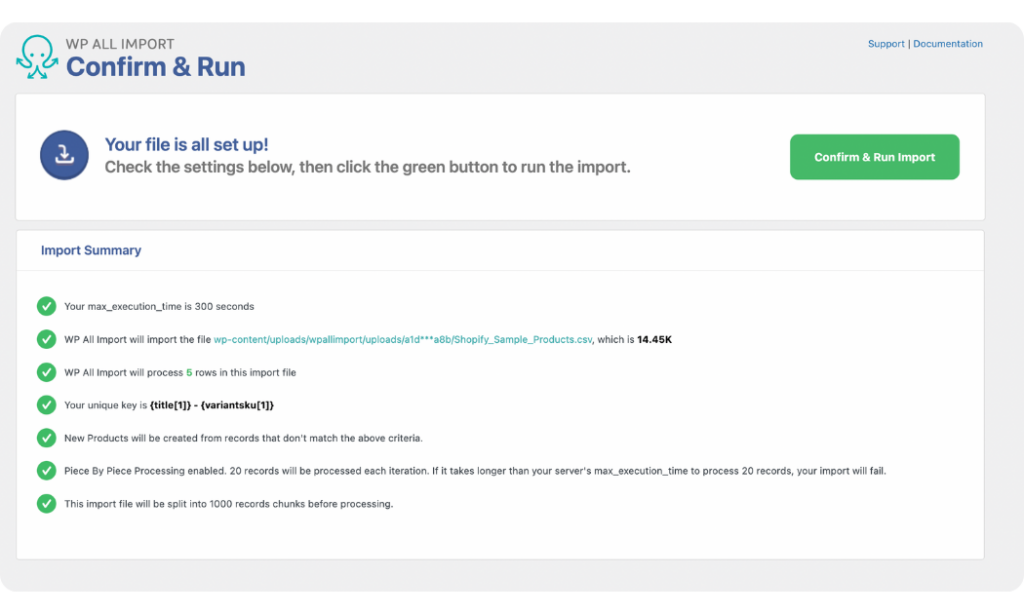
If you are satisfied with the import settings, click the Confirm & Run Import button to start the import. The import process will begin immediately, and you will see an Import Complete! notification once it is done.
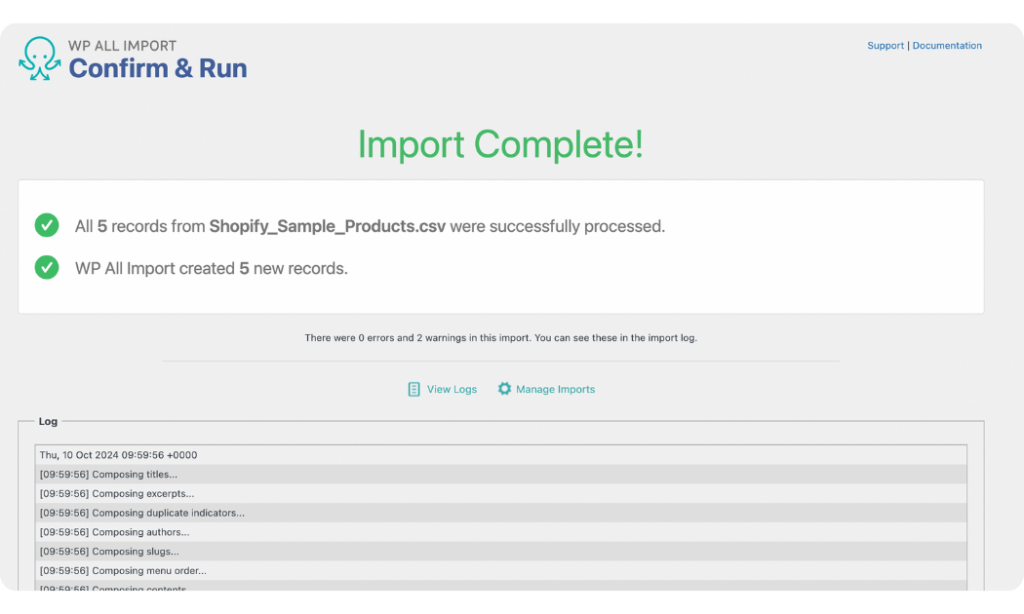
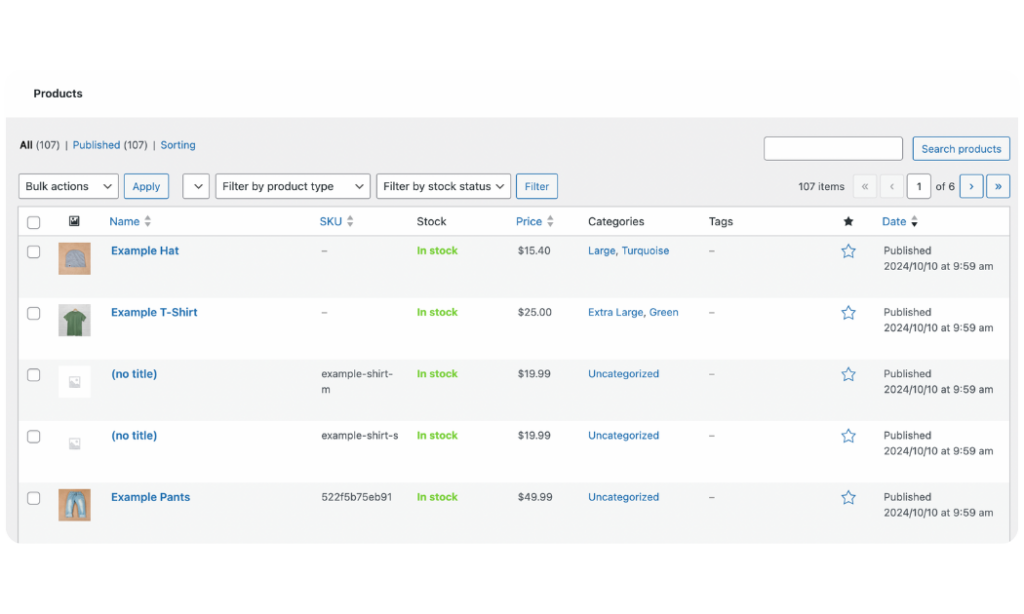
Navigate to Products › All Products in your WooCommerce dashboard to see a list of all your imported products. You can check the product data tabs of a few products at random to double-check that all their data is imported successfully.
We hope this article showed you the incredible importing power of the WP All Import plugin – especially for importing products from Shopify CSV to WooCommerce.
If you want to import your products from Shopify to WooCommerce without going through unnecessarily cumbersome steps or losing your valuable product data, download and install the WP All Import plugin today!
Import Products From Shopify to WooCommerce – FAQs
How Do I Import a CSV File From Shopify to WooCommerce?
- To import a CSV file from Shopify to WooCommerce, download and install the WP All Import plugin.
- Navigate to All Import › New Import, and upload the CSV file of your Shopify products.
- Follow the import wizard steps, map your product data using the user-friendly drag-and-drop tool, review your import, and complete the import process of your Shopify products in minutes.
How Do I Add Products to WooCommerce Easily?
- You can add products to WooCommerce easily with the WP All Import plugin and WooCommerce Import Add-On.
- The WP All Import plugin allows you to upload your product data from multiple sources and map them to WooCommerce’s standard fields using the WooCommerce Import Add-On.
- Once you have done this, you can run the import and all your products will be added to WooCommerce successfully.
Can You Import Orders Into WooCommerce?
- You can import orders into WooCommerce with the WP All Import plugin.
- To do this, navigate to All Import › New Import, upload your order import file, select WooCommerce Orders as the import type, map the incoming elements to the order fields, and run the import.
- Once the import process is completed, your orders will have been successfully imported into your WooCommerce store.
How Do I Import Shopify Orders Into WooCommerce?
- To import Shopify orders, download and install the WP All Import plugin.
- Upload the CSV file of your Shopify orders and select WooCommerce Orders as the import type.
- Use the drag-and-drop feature to map the incoming data elements to the WooCommerce order fields and run your import.
