Are you a WordPress site owner looking to move users from one site to another?
Transferring users between WordPress sites can be a challenging task, especially if you’re managing a large user base or dealing with a complex site having many third-party plugins.
In this article, we’ll guide you through the steps to export and import users between WordPress sites using the WP All Export and WP All Import plugins.
Why You Might Want To Migrate Users
Migrating users from one WordPress site to another is a common task that website owners and administrators often face.
The migration process involves exporting user information from one WordPress installation and importing it into another while making sure that valuable user data, including login credentials, user roles, and metadata, are preserved.
Here are some common reasons why you might want to migrate users:
- You’re rebranding your website and want to transfer users to a fresh WordPress installation.
- Your business is merging with another company, and you need to combine user databases.
- When you’re merging multiple WordPress sites and want to consolidate user databases.
- You want to separate user accounts for different products or services into individual websites.
- When you’re cleaning up your user database and want to selectively migrate specific user groups.
Regardless of your specific reason for migrating users, the process can seem challenging at first. However, with the right plugins, user migration can be a smooth and efficient process. Two such plugins that stand out in the WordPress ecosystem are the WP All Import Export Suite.
The combination of these powerful plugins offers a comprehensive solution for all your user migration needs. Let’s take a closer look at why these plugins are considered the best user migration plugins for WordPress.
WP All Import Export Suite – The Best User Migration Plugin
By default, WordPress allows you to export users in an XML file. However, when it comes to importing these users, there are no built-in features available.
The built-in export feature is also quite limited, as it does not provide any control over the selection of user fields for export. Additionally, it lacks support for custom user fields, which can be a hassle if your website uses third-party plugins like WooCommerce, membership plugins, or LMS plugins.
This is where third-party plugins like the WP All Import Export Suite come in. The WP All Export and WP All Import plugins integrate seamlessly to allow you to easily transfer WordPress users from one site to another.
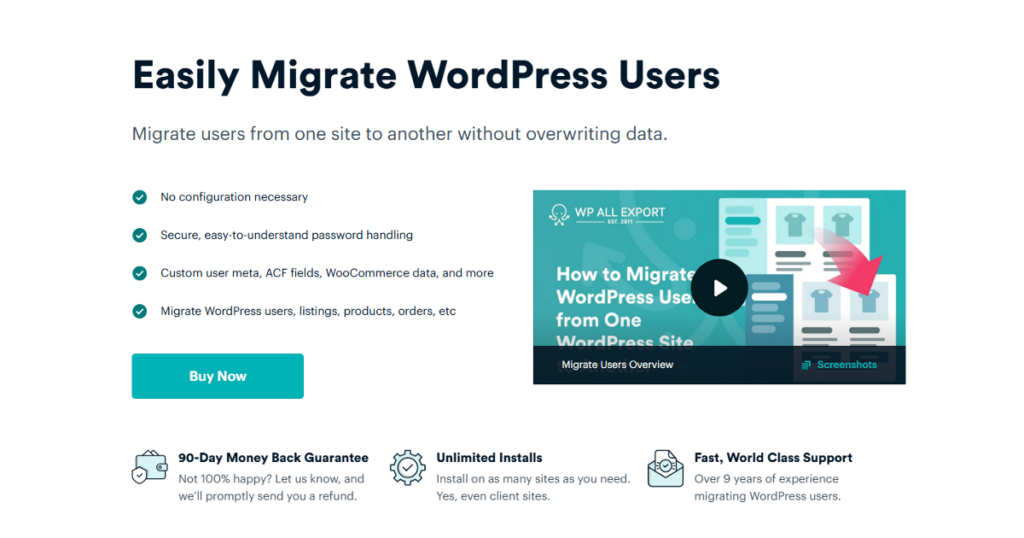
Both plugins feature a similar user-friendly wizard, meaning you only need to learn the process once for both exporting and importing users.
Another advantage of using them together is that the WP All Export plugin generates a bundle file that contains user data and an import template for the WP All Import plugin. This template helps WP All Import to automatically map the user fields on the destination site. When used together, these plugins offer advanced features such as:
- Exporting all user data, including basic information, passwords, custom fields, and more.
- Powerful customization options, such as combining multiple fields or modifying data using custom PHP.
- Scheduling automatic export and import of user data between sites.
- Applying combined filter rules to export and import exactly the users you need.
- Migrating a large user base without slowing down your website.
With these powerful features in mind, let’s look at how to use both plugins to export and import users from one WordPress site to another.
How to Export and Import Users Between WordPress Sites
WP All Export and WP All Import are primarily individual user export and user import plugins. However, when used together, they act as user migration plugins and help you seamlessly transfer users between sites.
The migration process involves two main steps: exporting user data from the source site and then importing that data to the destination site. Let’s explore each step in detail.
How to Export WordPress Users From Source Site
To export user data from the source site, you will need the WP All Export plugin along with its Export Users add-on. Once both the plugin and the add-on are installed and configured, you can proceed with the export process.
Step 1: Create a New User Export
To start the export process, navigate to All Export › New Export on your source site. WP All Export is an all-in-one WordPress export tool that supports multiple data types. For this tutorial, we’ll select Users as the export type from the dropdown menu.
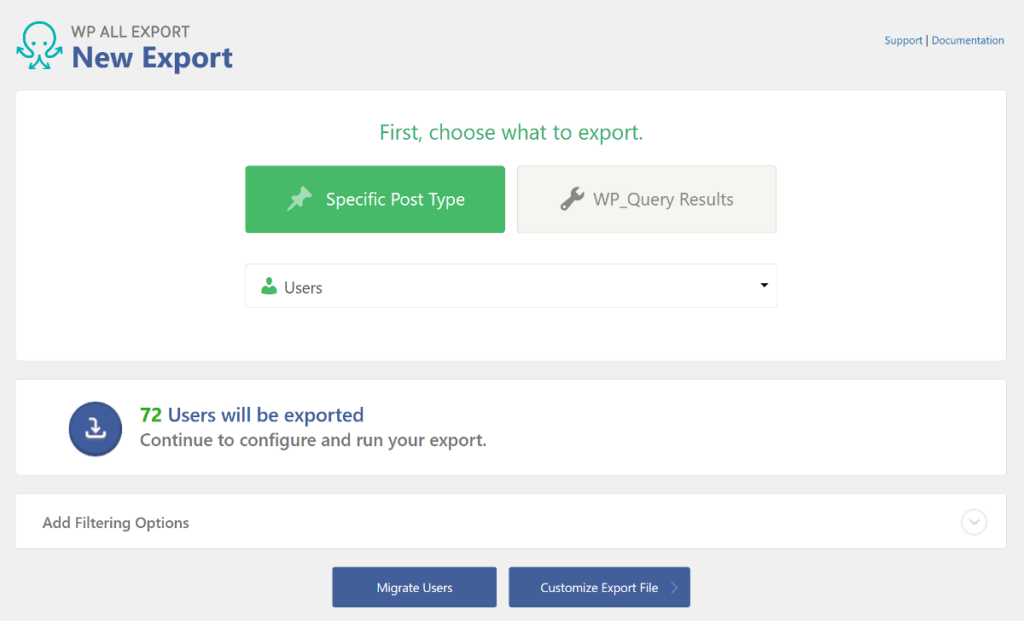
WP All Export will display the total number of users available for export. If you don’t want to export all of the users, WP All Export allows you to add filters to exclude specific users from your export file.
For example, you might want to exclude the source website’s admin from being added to the destination website. WP All Export lets you easily exclude the administrator user role by specifying the necessary components in the filter rule.

If you want to learn in detail about filtering exported WordPress user data, you can refer to WP All Import documentation.
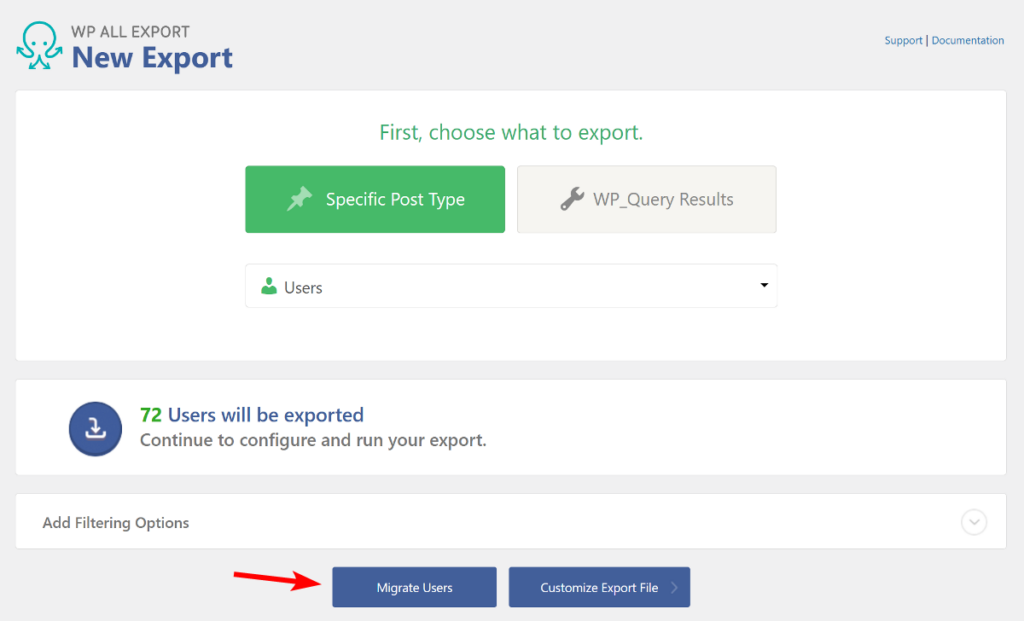
WP All Export also lets you customize the export file, but for now, we’ll download all user data. To do this, click the Migrate Users button to skip the Drag & Drop step and proceed to the Export Settings step.
Step 2: Configure Additional User Export Settings
The Export Settings page will display various settings and the scheduling panel. The scheduling feature is particularly useful if you want to automatically export new user data on a regular basis. WP All Import has documentation available for those who want to learn more about scheduling user exports.
The other Advanced Options are self-explanatory and can be enabled using simple checkboxes.
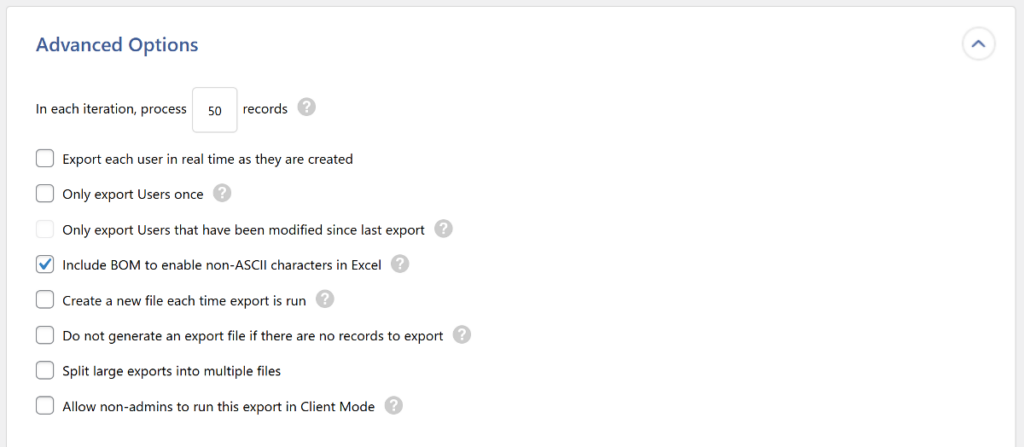
Once you’ve enabled the required options, click the green Confirm & Run button to start the user export and move to the next step.
Step 3: Download the User Export File
Depending on the size of your export file, WP All Export may take a few minutes to complete the process. Once completed, you’ll be given two options to download the file.
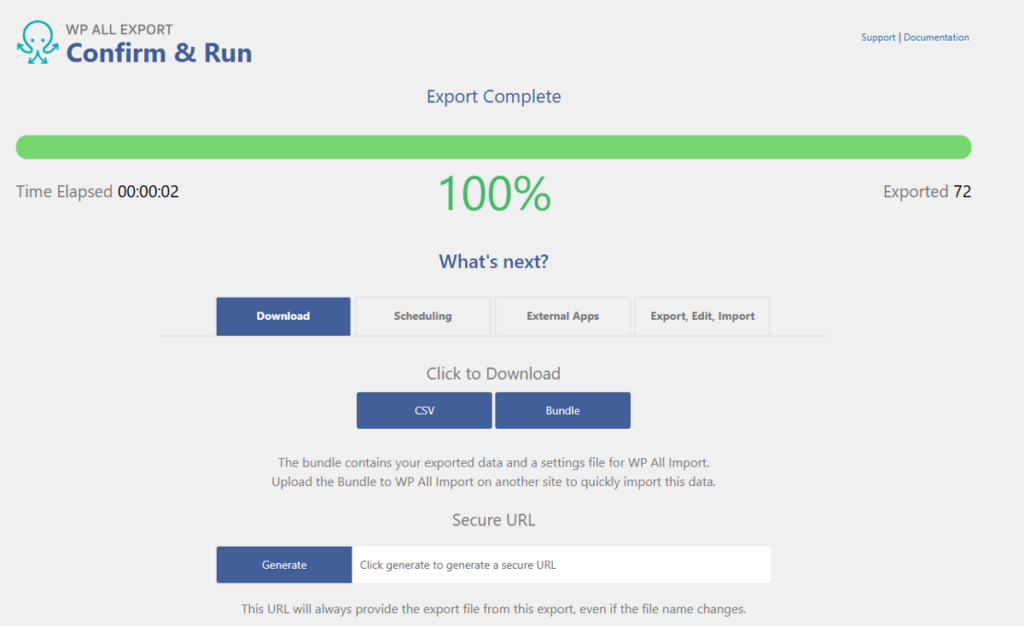
Click the Bundle option in the Click to Download section to download the user data. The Bundle file also includes an import template for WP All Import, which will automatically map the user fields from the export file to the relevant WordPress user fields.
Now that we have the export file, let’s look at how to import it to the destination site.
How to Import WordPress Users to Destination Site
On the destination site, we’ll use the WP All Import plugin along with the Import Users add-on to add the user data to the site. If your source site is a custom WordPress website such as a membership or LMS website, you’ll also need to make sure that you have those third-party plugins installed on your destination. This ensures there are no errors during the import process.
Once you’ve everything set up, let’s look at the import process in detail.
Step 1: Start a New WordPress User Import
Once you have the plugin and the add-on installed, navigate to All Import › New Import to start the import process.
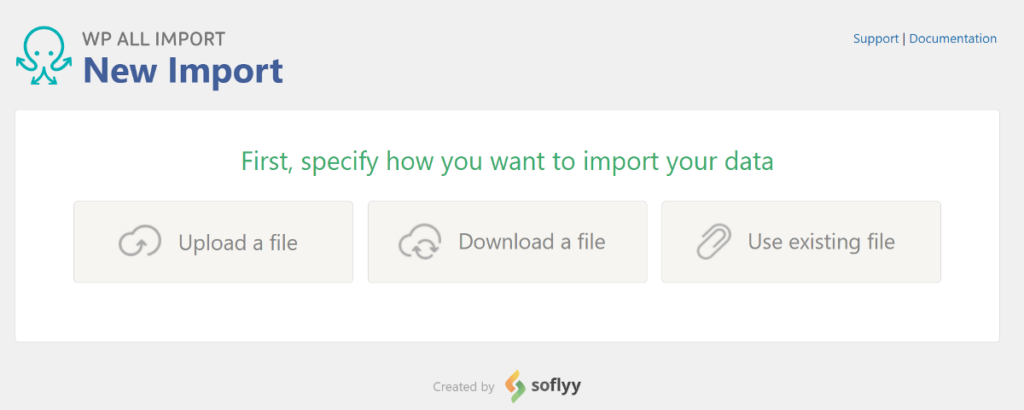
WP All Import gives you three options to load the user data. You can either:
- Upload the local file from your computer.
- Download from a URL, including Google Drive and Dropbox.
- Use an existing file on your server.
Since we have downloaded the file, we’ll choose the first option. Click the Upload a file option and select the Bundle file from your computer. WP All Import will automatically set the import type as Users under New Items.
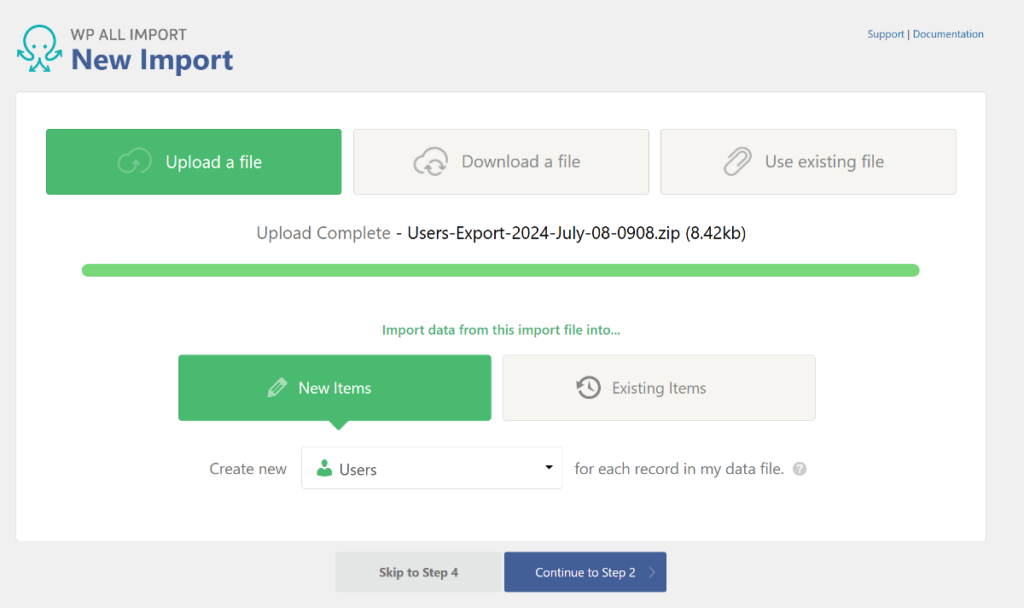
WP All Import features an intuitive interface that allows you to use drag-and-drop functionality to map fields from the import file to WordPress user fields. However, since we have the Bundle file, WP All Import does this automatically.
Once you have configured the import type, click Skip to Step 4 to move to the Import Settings step.
Step 2: Configure User Import Settings
The Import Settings page includes various settings to efficiently import user data into your site. Most of these settings can be applied with simple clicks.
The first setting on the page is the Unique Identifier, which allows WP All Import to differentiate between user records. This is important to avoid duplicates and is especially useful when you run the same import with an updated file.
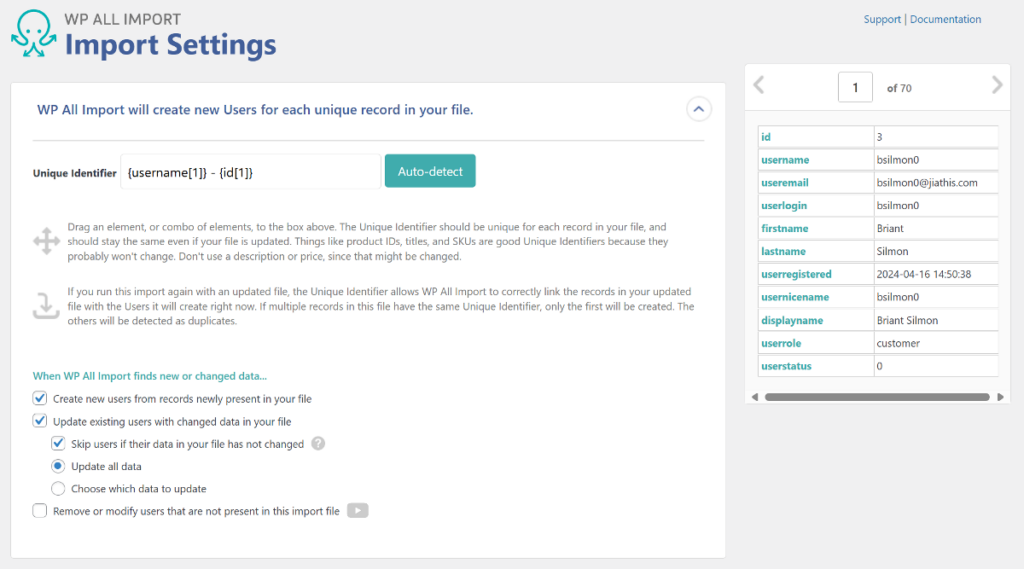
The Unique Identifier will be automatically set from the Bundle file, but you can also set it by clicking the Auto-detect option. There’s also a manual way to set it using the drag-and-drop interface, but the auto-detect option works well most of the time.
The next option is to choose whether or not to send a welcome email containing a password reset link to the imported users. Since we’re importing an export file from another website that already includes user passwords, we’ll check the option to prevent WordPress from sending the email.

Scrolling further down, you’ll see the Scheduling Option panel, which lets you automatically import user data on a fixed schedule.
This feature only works if you choose to import data from a URL or use an existing file from your server. Since we uploaded a local file, we’ll skip this and move to the next setting. If you want to learn more about automatic scheduling, WP All Import has a detailed documentation article.
The last section on the page is the Configure Advanced Settings panel. This section includes some speed optimization options and a few other settings. All of these options are self-explanatory and can be enabled by clicking the relevant checkboxes.
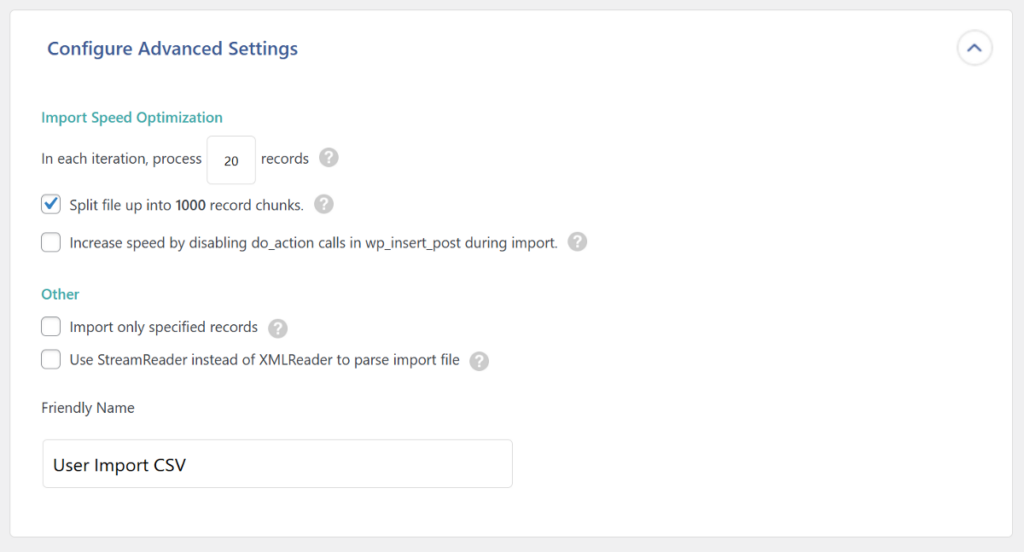
After you’ve configured all the settings, click the Continue button to move to the last step.
Step 3: Run the Import and Verify User Data
This is the final step in the user migration process. WP All Import provides a summary of the steps it will take to import users. This allows you to check for mistakes and confirm everything before proceeding with the import.
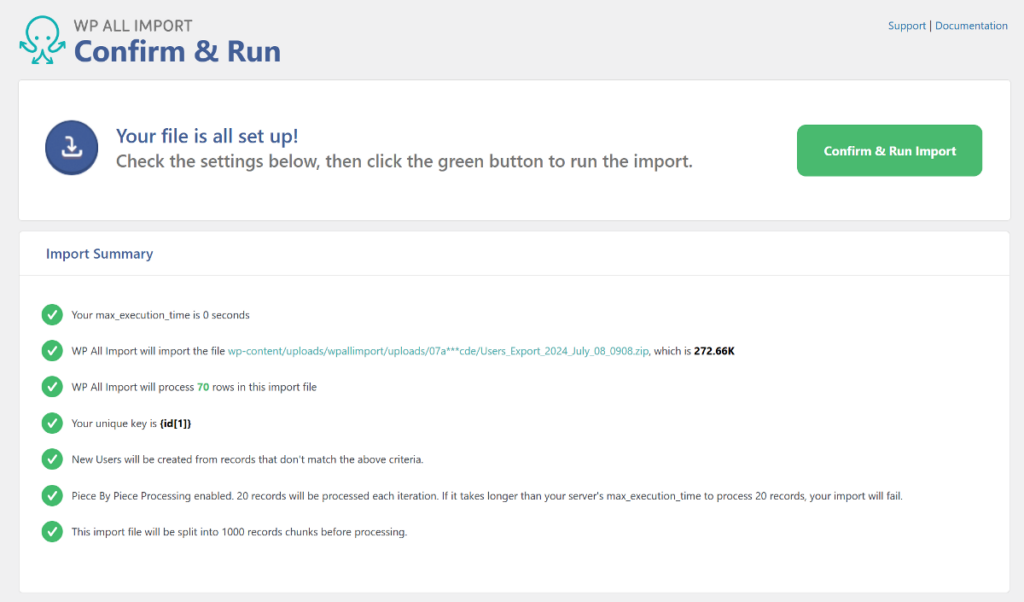
If you spot any mistakes in your import settings, you can go back to the previous steps to correct the issue.
If everything looks correct, click the green Confirm & Run button to begin the import process. Depending on the number of users, WP All Import may take a few minutes to complete the process.
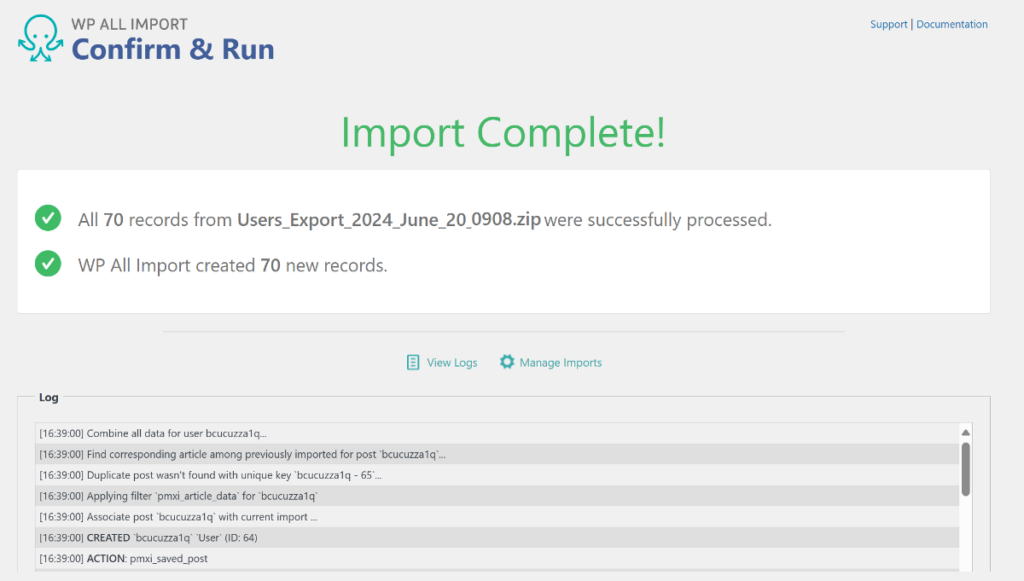
After completion, it will display a confirmation page showing the number of users that were imported. If there are any errors with any of the records, WP All Import will skip those. If any of the users already exist, it will update them with the newer information from your file.
That’s it! This is how simple and easy it is to export and import user data from one WordPress site to another using the combination of WP All Export and WP All Import.
Export & Import WordPress Users – Frequently Asked Questions
How Do I Transfer Users to WordPress?
Transferring users to WordPress is straightforward with the WP All Import plugin. Here are the steps to follow:
- Navigate to All Import > New Import.
- Upload the file containing user data.
- Use the Drag & Drop interface to map incoming data to your WordPress user fields.
- Run the import.
How Do I Export Users out of WordPress?
To export user data to CSV, Excel, or XML format using the WP All Export plugin, follow these steps:
- Go to All Export › New Export and select Users as the export type.
- Select your export fields using the Drag & Drop interface.
- Run the export and download your export file.
How Do I Import Logins Into CSV?
You can easily import users into WordPress while preserving their existing login credentials. This process involves using both WP All Export and WP All Import plugins. For a detailed guide on migrating users with preserved logins, refer to WP All Import’s comprehensive documentation.
How Do I Export Users With Custom Fields in WordPress?
The WP All Export plugin simplifies the process of exporting users with custom fields. It automatically detects custom data fields added by most plugins and extensions. You can easily include these fields in your export file using the plugin’s user-friendly drag-and-drop interface.