Are you looking to export and import WooCommerce products using a plugin?
Migrating products between sites can be a challenging task for store owners. Ensuring that all product data, including custom fields, is accurately imported to the destination site is important. While WooCommerce has a built-in export-import feature, it is not suitable for complex product types.
In this article, we will provide a step-by-step guide for exporting and importing WooCommerce products using third-party plugins. This ensures a smooth migration process by including all product data.
Step-by-Step: Export and Import WooCommerce Products Between Sites
There are a number of WooCommerce product export and import plugins available, each offering various features to simplify the migration process.
However, the WP All Export Import Pack stands out as the best plugin for this purpose. They both seamlessly integrate with each other and include a user-friendly guided wizard that breaks the entire process into manageable steps.
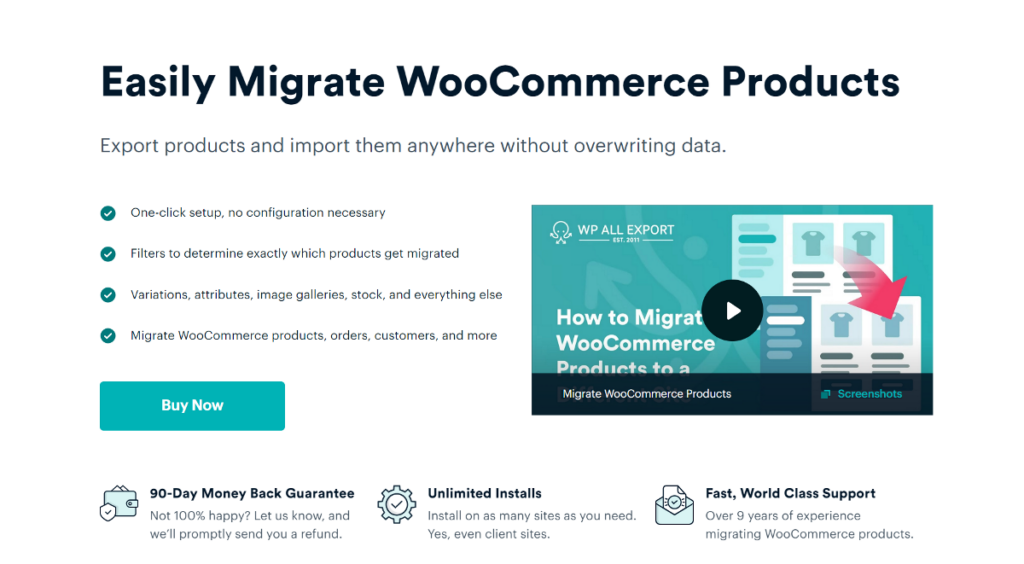
When used together for product migration, WP All Import generates a Bundle file containing all product data and an import template, allowing WP All Import to automatically map product data to the correct fields on the new WooCommerce site.
We’ll divide this article into two parts. Let’s start with the export process first.
Export Products From the Source WooCommerce Site
For exporting products from the source site, we will use the WP All Export plugin as it gives complete control over which product fields to add to the export. It supports custom product fields added by third-party plugins and handles complex product types, such as variable products.
WP All Export comes with the following export features:
- Choose exactly which product fields you want to export.
- Apply multiple filters to select specific products.
- Choose between CSV, Excel, and XML file formats.
- Modify the export data using inline PHP functions.
- Schedule your product export to run automatically at specified times.
Based on the above features, it’s clear that WP All Export is the best WooCommerce Product export plugin. Here’s a step-by-step guide to exporting products from the source site using it.
1. Install WP All Export and the WooCommerce Add-on
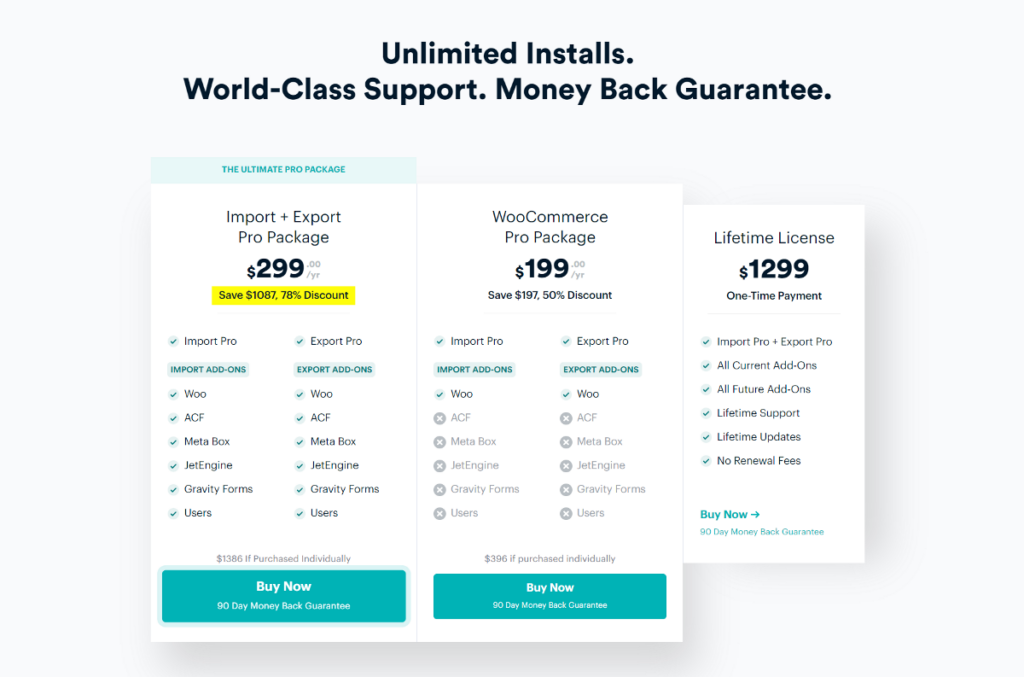
WP All Export is a premium plugin available for purchase from its website. Since we’re dealing with migrating WooCommerce products, select a plan that includes both WP All Export and WP All Import, along with their WooCommerce add-ons. These add-ons unlock special features tailored for WooCommerce product export and import.
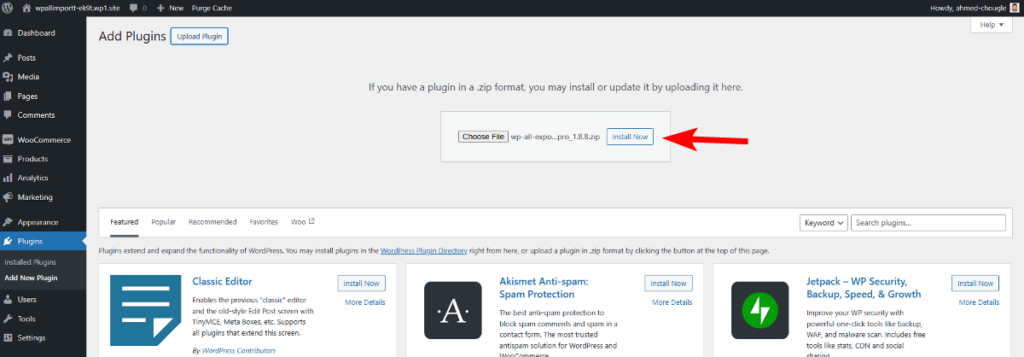
Once you get the plugin and add-on zip files, go to the Plugins page on your source site to install both.
2. Initiate a New WooCommerce Product Export
Once WP All Export and the WooCommerce add-on are installed, navigate to All Export › New Export in your WordPress dashboard. Click the dropdown field and select WooCommerce Products as your export type.

This will scan your WooCommerce store and display the total number of products available for export.
3. Apply Filtering to Product Export
If you only want to export specific products, WP All Export comes with a powerful filtering option to filter down the products you want to migrate. For example, you can use it to export products from a specific category, those with stock greater than a certain value, or products of a specific type.
To start adding filters, expand the Add Filtering Options panel. Each filter rule consists of three fields: the first two can be selected from dropdowns, while the third requires you to manually enter a value.
After you add all three filter fields, click the Add Rule button to apply the filter. You can add additional filters to further filter down the export and then combine them using the AND and OR conditions.

As an example, let’s filter for products with stock values greater than 0.
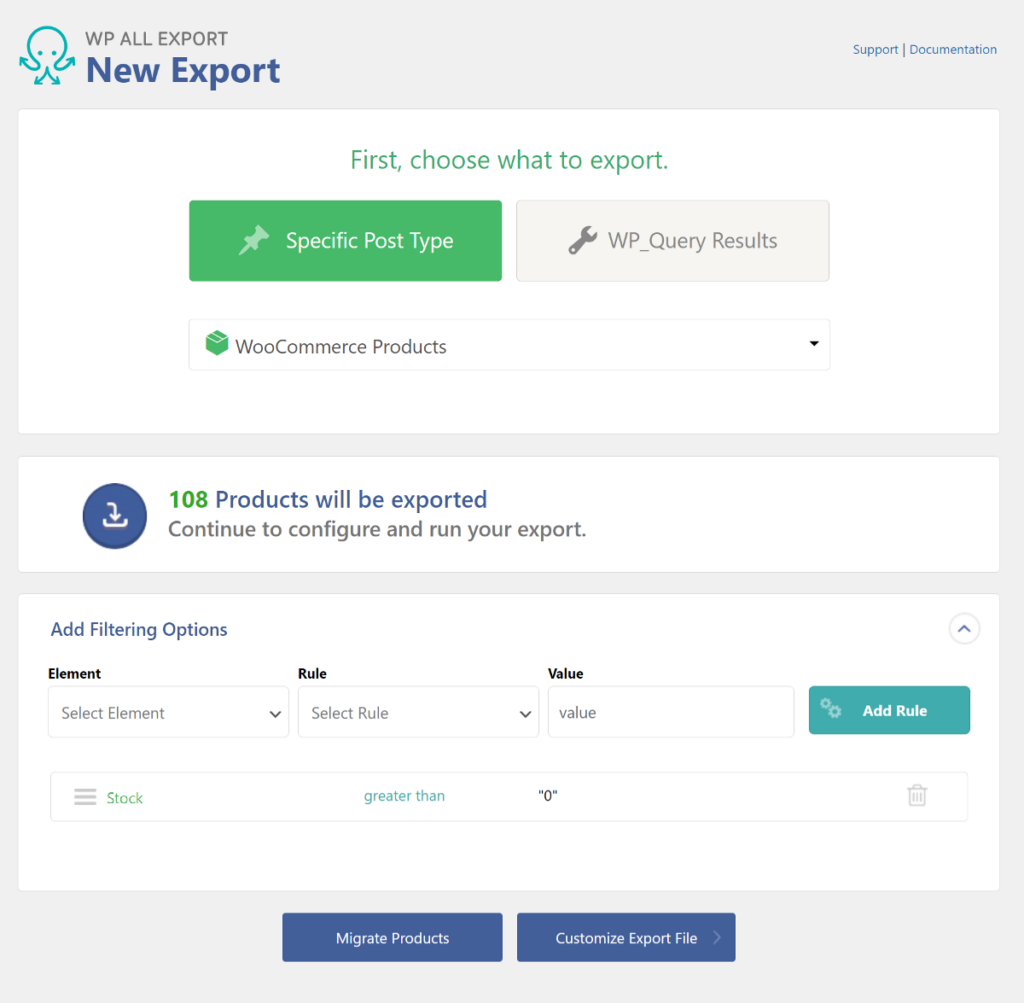
After applying the filters, click the Customize Export File button to proceed.
4. Add All WooCommerce Product Fields to Export
This takes you to the Drag & Drop page which allows you to individually select which product fields to add to your export file. The product data is organized into different tabs located on the right side of the page.
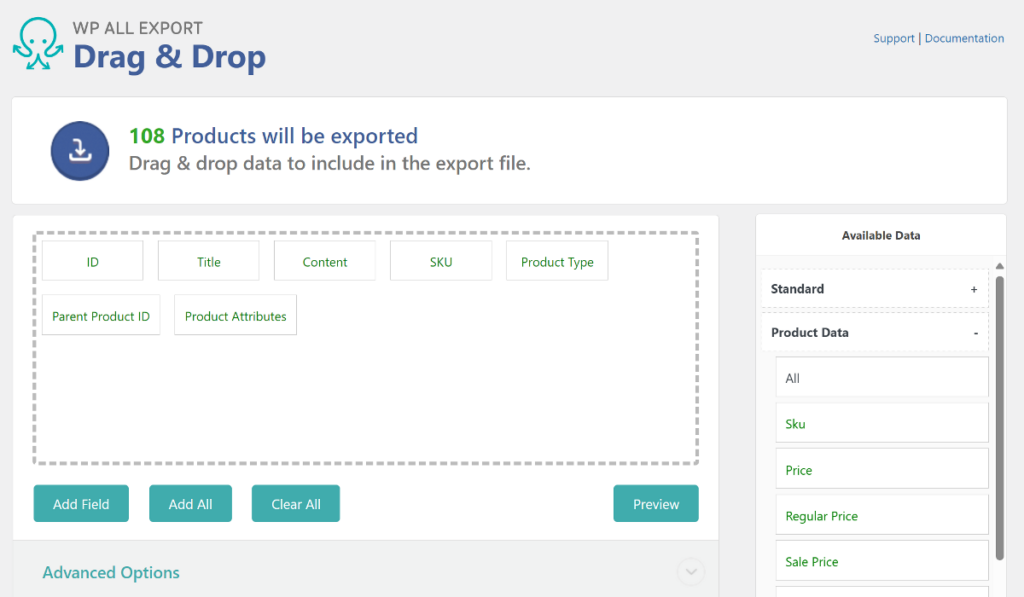
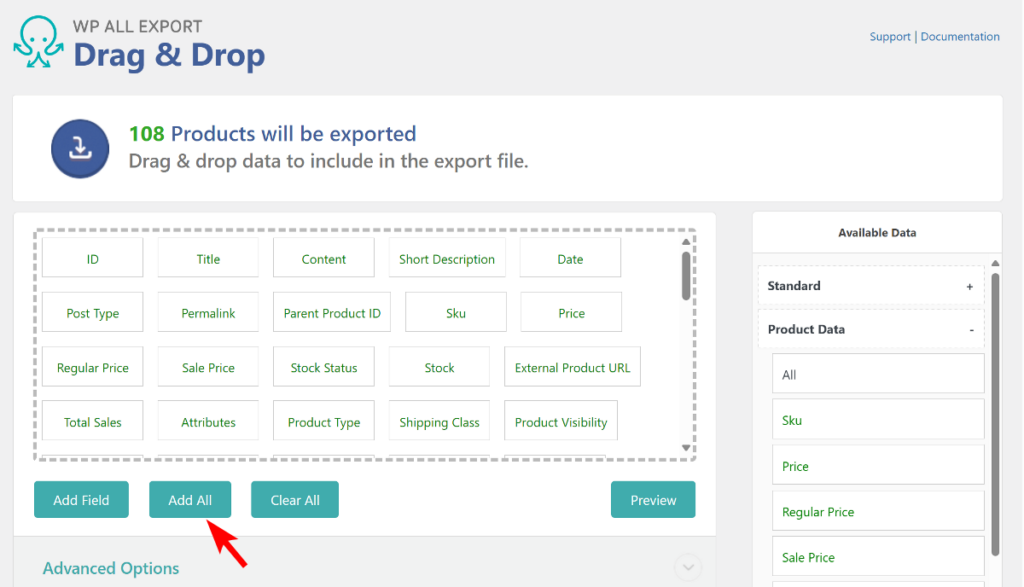
Since we are exporting the product data to add to another website, we’ll include all of the product fields from the source website. This ensures that we have everything needed for the destination site.
To do all fields, click the Add All button below the selection area.
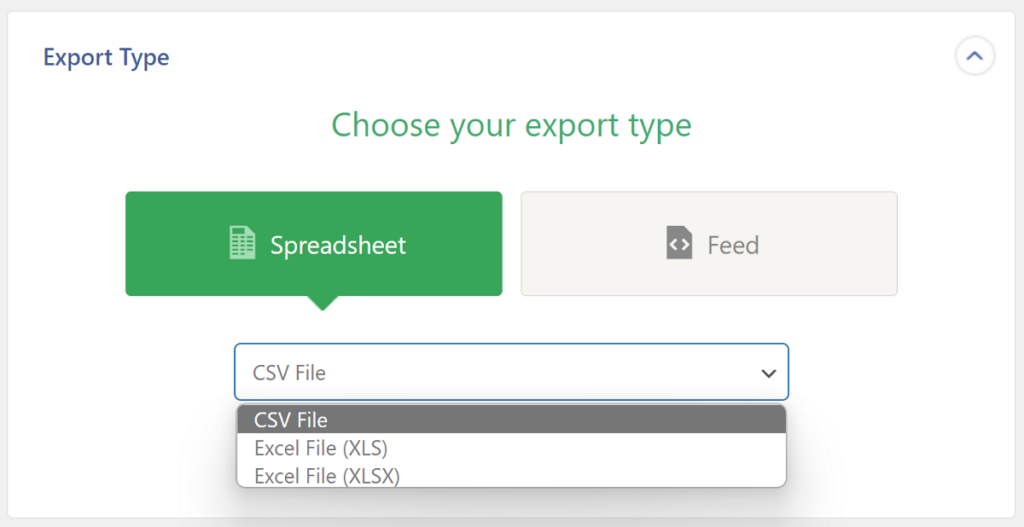
WP All Export also allows you to choose between CSV, Excel, and XML file formats for your export. By default, the file type is set to CSV, but you can change it to the other available options. This feature is useful if you want to bulk-edit the product data in your preferred tool before importing it to another website.
Click the Export File Type panel and select your preferred format between spreadsheet and feed.
Once you set the file type, click the Continue button to move to the next step.
5. Apply Additional WooCommerce Export Settings
The Export Settings page includes a few additional advanced settings that you can apply to optimize the export process. All of the settings are presented in a checkbox list, and you can easily enable them with a single click.
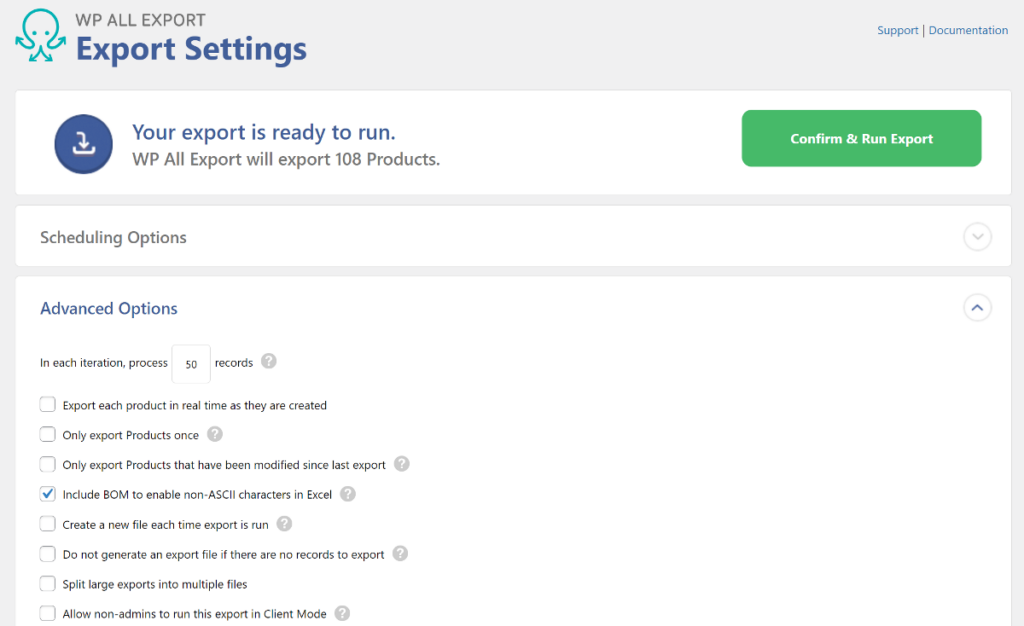
After configuring these settings, click the Confirm & Run button to execute the export.
6. Execute the WooCommerce Product Export
WP All Export will start the product export process. You get real-time progress of export via a log at the bottom of the page and a progress bar that fills as products are exported.
Once the export is complete, you’ll see two download options in the Click to Download section. If you didn’t change the file format, you’ll see an option to download your product data in CSV format
Alternatively, there’s also an option to download the Bundle file which is useful if you’d like to import products to another site. Since we’re migrating the product data, click on the second option to download the Bundle zip file.
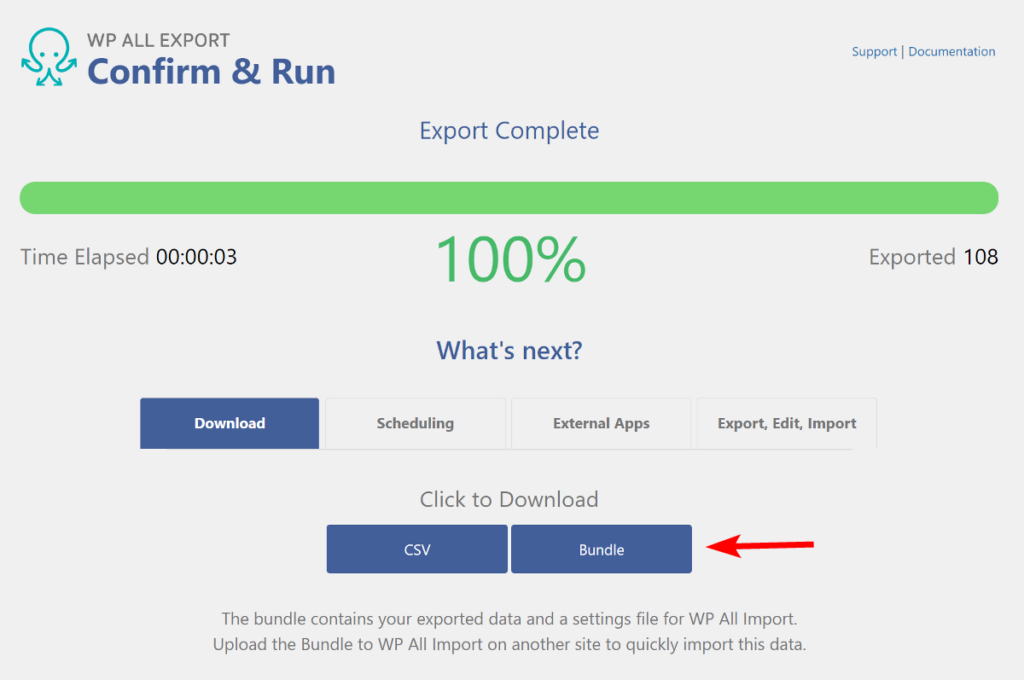
The Bundle file includes the product data and an import template for the WP All Import plugin. This file makes the migration process as seamless as uploading the file and clicking a few options.
Now that we have the product export file, let’s look at how to add this data to another WooCommerce site.
Import Products to the Destination WooCommerce Site
On the destination site, we’ll use WP All Export’s sister plugin, WP All Import to import the product data. In working, it’s quite similar to WP All Export, so you won’t have to learn an entirely new process.
WP All Import includes features such as:
- Powerful filtering to exclude products you don’t want to import.
- Drag & drop interface to add product fields from your import file to WooCommerce fields.
- Schedule imports to run automatically at specified times.
- Use PHP to modify the product data during the import process.
Considering these features, it’s clear that WP All Import, just like WP All Export, is an excellent choice for importing WooCommerce products.
Let’s look at the step-by-step process of using it to import WooCommerce products to the destination site.
1. Install WP All Import and the WooCommerce Add-on
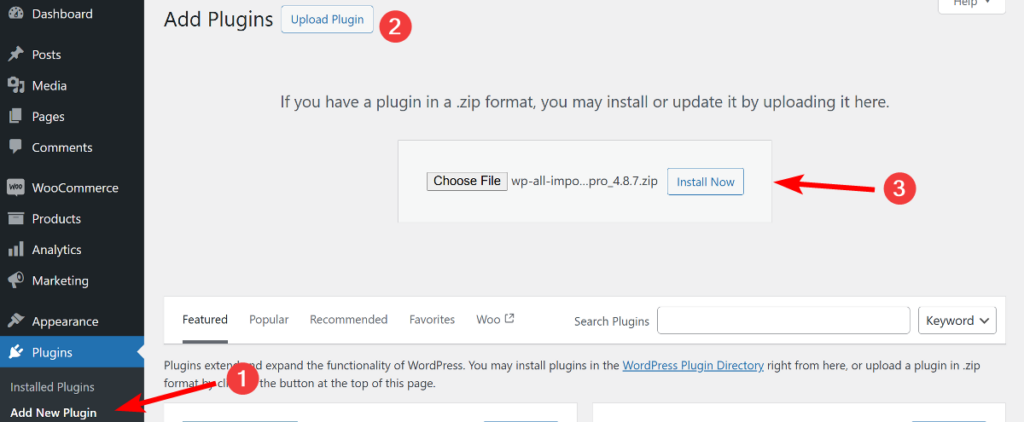
WP All Import is also a premium plugin that’s available to purchase from its website. Once you have the zip files for the WP All Import plugin and its add-on, go to the Plugins page on your destination site and install the plugin first followed by the add-on.
2. Start a New WooCommerce Product Import
To start a new product import, navigate to All Import › Import in your destination site WordPress dashboard. WP All Import gives you three options to add your product data. This includes uploading the product data file, downloading it from a URL, or selecting an already uploaded file in WP All Import.
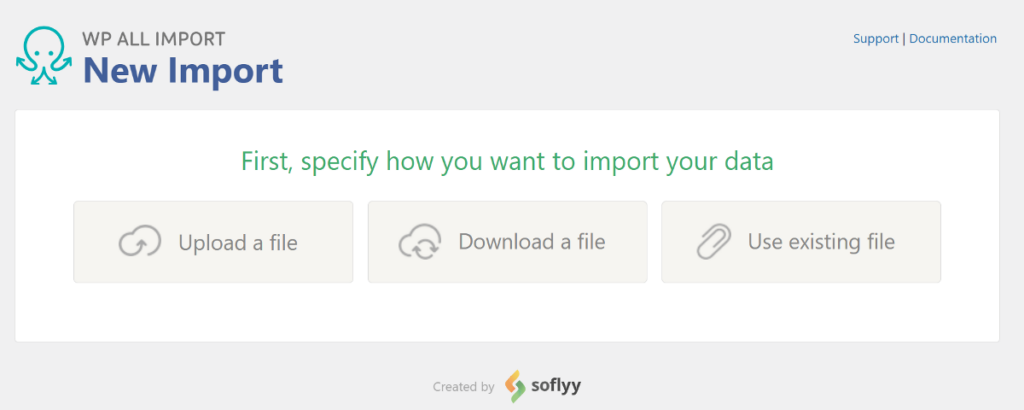
Since we have the Bundle file downloaded, click the first option and select the Bundle file from our computer.
As the Bundle file includes an import template, WP All Import will automatically set the Import Type to WooCommerce Products.
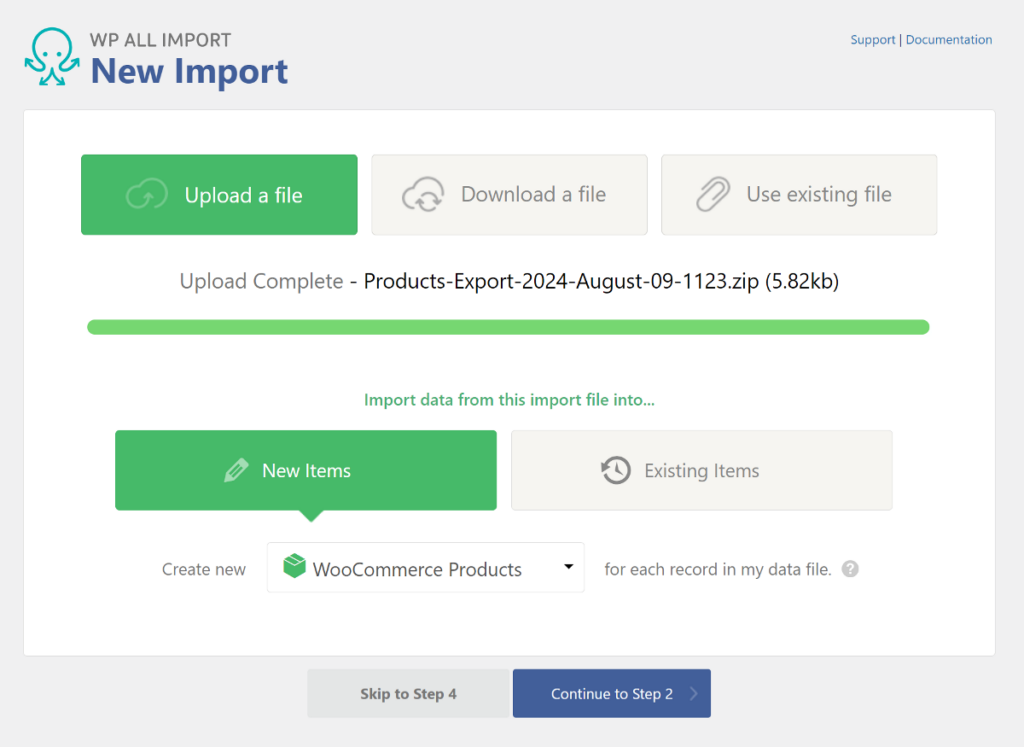
Next, click the Continue to Step 2 button to move ahead.
3. Review and Filter Product Data
This takes you to the Review Import File step which displays the product data in a table. Unlike a spreadsheet, this page displays individual product details at a time, and you can click the arrows on both sides of the table to navigate between the records.
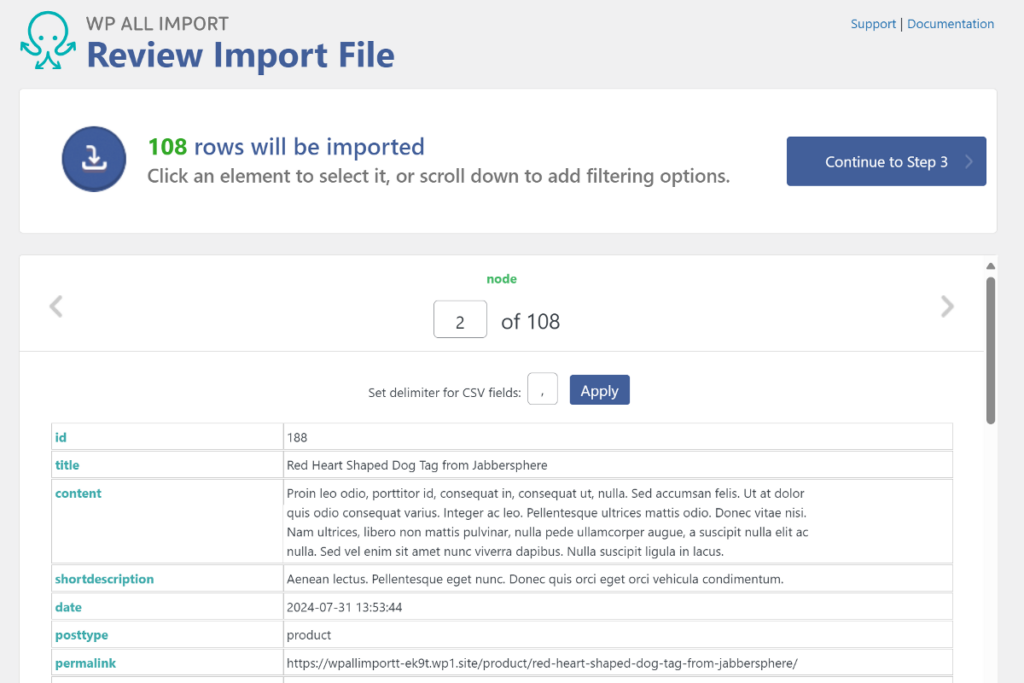
The aim of this page is to help you verify the data in your file before moving ahead with the import process.
The same page also lets you apply filters so that you only import specific products from your import file. It works in a similar way to the filters we applied in step 3 of the export process above. We won’t explain it again, so click the Continue to Step 3 button to proceed ahead.
4. Map Product Data to WooCommerce Fields
This takes you to the Drag & Drop step which divides the page into two parts. The table with your import data is positioned on the right while the WooCommerce products fields are located on the left.
The drag-and-drop interface allows you to drag fields from the table and add them to the corresponding product fields available. Since we uploaded the Bundle file, all fields will be automatically mapped based on the template settings.
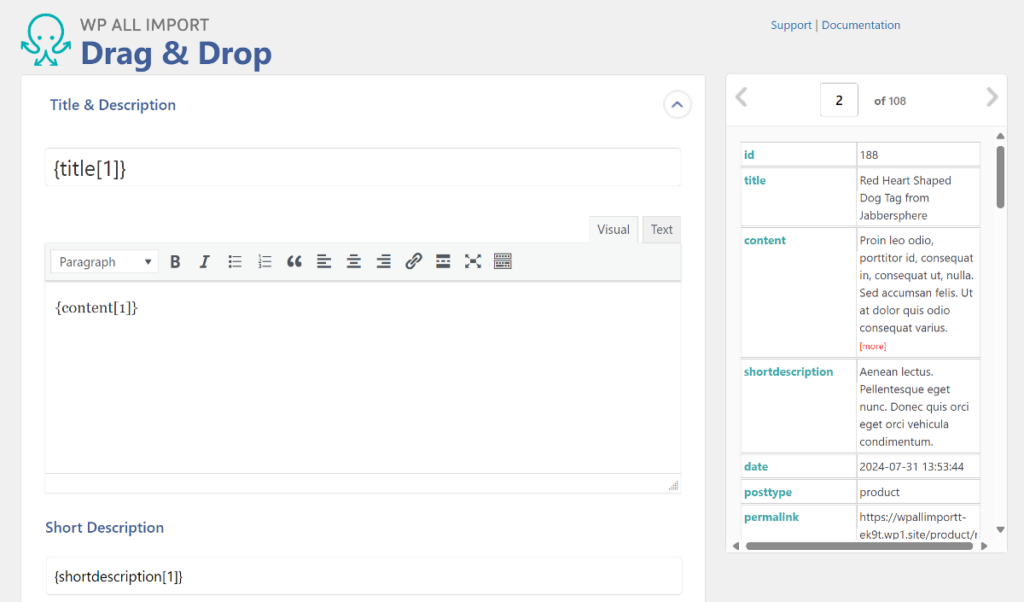
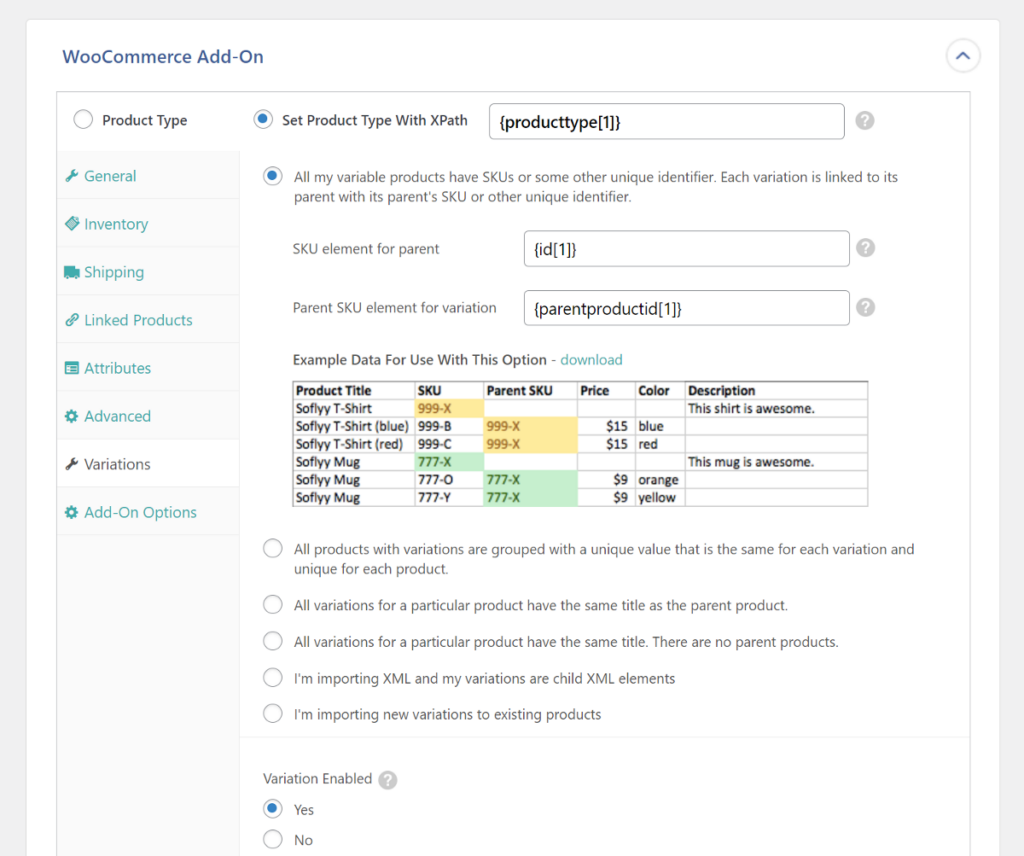
The product-specific fields are located in a separate WooCommerce add-on tab. Expand the tab and you’ll see an interface similar to what you see when manually adding product information in WooCommerce.
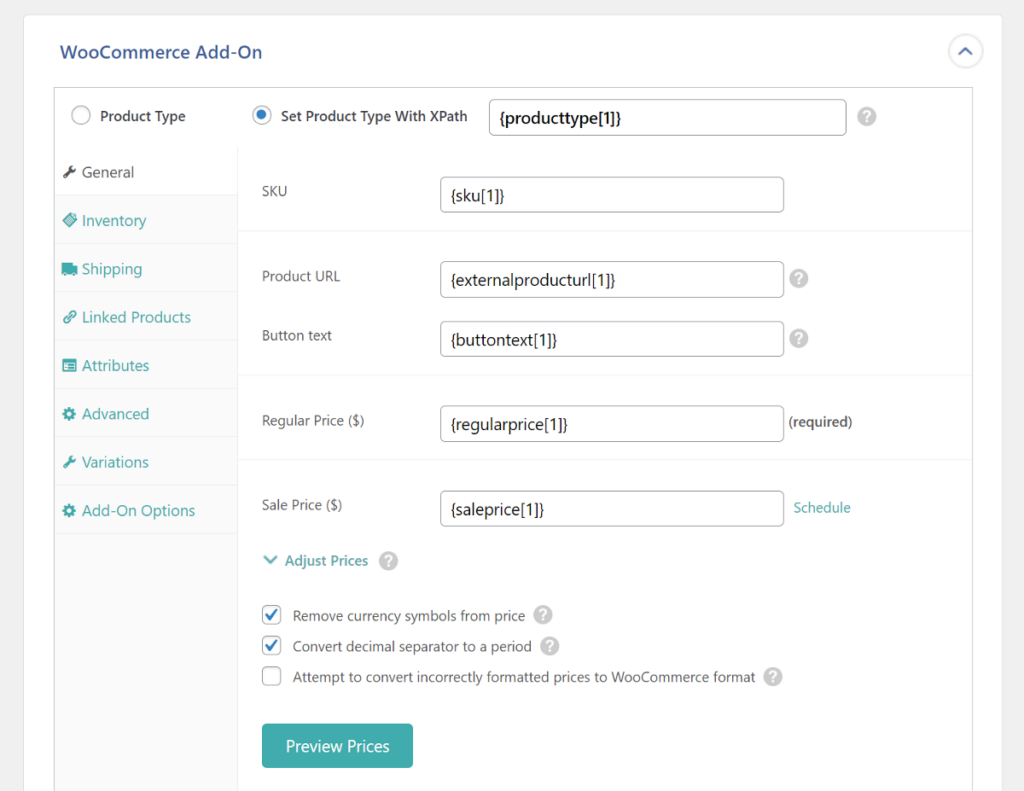
It includes tabs such as General, Inventory, Shipping, Linked Products, Attributes, and more. Go through each of the tabs and verify that all product fields are correctly added. WP All Import also supports variable products, and it gives you six pre-designed parent-child relationships to choose from.
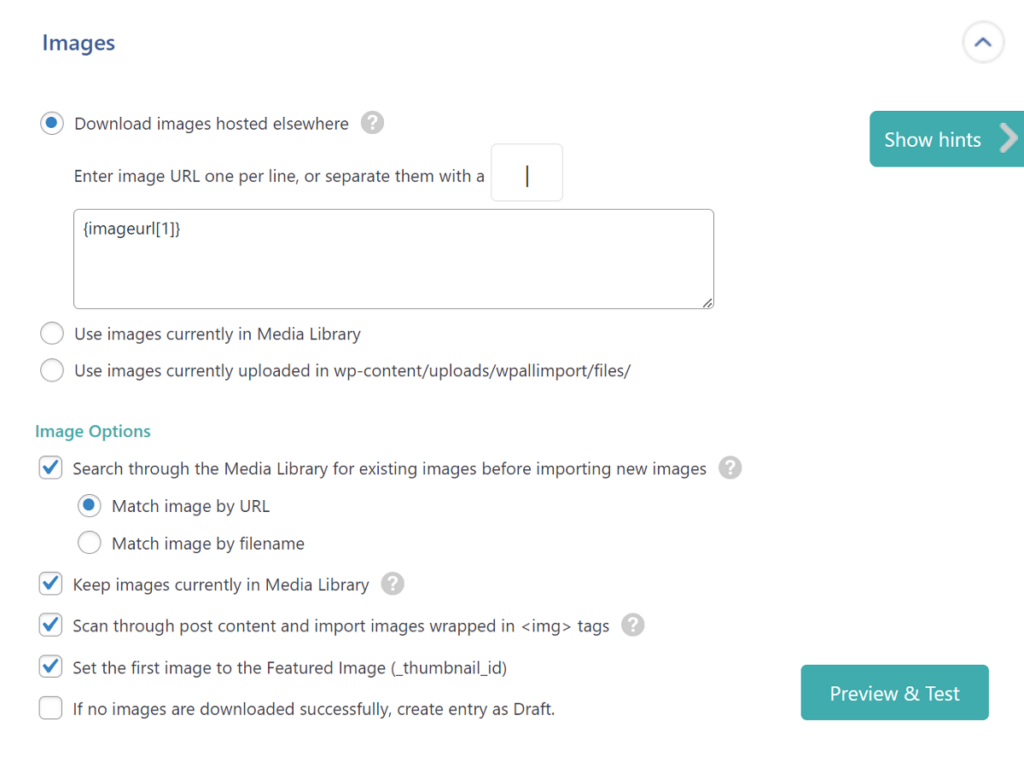
There’s also a separate panel for Product images and you can choose to import these from external servers, choose already uploaded images from the media library, or select images from another folder on your server.
If your source website had custom product fields from third-party plugins, you can find those in the Custom Fields panel.
After verifying all the product data, click the Continue to Step 4 button to proceed to the next step.
5. Configure Additional Import Settings
The first panel on this page is the Unique Identifier settings and it allows WP All Import to differentiate between products in your import file. The Unique Identifier value needs to be unique for each record. In this import, it’ll be automatically set using the template in the Bundle file.
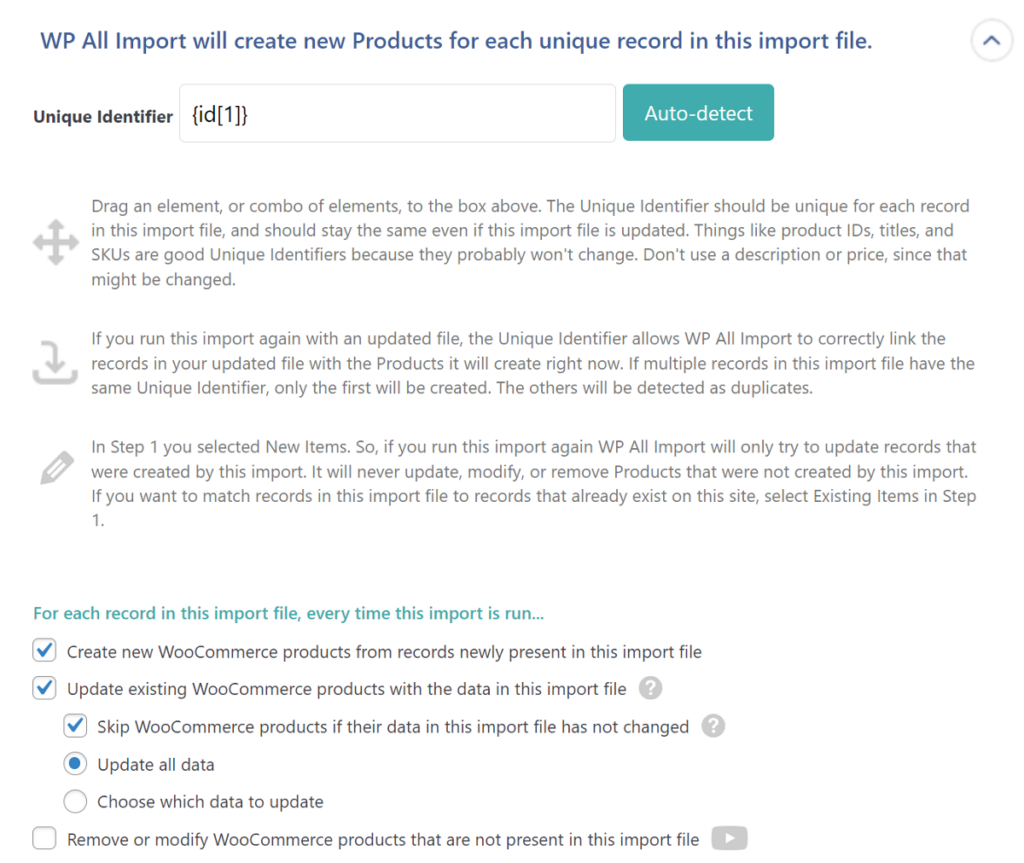
If you want to set it manually, you can click the Auto-detect button, and WP All Import will automatically select the best value from your import file.
There are also other Advanced options on the page that let you optimize the import process. Once you have configured all the options, click the Continue button to proceed ahead.
6. Confirm and Execute the Product Import
The last step is the Confirm & Run step which gives you a summary of all the previous import steps you have performed so far. Go through each point in the list to verify that all settings have been correctly applied.
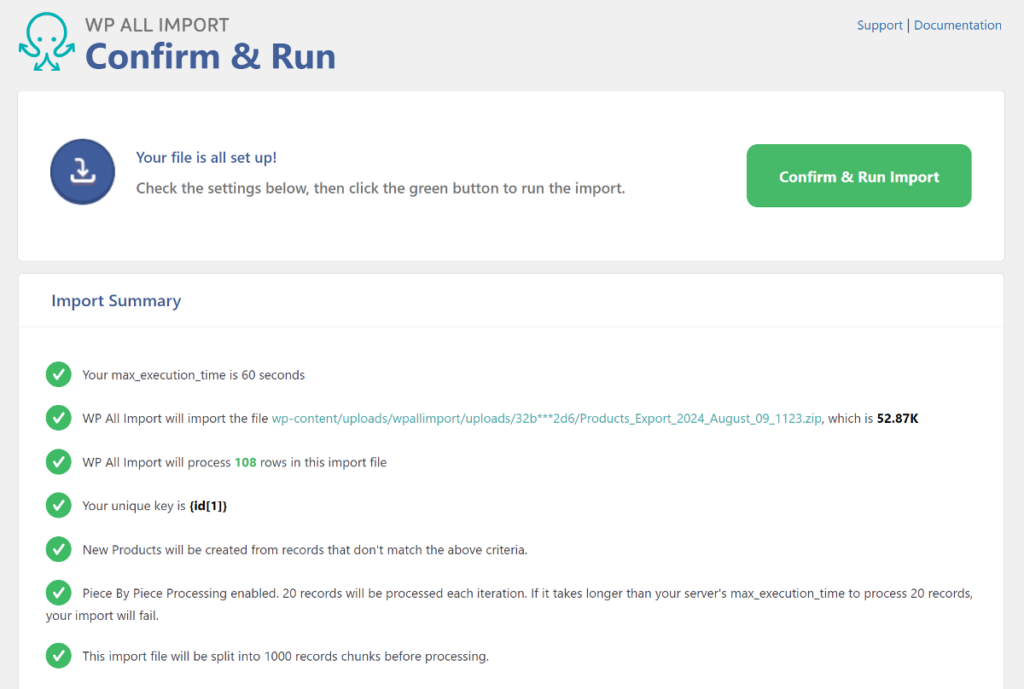
After verifying, click the green Confirm & Run button to start the import process.
WP All Import will take a few seconds to complete the import process. After completion, it will show how many products were imported correctly, if any of the products were skipped due to an error, or if any of the existing products were updated. You can also find a complete log of the import process down below.
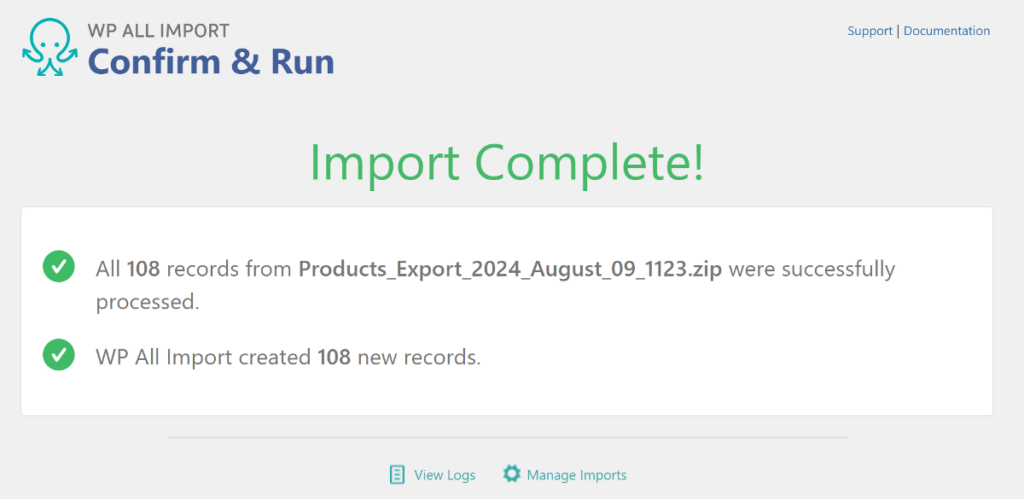
To verify the import, navigate to Products › All Products to see the list of the newly imported products. Open a few different to verify that all product information has been correctly added.
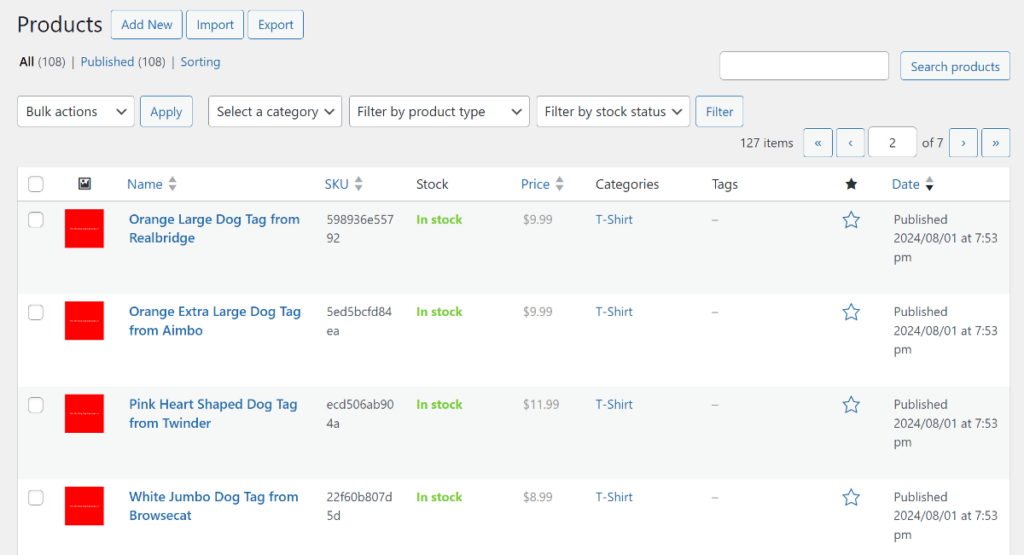
That’s it! This is how you seamlessly export and import WooCommerce products using the WP All Export and WP All Import plugins.
Export and Import WooCommerce Products – Frequently Asked Questions
How Do I Export Specific Products From WooCommerce?
WP All Export comes with a powerful filtering feature that lets you select products to add to your export file. You can apply multiple rules and combine them using the AND and OR conditions.
How Do I Export and Import WooCommerce Orders?
Both WP All Export and WP All Import support all types of WooCommerce data, including orders. Use the WP All Export plugin to export orders from your source site, and then use the WP All Import plugin to map the product fields from your import file to the corresponding WooCommerce fields.
How To Bulk Upload Products in WooCommerce?
You can easily bulk-upload products by using the WP All Import plugin. Simply upload your CSV, Excel, or XML file containing your product data and map the fields to WooCommerce using the intuitive drag-and-drop interface.
How Do I Export Everything From WooCommerce?
WP All Export is a comprehensive WooCommerce export plugin that supports all data types. It allows you to export various data types such as orders, products, variable products, customers, reviews, coupons, and much more.
