Are you a WordPress website owner looking to bulk import users from an external source?
Managing user accounts individually can be incredibly time-consuming, especially if you need to add hundreds or even thousands of users at once. The manual process is not only tedious but also prone to errors. Thankfully, there’s an efficient way to do this.
In this article, we’ll share a simple step-by-step guide on how to import users from an external file into WordPress.
Why Bulk Import Users into WordPress
By default, WordPress lacks robust bulk importing features. It doesn’t allow website administrators to import multiple users at once.
Typically, the only way to add users is to manually fill out their details one by one, which is time-consuming and inefficient. This is especially true for those managing large-scale websites, online communities, and membership platforms.
Bulk importing users into WordPress can be a game-changer. Here are some scenarios where you might need to import users to your WordPress site:
- When moving your site from another platform to WordPress.
- For educational websites that enroll students in courses.
- If you’re running a special promotion, contest, or event that involves registering a large number of participants.
- Regularly updating user profiles with new information.
To simplify the process, there are third-party plugins that allow you to upload a file containing user records and add those to the website in just a few clicks.
Let’s look at the best import user plugin available for WordPress.
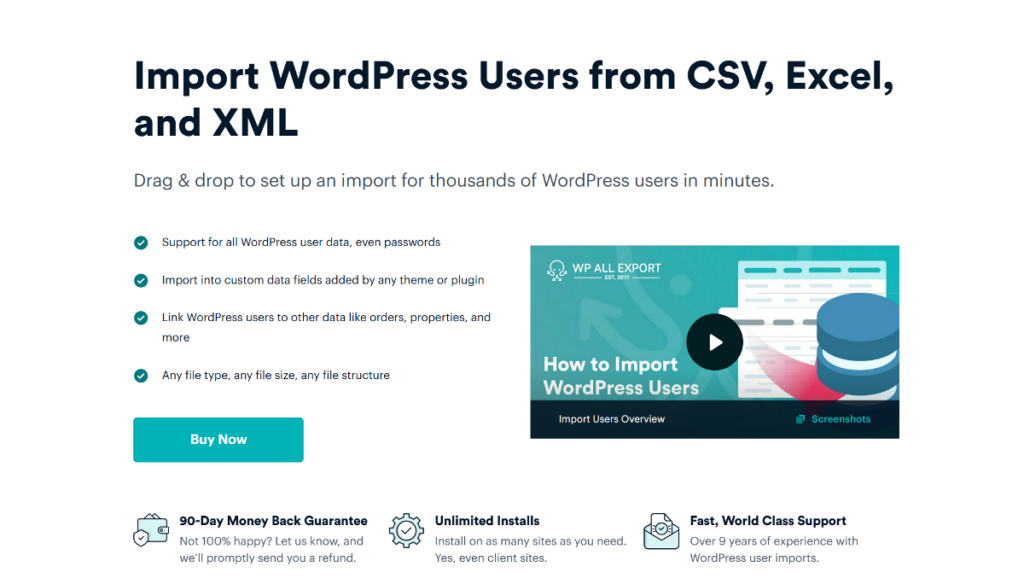
WP All Import: The Most User-Friendly WordPress Bulk Importer Plugin
WP All Import is the best import user plugin that simplifies the process and allows you to import a large number of users without any slowdown. It comes with an intuitive interface and an import wizard that makes the whole import process easier, even for beginners.
Here are the features that show how WP All Import can help you streamline the process:
- Easy Data Mapping: WP All Import provides a drag-and-drop interface that makes it simple to map your user fields. You can import user data from CSV, Excel, or XML files and map the columns to the corresponding user fields in WordPress with ease.
- Custom Fields Support: The plugin supports custom fields, including those created with plugins like Advanced Custom Fields and WooCommerce. Whether you’re importing standard user information or additional custom fields, WP All Import has you covered.
- Error Handling: WP All Import includes robust error handling features. If there are any minor layout or formatting issues with your import, the plugin includes powerful features to modify the incoming data during the import process.
- Scheduled Imports: For websites that frequently update user information, WP All Import offers scheduled imports. This feature allows you to automate the import process and automatically sync user data without manual intervention.
With these powerful features, WP All Import significantly streamlines the process of managing bulk imports. Let’s now look at the detailed guide on how to bulk import user data into WordPress using WP All Import.
How to Bulk Import Users Data into WordPress
Here’s a step-by-step guide on how to use the WP All Import plugin to bulk import users into WordPress.
1. Install the WP All Import Plugin and Users Add-on
Before starting the import process, you need to install and activate both the WP All Import plugin and its Users add-on. If you do not already have the plugin, you can get it here.
Once you have the zip files for both the plugin and the add-on, follow these steps to install them:
- Go to WordPress admin dashboard › Plugins › Add New.
- Upload the WP All Import zip file on the website and click the Install button.
- Once the installation completes, click on the Activate button.
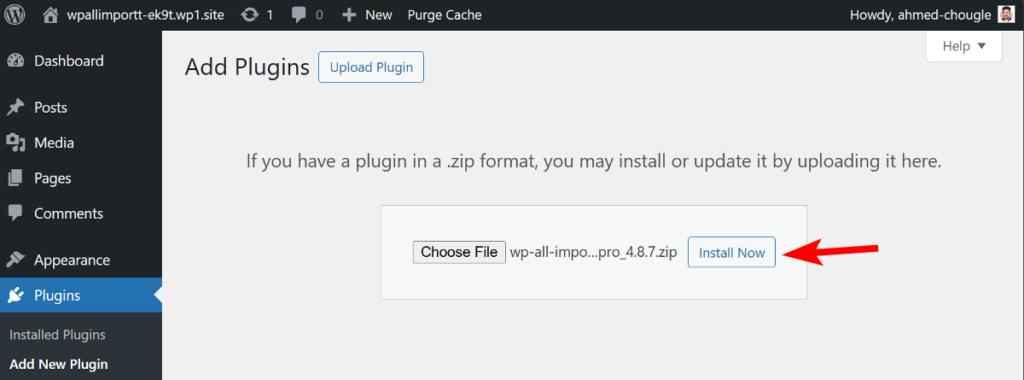
Repeat the same process to install the Users add-on on your website. Once everything is properly set up, let’s proceed with the import process.
2. Create a New Import to Bulk Upload Users
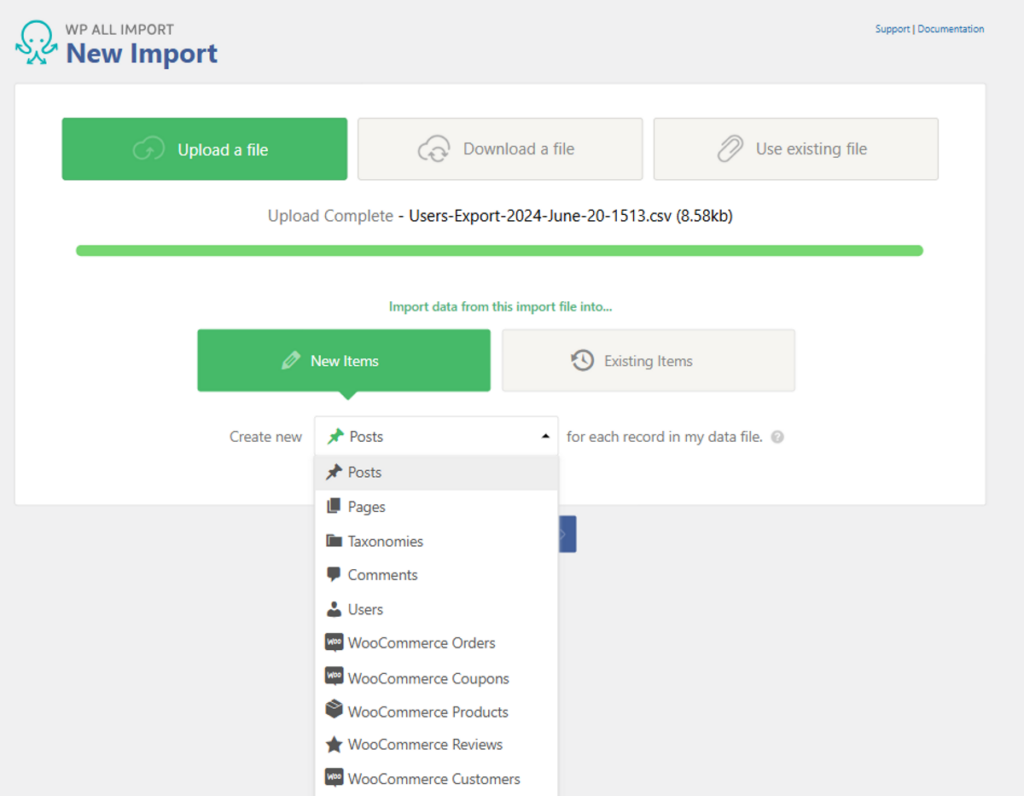
To start the import process, navigate to All Import › New Import and load your user data from an external CSV file.
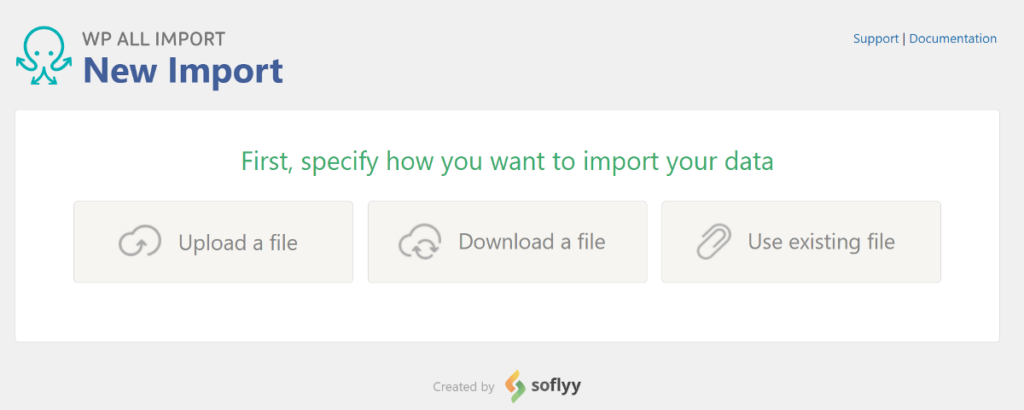
WP All Import offers multiple options to upload your file: you can upload a local file, import from a URL, or select an existing file on your server.
For this tutorial, we’ll upload a file from your computer. Click the Upload a file option and select the CSV file from your computer.
Once uploaded, WP All Import will display additional options. Select New Items and then choose the import post type as Users.
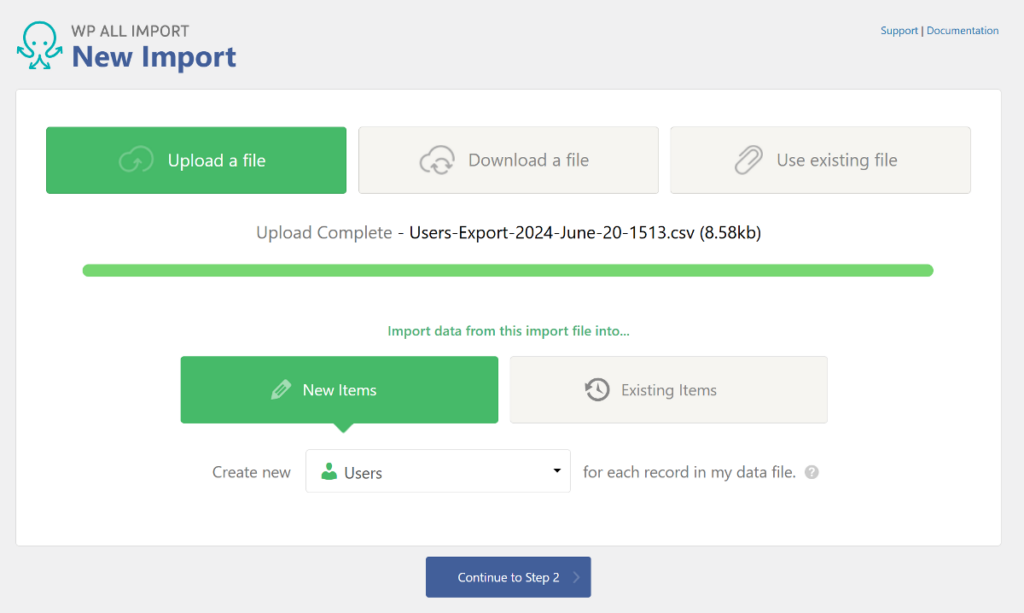
You can also choose to update your existing user data from this same screen if needed.
After you’ve made all the selections, click Continue to Step 2.
3. Review the WordPress User Data in Your Import File
The next page is the Review Import File page, which allows you to preview the user data before proceeding with the import.
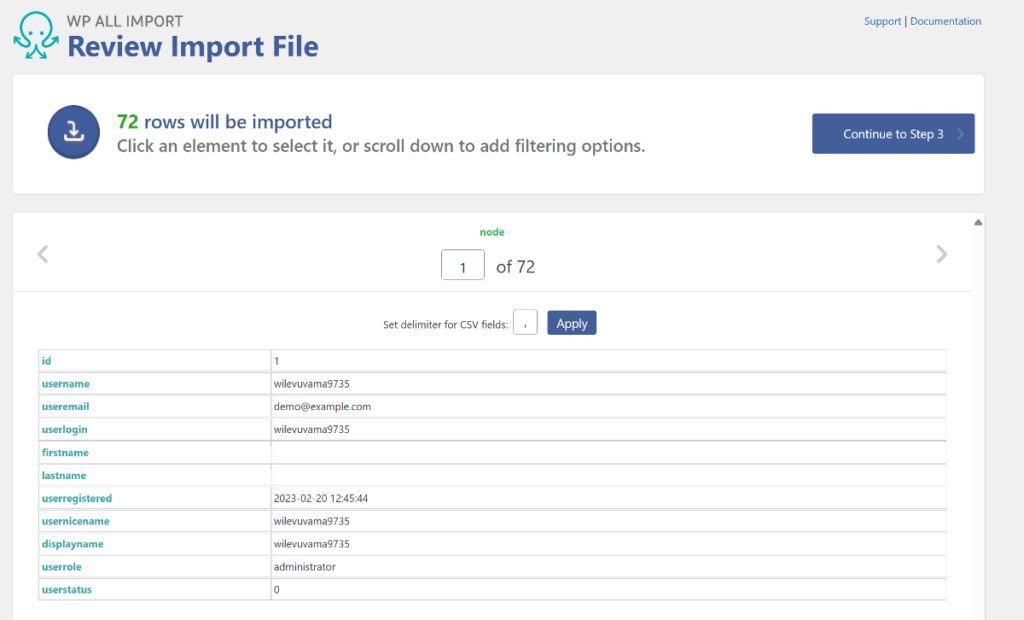
The page displays the total user count at the top, and you can use the gray arrows on both sides to navigate between individual records.
If you spot major problems with your data, you’ll need to fix the file and try again. However, if your file only has minor layout or formatting issues, you can ignore those and click Continue to Step 3.
The reason you can ignore minor layout and formatting issues is that WP All Import has several powerful features to modify incoming data during the import process.
Additionally, WP All Import lets you filter the incoming user data. For more information, you can refer to WP All Import’s documentation on filtering import data.
4. Map Import Data to WordPress User Fields
Next, you’ll be taken to the Drag & Drop page. This page allows you to easily map fields from your CSV file, displayed in a table on the right, to the WordPress user fields on the left. The drag-and-drop interface simplifies the process, making it easier even for beginners.
The WordPress user fields are divided into different sections, such as User Account Info, Other User Info, and Custom Fields. Expand each section and use the same mapping technique for all user fields.
For example, in the screenshot below, you can see that we added the User Role and other fields to the Other User Info panel.
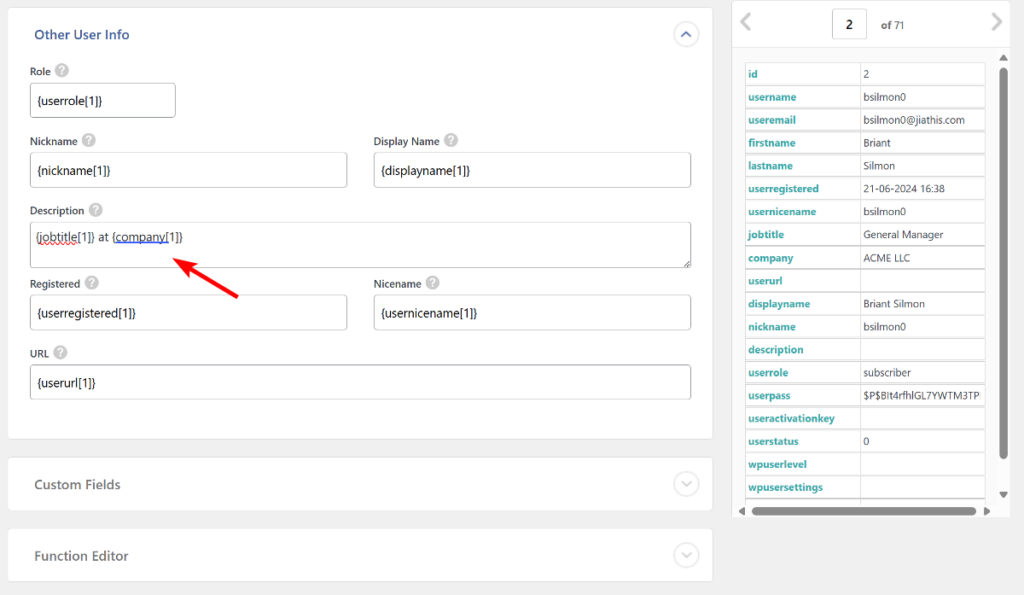
In the same screenshot, if you look closely at the Description field, you’ll notice that we combined the Job Title and Company Name fields along with a static text. This is one of the advanced features of WP All Import, allowing you to map two or more fields from your import file to the WordPress fields.
If you need further customizations, WP All Import also supports modifying the data from your user import file using PHP functions. You can learn more about this from WP All Import’s documentation on using custom code.
After you’ve mapped all the fields, click the Continue to Step 4 button to proceed.
5. Apply More WordPress User Data Settings
The Import Settings step includes several additional settings to efficiently import incoming users.
Most of the settings are simple checkboxes. Let’s look at each section one by one.
The first setting at the top is the Unique Identifier, which allows WP All Import to differentiate between users. This is crucial as it prevents duplicate users from being created on your website. It’s also helpful when importing users from an updated file.
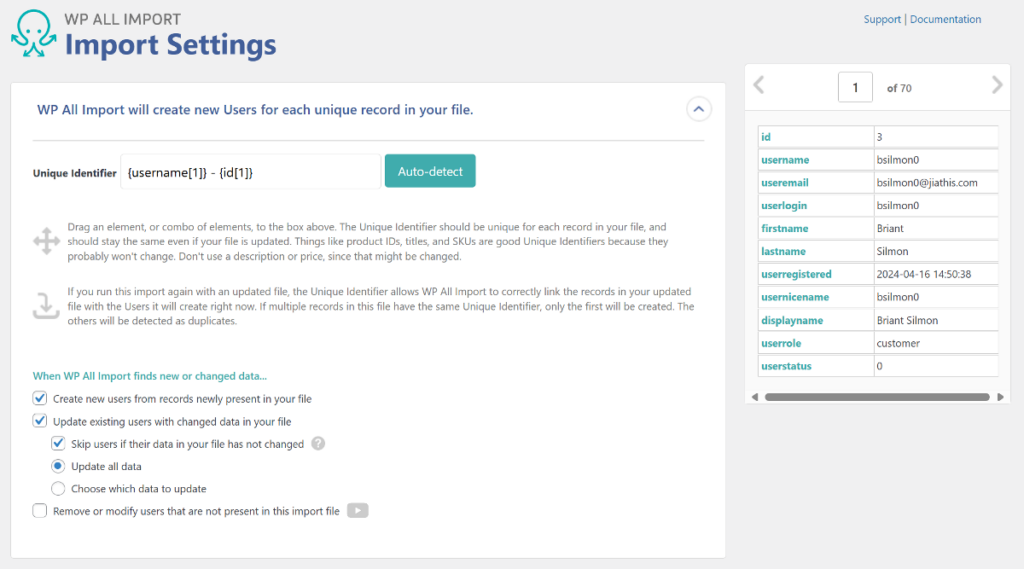
Setting the unique identifier requires just a click. Simply click the Auto-detect button to let WP All Import pick the best identifier from your import file.
You also have the option to manually set the identifier using the drag-and-drop interface, but the auto-detect option works well almost all of the time.
The next settings allow you to choose whether or not to send a welcome email to imported users.
If the file you uploaded is an export from another website and contains user passwords, you can check the box to block welcome emails from being sent.
If you’re bulk importing users by creating the file from scratch, you can uncheck the box to send welcome emails containing a password reset link.

The next option is the Scheduling Option, which lets you automatically import user data on a fixed schedule. This option only works if you choose to import the file from a URL or use an existing file from your server in the first step of the import process.
Since we uploaded a file, the Scheduling Options panel won’t expand. To learn more about this feature in detail, you can refer to the recurring import documentation on WP All Import’s website.
The final set of settings includes additional options that can help you optimize the speed of your import. These options are self-explanatory and can be enabled by clicking the relevant checkboxes.
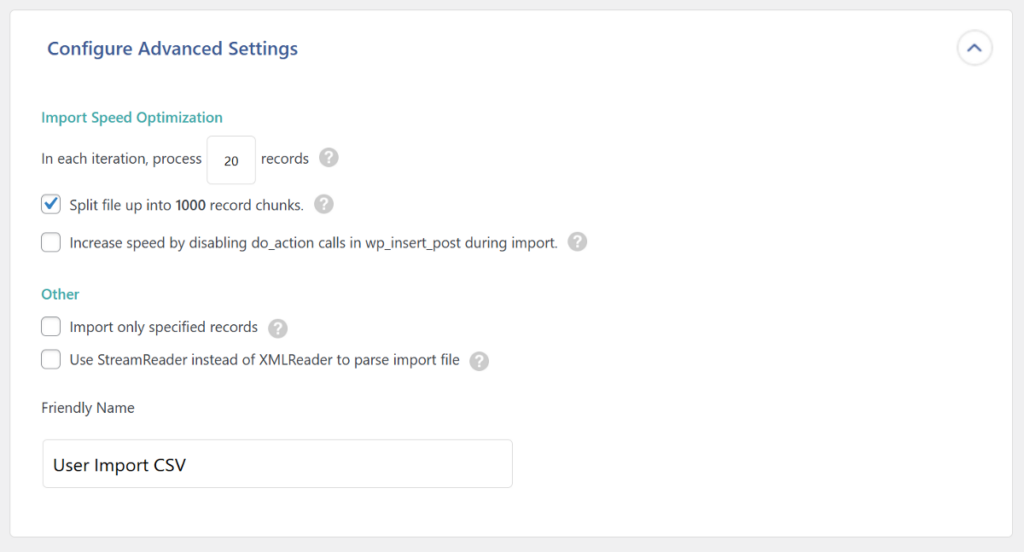
These speed optimization options include setting up the batch size and splitting your import into multiple files containing no more than 1,000 records each.
Once you’ve applied all the settings, click the Continue button to move to the next step.
6. Finish the Bulk Import and Verify the User Data
The Confirm & Run page is the last step in the import process. This page gives you a summary of all the previous steps we have completed before running the import. If you spot any mistakes, you can go back to that specific step and rectify the issue.
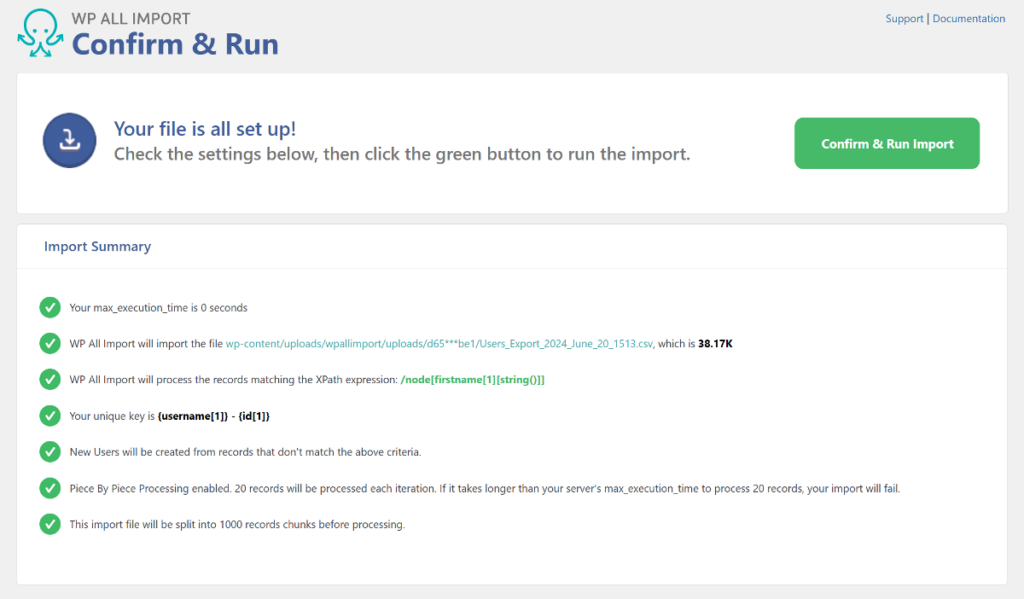
If everything looks correct, click the green Confirm & Run button to start the bulk-import process. Depending on the size of your user base, WP All Import will take a few minutes to complete the process.

Once the process is complete, you’ll see a confirmation along with a summary of how many users were imported and if any existing users were updated.
That’s it! This is how easy it is to bulk import users into WordPress using the WP All Import plugin. You can navigate to Users > All Users to confirm that all users have been imported correctly along with their details
Next: Use WP All Import to Bulk Import Other WordPress Data Types
WP All Import’s use case doesn’t stop at user imports. The plugin also supports importing various other WordPress data types, including Posts, Pages, Categories, WooCommerce Orders, Products, Customers, Reviews, Coupons, and more. You can even import custom post types from plugins like Advanced Custom Fields, Meta Box, and Jet Engine.
What’s best about using WP All Import is that, regardless of the data type you are importing, the basic import process remains the same.
Ready to efficiently import different WordPress data types? Download and install the WP All Import plugin to meet all your import needs.
Bulk Import WordPress Users: Frequently Asked Questions
How To Mass Upload Users to WordPress?
WP All Import makes it easy to mass upload users from Excel, CSV, Google Sheets, or XML files. Here’s how:
- Navigate to All Import › New Import.
- Load your file and select Users as the import type.
- Use the Drag & Drop interface to map data from your file to WordPress user fields.
- Run the import.
How Do I Import Users From One WordPress Site to Another?
To efficiently migrate users from one WordPress site to another, use a combination of the WP All Export and WP All Import plugins.
- Use the WP All Export plugin to export users from your source site.
- Import the exported file to your destination site using the WP All Import plugin.
What Is the WordPress Plugin to Bulk Add Users?
WP All Import is the best WordPress plugin to bulk add multiple users in one go. It simplifies the import process by breaking it down into multiple steps and uses the drag-and-drop interface to map the fields.
How Do I Download WordPress Users As CSV?
WP All Export allows you to export users in various formats, with CSV being the default. Follow the steps in this guide and click the CSV button in the final step to download your file.